
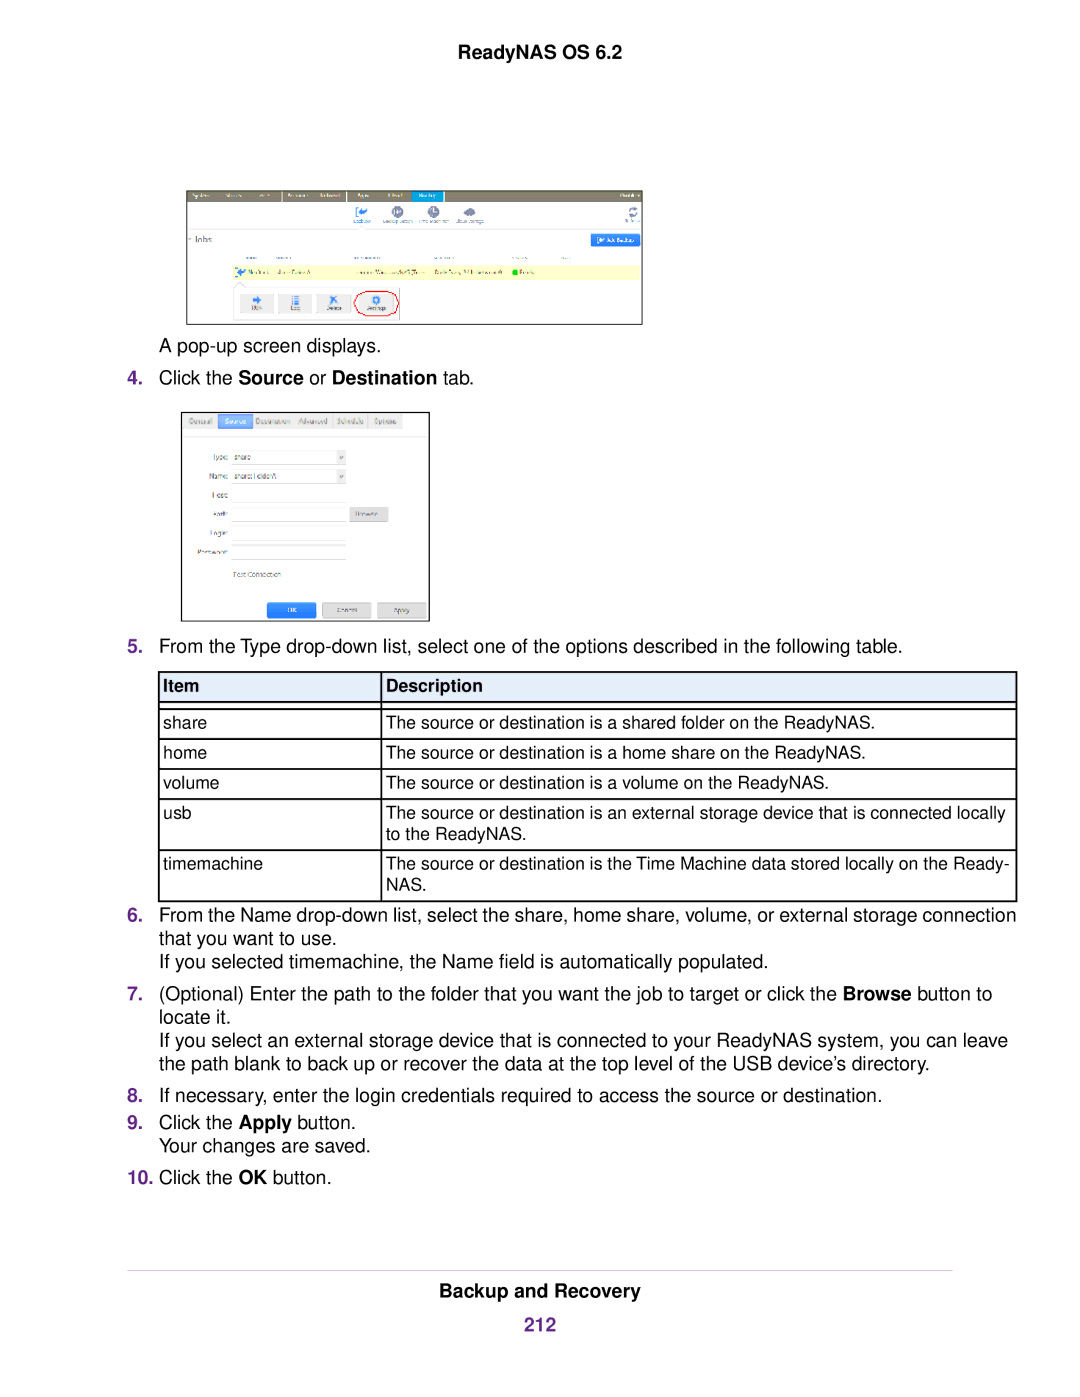
READYNAS 3220, READYNAS 314, READYNAS 102, ReadyNAS 2120 v2, READYNAS 516 specifications
The NETGEAR ReadyNAS series encompasses a range of NAS (Network Attached Storage) solutions designed to provide reliable data storage, backup, and sharing options for both home and business users. Among the prominent models are the ReadyNAS 104, ReadyNAS 4220, ReadyNAS 316, ReadyNAS 716X, and ReadyNAS 312, each tailored to specific needs and use cases while delivering advanced features and technologies.The ReadyNAS 104 is a four-bay desktop NAS that offers scalability and flexibility for home users and small businesses. Its ability to support up to 40 TB of storage using 10TB drives makes it a good choice for video streaming, file sharing, and automated backup tasks. The device is equipped with ReadyCLOUD technology, allowing users to access and manage their files easily from anywhere, via the mobile app or web portal.
Next, the ReadyNAS 4220 targets small and medium-sized businesses with its robust performance and enterprise-level features. Featuring up to 8 TB of storage in a 2-bay configuration, it employs the ReadyDR (Disaster Recovery) feature that allows for seamless offsite backups. The ReadyNAS 4220 excels in virtualization support, making it compatible with VMware and Microsoft environments, and offers built-in snapshot technology to safeguard data integrity.
The ReadyNAS 316 provides a perfect blend of power and features for users requiring advanced media management. With its six drive bays, it allows for extensive storage options and employs advanced data protection technologies such as RAID and BTRFS file system. The device's real-time transcoding capability is a standout feature, enabling smooth streaming of high-definition content to various devices without file format constraints.
The ReadyNAS 716X is designed for demanding workloads and power users. With its 6 bays and Intel Xeon processor, it is ideal for data-intensive applications, such as video production and large-scale backup solutions. This model supports 10GbE connectivity for high-speed data transfer and features dual power supplies for enhanced reliability, ensuring that users have a dependable system for mission-critical tasks.
Lastly, the ReadyNAS 312 offers a cost-effective solution for entry-level users who still need powerful performance. With 2 bays and support for up to 20 TB of storage, it utilizes the same advanced RAID technologies for data protection. The inclusion of features like real-time file syncing and play-out functionality makes it ideal for home users looking to centralize their media library and access their files anytime.
Overall, the NETGEAR ReadyNAS series presents a variety of options, each equipped with essential features and advanced technologies, catering to the diverse demands of users seeking reliable and efficient data storage solutions.