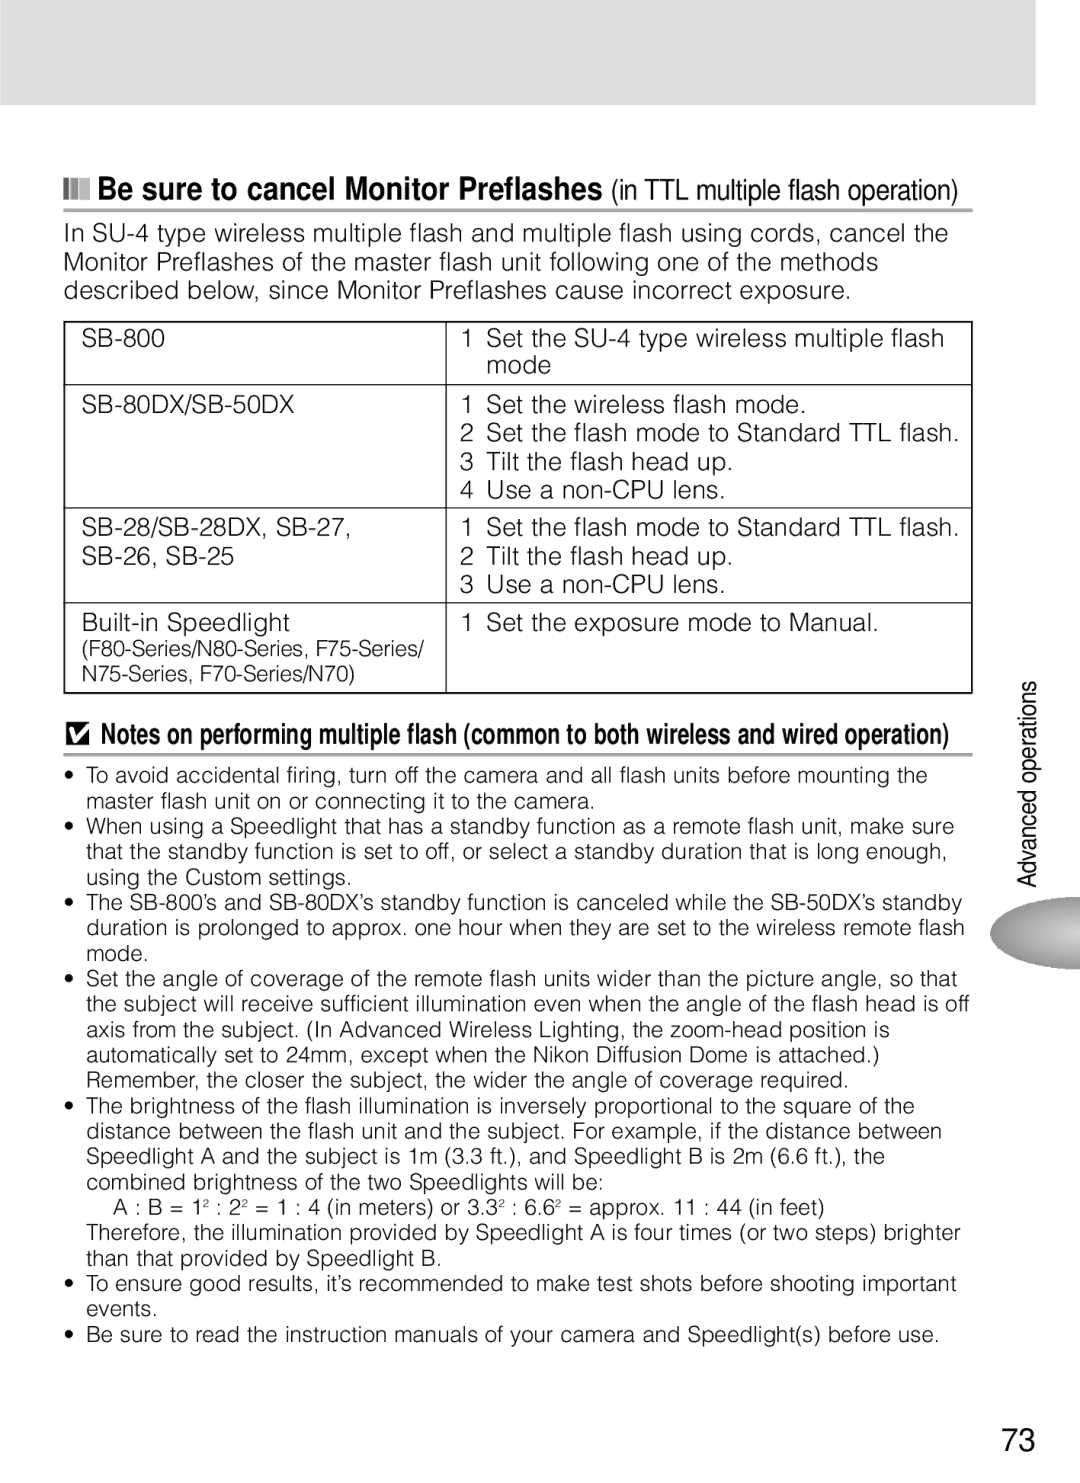
■■■ Be sure to cancel Monitor Preflashes (in TTL multiple flash operation)
In
1 | Set the | |
|
| mode |
|
|
|
| 1 | Set the wireless flash mode. |
| 2 | Set the flash mode to Standard TTL flash. |
| 3 | Tilt the flash head up. |
| 4 | Use a |
1 | Set the flash mode to Standard TTL flash. | |
2 | Tilt the flash head up. | |
| 3 | Use a |
1 | Set the exposure mode to Manual. | |
|
| |
|
| |
|
|
|
v Notes on performing multiple flash (common to both wireless and wired operation)
•To avoid accidental firing, turn off the camera and all flash units before mounting the master flash unit on or connecting it to the camera.
•When using a Speedlight that has a standby function as a remote flash unit, make sure that the standby function is set to off, or select a standby duration that is long enough, using the Custom settings.
•The
•Set the angle of coverage of the remote flash units wider than the picture angle, so that the subject will receive sufficient illumination even when the angle of the flash head is off axis from the subject. (In Advanced Wireless Lighting, the
•The brightness of the flash illumination is inversely proportional to the square of the distance between the flash unit and the subject. For example, if the distance between Speedlight A and the subject is 1m (3.3 ft.), and Speedlight B is 2m (6.6 ft.), the combined brightness of the two Speedlights will be:
A : B = 12 : 22 = 1 : 4 (in meters) or 3.32 : 6.62 = approx. 11 : 44 (in feet)
Therefore, the illumination provided by Speedlight A is four times (or two steps) brighter than that provided by Speedlight B.
•To ensure good results, it’s recommended to make test shots before shooting important events.
•Be sure to read the instruction manuals of your camera and Speedlight(s) before use.
Advanced operations
73
