2.If cables are used without the use of flexible conduit:
a.Remove the enclosure top by loosening the 3 screws. Remove the conduit fitting by loosening the nut and sliding it out. Install the supplied strain relief fitting in its place and
b.Hold the enclosure near the hole in the ceiling and route cables through the strain relief fitting.
2.If cables are channeled through flexible cable:
a.Hold the enclosure near the hole in the ceiling and route conduit cables through the conduit fitting.
b.Insert the end of the flexible conduit pipe into the conduit fitting. Cable length should be flush with the bottom of the enclosure, approximately 12 in. (305 mm). Tighten the clamp screw.
3.Lift the enclosure up through the ceiling hole. Turn and tighten the flipper screws to obtain a flush fit with the ceiling plane.
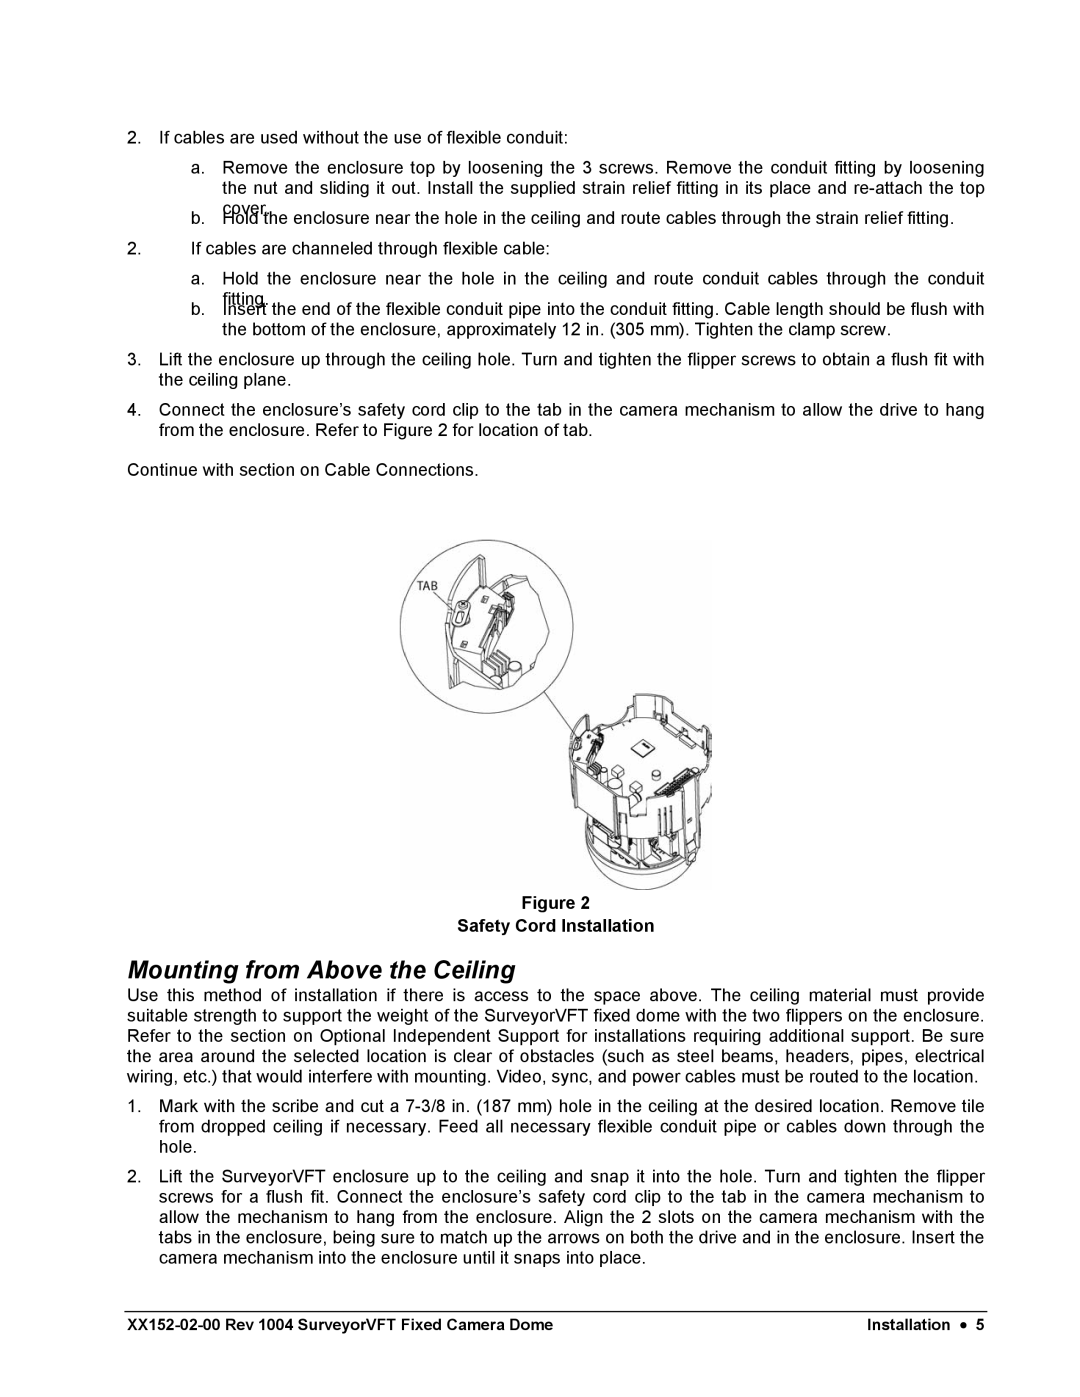
4.Connect the enclosure’s safety cord clip to the tab in the camera mechanism to allow the drive to hang from the enclosure. Refer to Figure 2 for location of tab.
Continue with section on Cable Connections.
Figure 2
Safety Cord Installation
Mounting from Above the Ceiling
Use this method of installation if there is access to the space above. The ceiling material must provide suitable strength to support the weight of the SurveyorVFT fixed dome with the two flippers on the enclosure. Refer to the section on Optional Independent Support for installations requiring additional support. Be sure the area around the selected location is clear of obstacles (such as steel beams, headers, pipes, electrical wiring, etc.) that would interfere with mounting. Video, sync, and power cables must be routed to the location.
1.Mark with the scribe and cut a
2.Lift the SurveyorVFT enclosure up to the ceiling and snap it into the hole. Turn and tighten the flipper screws for a flush fit. Connect the enclosure’s safety cord clip to the tab in the camera mechanism to allow the mechanism to hang from the enclosure. Align the 2 slots on the camera mechanism with the tabs in the enclosure, being sure to match up the arrows on both the drive and in the enclosure. Insert the camera mechanism into the enclosure until it snaps into place.
Installation • 5 |