Powering Up the System
Once all connections throughout the system have been checked, the power cable plug can be plugged into a 120 VAC duplex outlet. Refer to the homeowner’s manual for operating instructions.
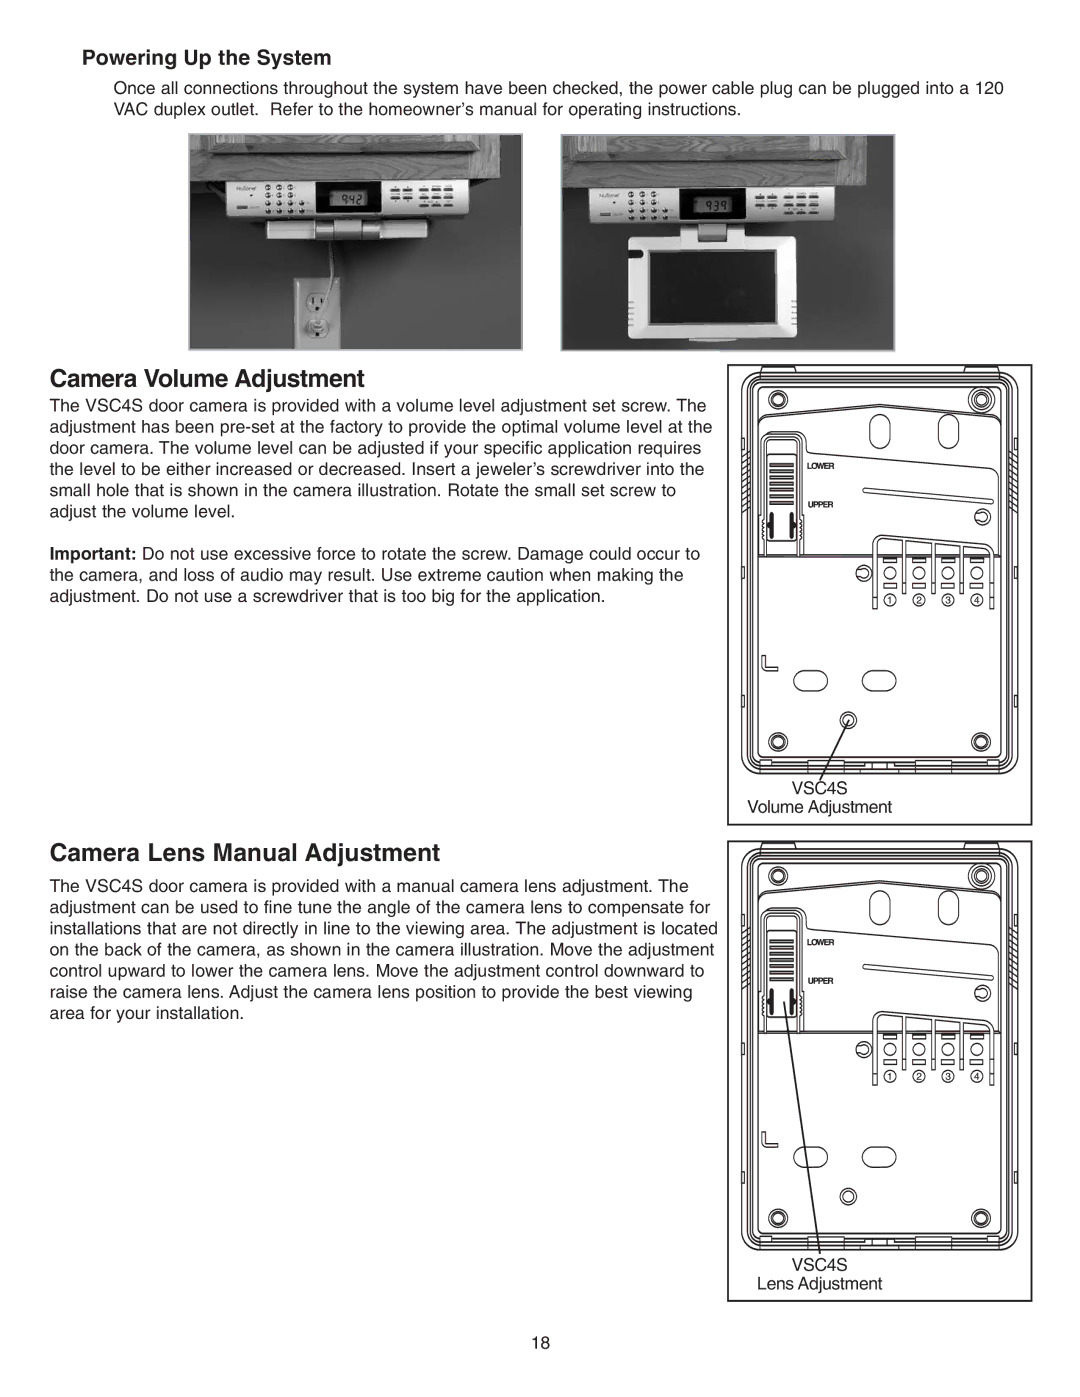
Camera Volume Adjustment
The VSC4S door camera is provided with a volume level adjustment set screw. The adjustment has been
Important: Do not use excessive force to rotate the screw. Damage could occur to the camera, and loss of audio may result. Use extreme caution when making the adjustment. Do not use a screwdriver that is too big for the application.
VSC4S |
Volume Adjustment |
Camera Lens Manual Adjustment
The VSC4S door camera is provided with a manual camera lens adjustment. The adjustment can be used to fine tune the angle of the camera lens to compensate for installations that are not directly in line to the viewing area. The adjustment is located on the back of the camera, as shown in the camera illustration. Move the adjustment control upward to lower the camera lens. Move the adjustment control downward to raise the camera lens. Adjust the camera lens position to provide the best viewing area for your installation.
VSC4S |
Lens Adjustment |
18