VIII. Installing the Essentia keypads
(Fig. 7)
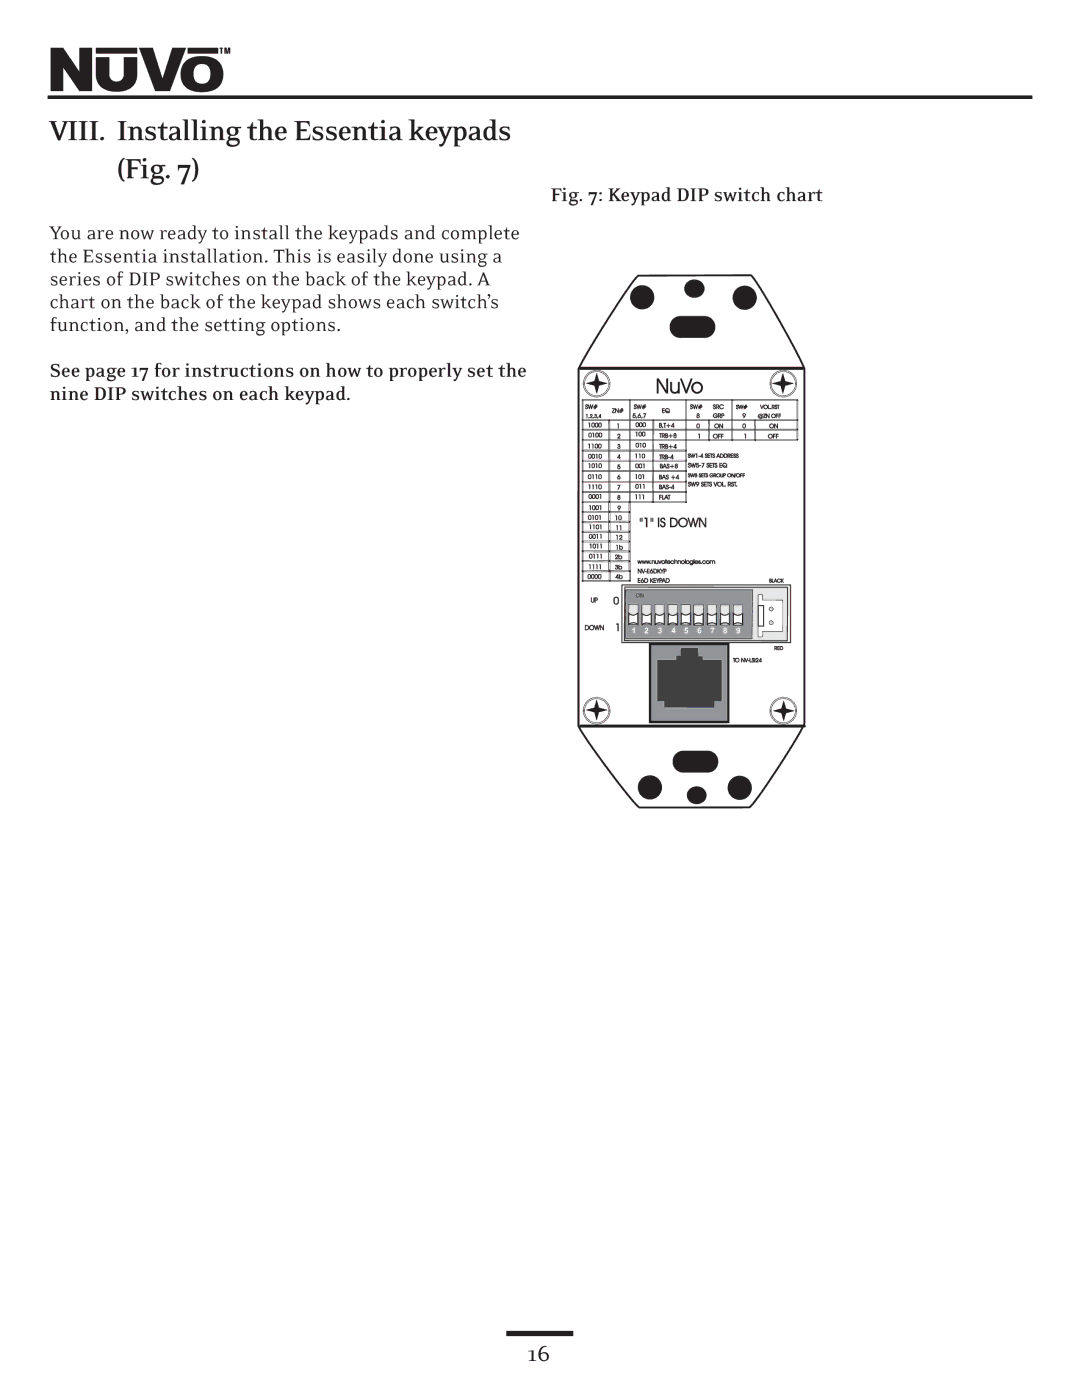
Fig. 7: Keypad DIP switch chart
You are now ready to install the keypads and complete the Essentia installation. This is easily done using a series of DIP switches on the back of the keypad. A chart on the back of the keypad shows each switch’s function, and the setting options.
See page 17 for instructions on how to properly set the nine DIP switches on each keypad.
SW#
1,2,3,4
1000
0100
1100
0010
1010
0110
1110
0001
1001
0101
1101
0011
1011
0111
1111
0000
UP
DOWN
NuVo
ZN# | SW# | EQ |
|
| SW# | SRC | SW# | VOL.RST | ||
5,6,7 |
|
| 8 | GRP | 9 | @ZN OFF | ||||
|
|
|
| |||||||
1 | 000 | B,T+4 |
| 0 | ON |
| 0 | ON | ||
2 | 100 | TRB+8 |
| 1 | OFF | 1 | OFF | |||
3 | 010 | TRB+4 |
|
|
|
|
|
| ||
4 | 110 |
| ||||||||
5 | 001 | BAS+8 |
|
| ||||||
6 | 101 | BAS +4 | SW8 SETS GROUP ON/OFF |
| ||||||
7 | 011 | SW9 SETS VOL. RST. |
| |||||||
|
|
|
|
|
| |||||
8 | 111 | FLAT |
|
|
|
|
|
|
| |
9 |
|
|
|
|
|
|
|
|
|
|
10 |
| "1" IS DOWN |
|
|
|
| ||||
11 |
|
|
|
|
| |||||
12 |
|
|
|
|
|
|
|
|
|
|
1b |
|
|
|
|
|
|
|
|
|
|
2b |
| www.nuvotechnologies.com |
|
|
| |||||
3b |
|
|
|
| ||||||
|
|
|
|
|
|
|
| |||
4b |
|
|
|
|
|
|
|
| ||
| E6D KEYPAD |
|
|
|
|
|
| BLACK | ||
|
|
|
|
|
|
|
| |||
0 | ON |
|
|
|
|
|
|
|
| |
|
|
|
|
|
|
|
|
|
| |
1 | 1 | 2 | 3 | 4 | 5 | 6 | 7 | 8 | 9 |
|
|
|
|
|
|
|
|
|
|
| RED |
|
|
|
|
|
|
|
|
| TO | |
16