XII. Changing the Buttons on the NV-EKP
The
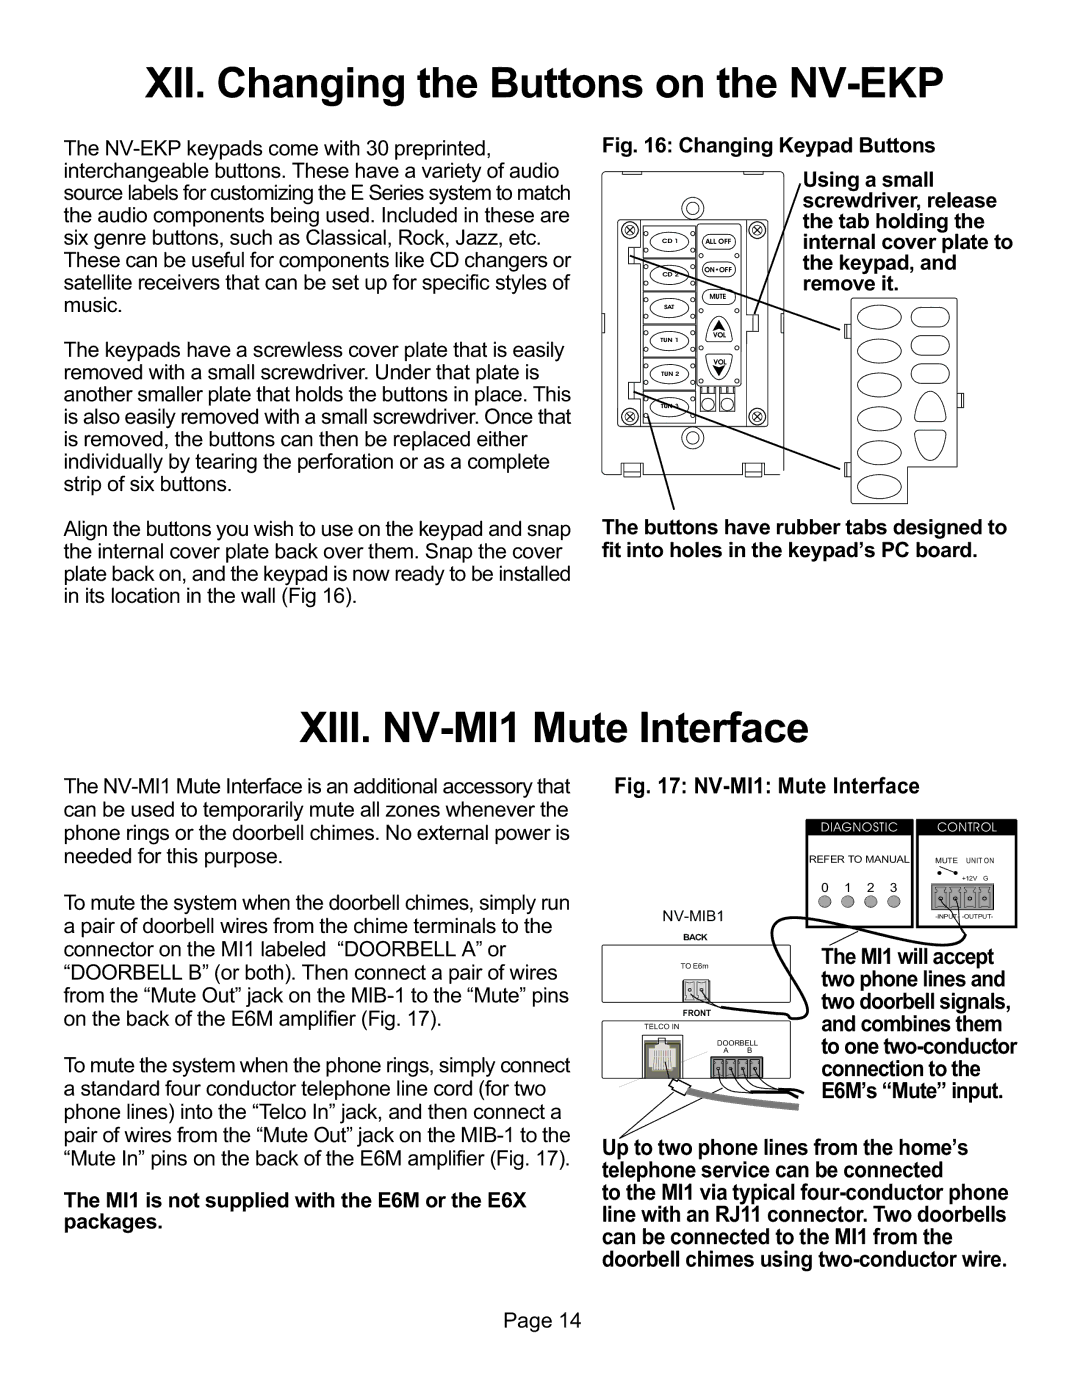
Fig. 16: Changing Keypad Buttons
interchangeable buttons. These have a variety of audio source labels for customizing the E Series system to match the audio components being used. Included in these are six genre buttons, such as Classical, Rock, Jazz, etc. These can be useful for components like CD changers or satellite receivers that can be set up for specific styles of music.
CD 1 | ALL OFF |
CD 2 | ON•OFF |
| |
| MUTE |
SAT |
|
Using a small screwdriver, release the tab holding the internal cover plate to the keypad, and remove it.
The keypads have a screwless cover plate that is easily removed with a small screwdriver. Under that plate is
TUN 1
VOL
VOL
another smaller plate that holds the buttons in place. This is also easily removed with a small screwdriver. Once that is removed, the buttons can then be replaced either individually by tearing the perforation or as a complete strip of six buttons.
Align the buttons you wish to use on the keypad and snap the internal cover plate back over them. Snap the cover plate back on, and the keypad is now ready to be installed in its location in the wall (Fig 16).
TUN 2
TUN 3
The buttons have rubber tabs designed to fit into holes in the keypad’s PC board.
XIII. NV-MI1 Mute Interface
The
can be used to temporarily mute all zones whenever the
phone rings or the doorbell chimes. No external power is needed for this purpose.
Fig. 17: NV-MI1: Mute Interface
DIAGNOSTIC CONTROL
REFER TO MANUAL | MUTE UNIT ON |
To mute the system when the doorbell chimes, simply run
0 1 2 3
+12V G
a pair of doorbell wires from the chime terminals to the
connector on the MI1 labeled “DOORBELL A” or “DOORBELL B” (or both). Then connect a pair of wires
from the “Mute Out” jack on the
To mute the system when the phone rings, simply connect
a standard four conductor telephone line cord (for two
phone lines) into the “Telco In” jack, and then connect a
BACK
TO E6m
FRONT
TELCO IN
DOORBELLI
A B
The MI1 will accept two phone lines and two doorbell signals, and combines them to one
pair of wires from the “Mute Out” jack on the
“Mute In” pins on the back of the E6M amplifier (Fig. 17).
The MI1 is not supplied with the E6M or the E6X packages.
Up to two phone lines from the home’s telephone service can be connected
to the MI1 via typical
Page 14