Nuvo NV-E6XS, NV-E6MS manual II. Installing the E-ZPort Hub, III. Connecting the E6M to the E-ZPort

Models: NV-E6XS NV-E6MS

1 19
Download 19 pages 17.11 Kb
Page 9
Image 9
II. Installing the E-Z Port Hub

II. Installing the E-Z Port Hub

The location of the E-Z Port is mostly determined by where Fig. 2: E-Z Port Backside you locate the E6M amplifier. All Cat-5 cables should be

terminated and routed to this location. Once this is done,

installation of the E-Z Port is easy.

Plug each of the keypad cables into one of fifteen available jacks on the back of the E-Z Port (Fig. 2). The jacks are numbered 1-15, although order is not important to the system’s operation.

Once all the Cat-5 cables are plugged into the E-Z Port, it can then be easily mounted into any commercially available dual-gang J-box or mud ring.

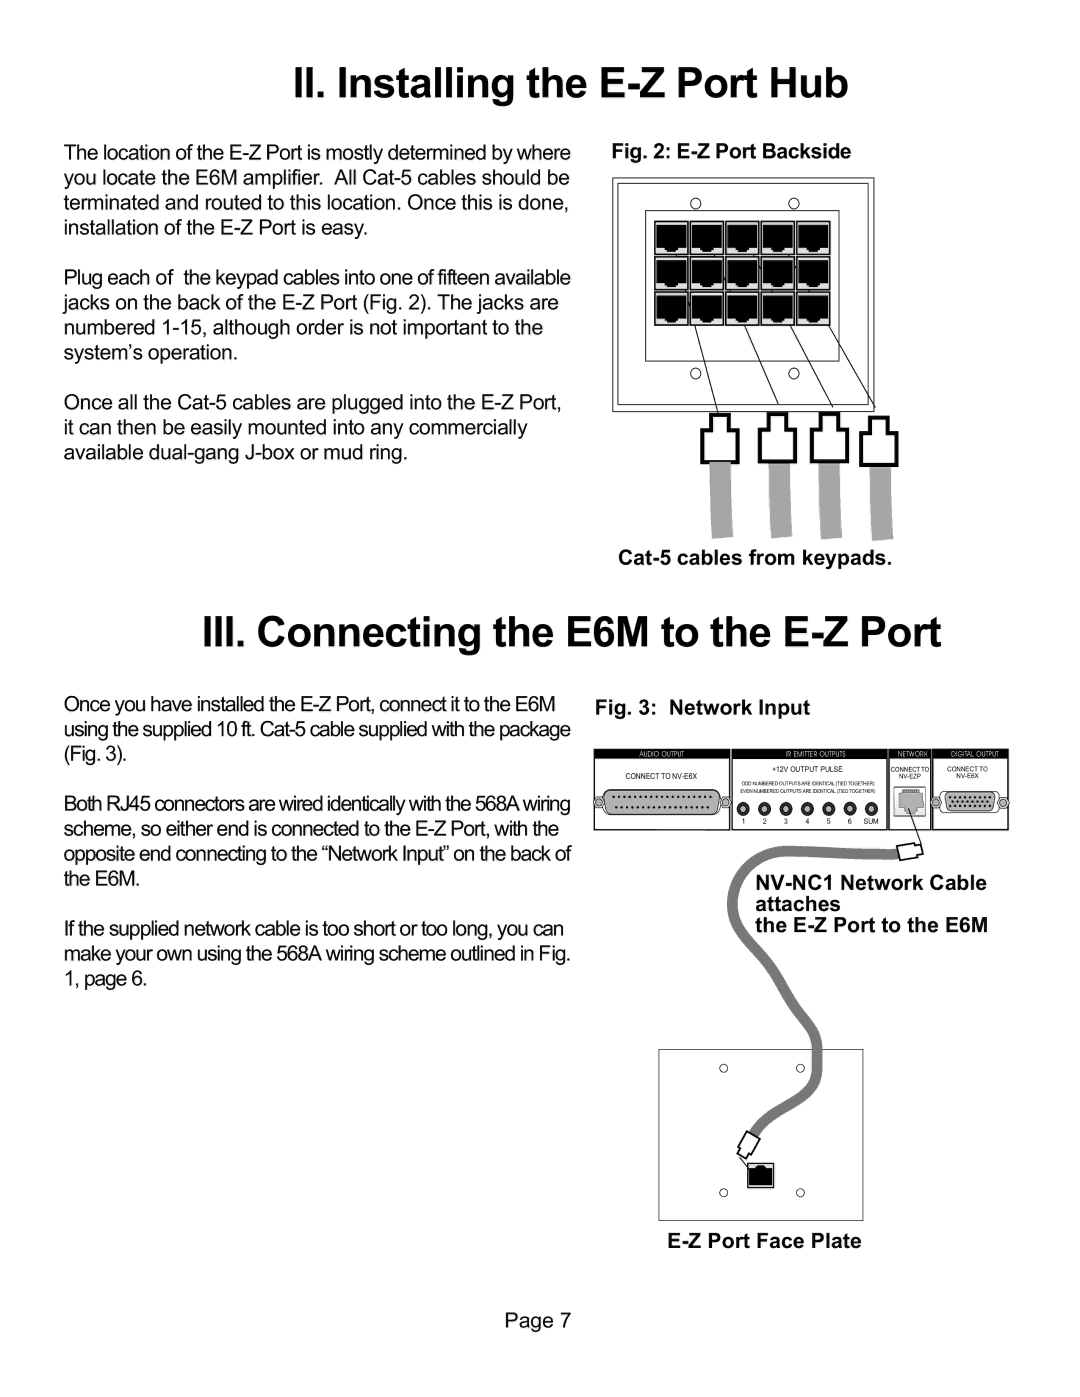
Cat-5 cables from keypads.

III. Connecting the E6M to the E-Z Port

Once you have installed the E-Z Port, connect it to the E6M using the supplied 10 ft. Cat-5 cable supplied with the package (Fig. 3).

Both RJ45 connectors are wired identically with the 568A wiring scheme, so either end is connected to the E-Z Port, with the opposite end connecting to the “Network Input” on the back of

Fig. 3: Network Input

AUDIO OUTPUT

IR EMITTER OUTPUTS


NETWORK


CONNECT TO NV-E6X

+12V OUTPUT PULSE

CONNECT TO

ODD NUMBERED OUTPUTS ARE IDENTICAL (TIED TOGETHER)


NV-EZP


EVEN NUMBERED OUTPUTS ARE IDENTICAL (TIED TOGETHER)


1 2 3 4 5 6 SUM

DIGITAL OUTPUT

CONNECT TO

NV-E6X

the E6M.

If the supplied network cable is too short or too long, you can make your own using the 568A wiring scheme outlined in Fig. 1, page 6.

NV-NC1 Network Cable attaches

the E-Z Port to the E6M

E-Z Port Face Plate

Page 7

Page 9
Image 9
Nuvo NV-E6XS, NV-E6MS II. Installing the E-ZPort Hub, III. Connecting the E6M to the E-ZPort, Cat-5cables from keypads