Hardware Installation
Serial (COM)
The motherboard provides an additional serial header for your machine.
FDD Connector
The motherboard supports a standard 360K, 720K, 1.2M, 1.44m, and a 2.88M floppy disk drive (FDD).
IDE Connector
The IDE connector supports Ultra ATA 133/100/66 IDE hard disk drives.
1.Connect the blue connector (the cable end with a single connector) to the motherboard.
2.Connect the black connector (the cable with the two closely spaced black and gray connectors) to the Ultra ATA master device.
3.Connect the gray connector to a slave device.
If you install two hard disk drives, you must configure the second drive as a slave device by setting its jumper accordingly. Refer to the hard disk documentation for the jumper settings.
Note: If an
Serial ATA II Connectors
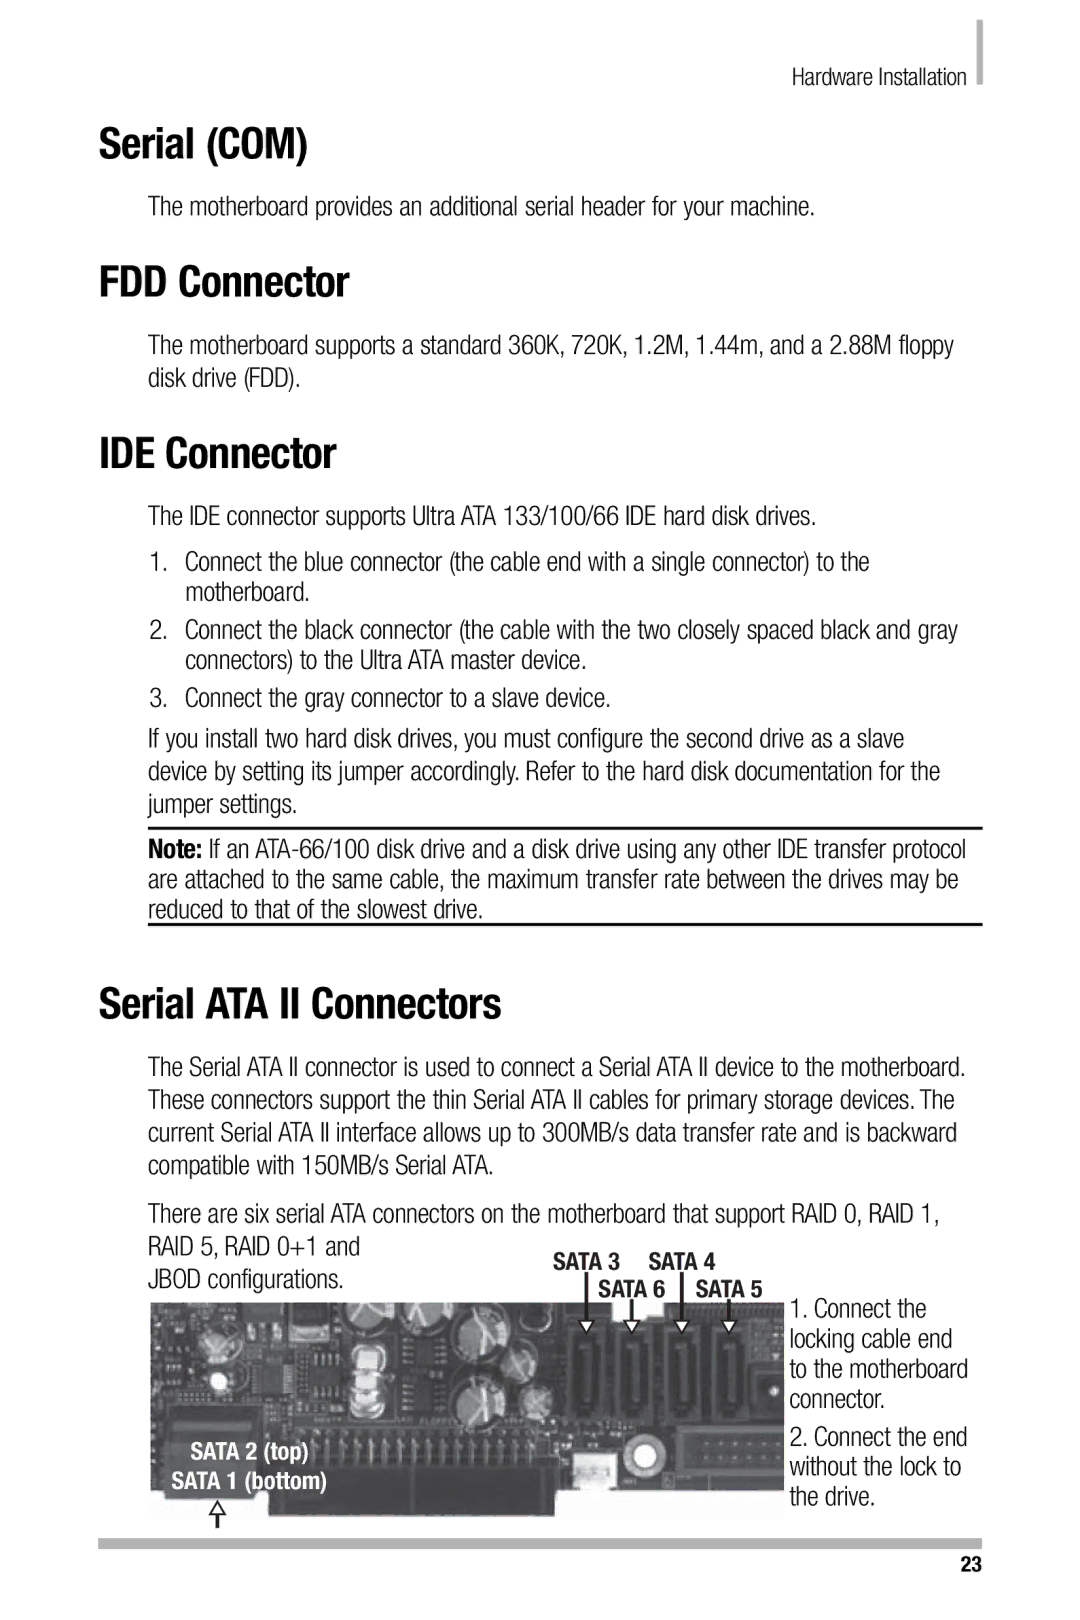
The Serial ATA II connector is used to connect a Serial ATA II device to the motherboard. These connectors support the thin Serial ATA II cables for primary storage devices. The current Serial ATA II interface allows up to 300MB/s data transfer rate and is backward compatible with 150MB/s Serial ATA.
There are six serial ATA connectors on the motherboard that support RAID 0, RAID 1, RAID 5, RAID 0+1 and
JBOD configurations.
SATA 2 (top)
1. Connect the locking cable end to the motherboard connector.
2. Connect the end without the lock to
SATA 1 (bottom)
the drive.
23
