RW400SG Router OLITEC
Users Guide
Page
5.6.1 DHCP Settings
Appendix B Configuring the PCs
5.11.3 Factory Defaults
Appendix A FAQ
Appendix C Specifications
Chapter 2 Introduction
2.2 Features
2.1 Overview of the Router
2.3 Panel Layout
2.3.1 The Front Panel
2.3.2 The Rear Panel
3.3 Connecting the Router
Chapter 3 Connecting the Router
3.2 Installation Environment Requirements
3.1 System Requirements
To LAN
Switch/Hub
(XDSL 、Cable 、Ethernet )
To WAN
Chapter 4 Quick Installation Guide
4.1 TCP/IP configuration
4.2 Quick Installation Guide
Figure 4-6 Choose WAN Connection Type
Figure 4-4 Login Windows
Figure 4-5 Quick Setup
If you choose PPPoE, you will see this page shown in figure
Figure 4-7 Quick Setup - PPPoE
In this page, you can configure the following wireless parameters
2. Wireless
Chapter 5 Configuring the Router
5.1 login
Radio, SSID, Channel, Mode, Wireless MAC address and IP address
Please refer to Section 4.2 Quick Installation Guide
5.3 Quick Setup
5.4 Network
Figure 5-1 Router Status
5.4.1 LAN
5.4.2 WAN
Figure 5-4 WAN - Dynamic IP
Figure 5-5 WAN - Static IP
Click Logout button to end 802.1x authentication
Figure 5-4a WAN - 802.1X + Dynamic IP
You should type the following parameters into the spaces provided
Figure 5-5a WAN - 802.1X + Static IP
Click Login to start 802.1x authentication
Click Logout to end 802.1x authentication
Figure 5-6 WAN - PPPoE
Figure 5-7 PPPoE Advanced Settings
5.4.3 MAC Clone
5.5 Wireless
5.5.1 Wireless Settings
¾ Mode - Select the desired wireless mode. The options are
Encryptions
5.5.2 MAC Filtering
Figure 5-12 Add or Modify Wireless MAC Address Filtering entry
5.5.3 Wireless Statistics
5.6.1 DHCP Settings
5.6 DHCP
5.6.2 DHCP Clients List
To modify A Reserved IP address
5.6.3 Address Reservation
To Reserve IP addresses
To delete all Reserved IP addresses
5.7 Forwarding
5.7.1 Virtual Servers
To delete all service entries
To setup a virtual server entry
To delete a service entry
To modify a virtual server entry
Figure 5-20 Port Triggering Once configured, operation is as follows
To delete all rules
Modifying an existing rule
Deleting an existing rule
5.7.3 DMZ
5.7.4 UPnP
5.8 Security
5.8.1 Firewall
5.8.2 IP Address Filtering
5.8.3 Domain Filtering
Figure 5-28 Add or Modify a Domain Filtering entry
Click the Enabled All button to make all entries enabled
Figure 5-27 Domain Filtering
To add or modify a Domain Filtering entry, follow these instructions
5.8.4 MAC Filtering
5.8.5 Remote Management
5.8.6 Advanced Security
Click the Save button to save the settings
To modify an existing entry
5.9 Static Routing
To add static routing entries
1. Modify the entry’s Destination IP Address, Subnet Mask and Gateway
5.10.1 Dyndns.org DDNS
5.10 DDNS
To delete all the entries
5.10.2 Oray.net DDNS
5.10.3 Comexe.cn DDNS
5.11 System Tools
5.11.1 Time
5.11.2 Firmware
5.11.3 Factory Defaults
5.11.4 Reboot
5.11.5 Password
5.11.7 Statistics
5.11.6 Log
Statistics Table
Click the Refresh button to refresh immediately
The total amount of packets received and transmitted by the router
Appendix A FAQ
1. How do I configure the router to access Internet by ADSL users?
3. I want to use Netmeeting, what do I need to do?
4. I want to build a WEB Server on the LAN, what should I do?
5. The wireless stations cannot connect to the router
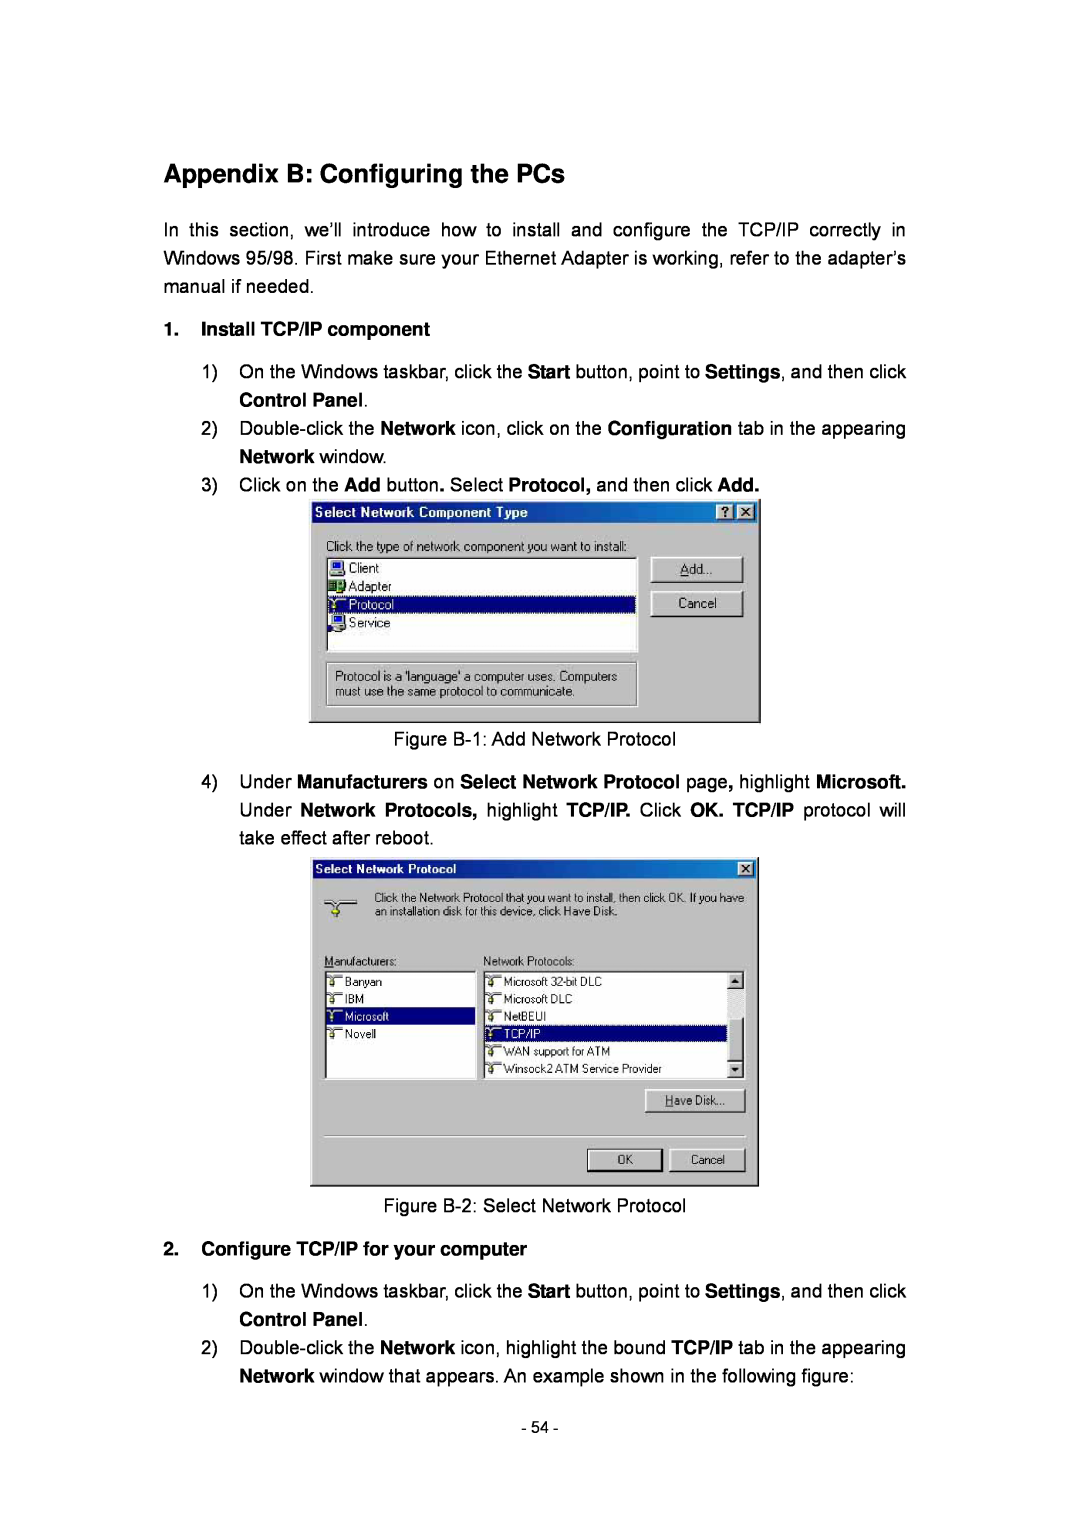
1. Install TCP/IP component
Appendix B Configuring the PCs
2. Configure TCP/IP for your computer
Assigned by DHCP Sever
Figure B-6 DNS Configuration tab
Setting IP address manually
Figure B-5 Gateway tab
Figure B-7 IP Address tab
Figure B-8 Gateway tab
click Add button. Shown below Figure B-9 DNS Configuration tab
Appendix C Specifications
General
Appendix D Glossary
¾ Domain Name - A descriptive name for an address or group of addresses on the Internet
