ASSEMBLY
Assembly is easy and requires no tools.
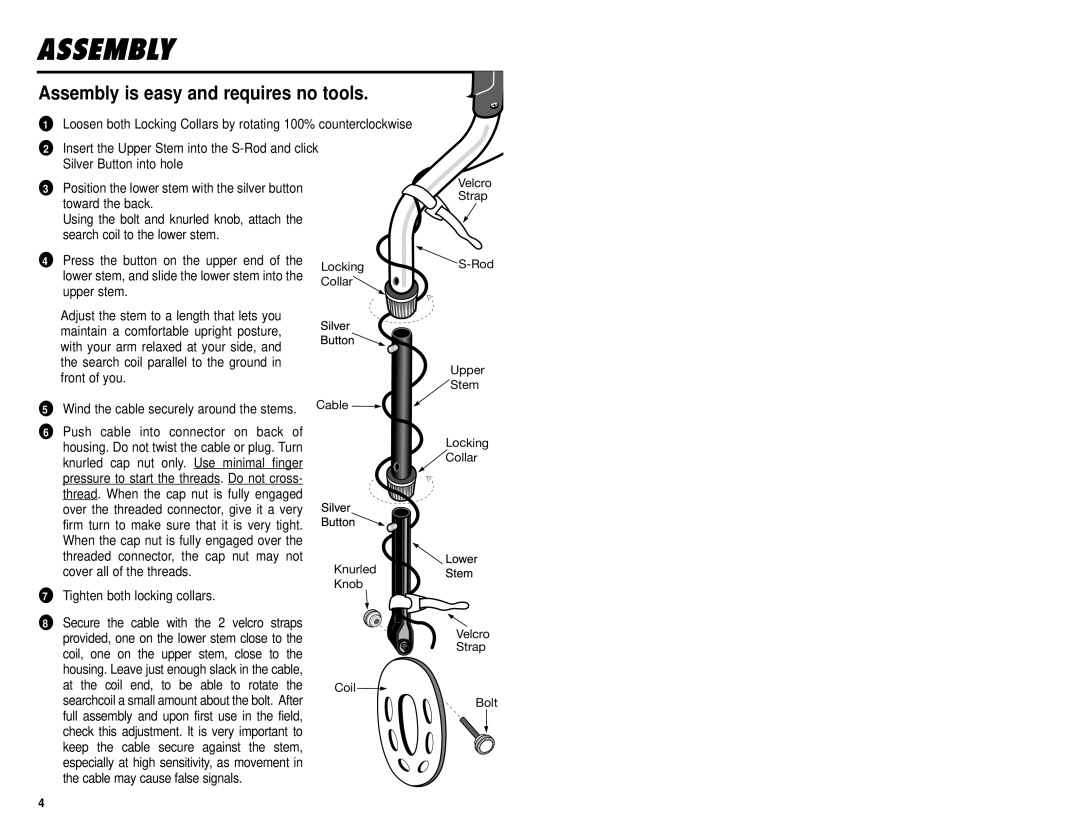
●Loosen both Locking Collars by rotating 100% counterclockwise
●Insert the Upper Stem into the
●Position the lower stem with the silver button toward the back.
Using the bolt and knurled knob, attach the search coil to the lower stem.
Velcro Strap
●Press the button on the upper end of the lower stem, and slide the lower stem into the upper stem.
Adjust the stem to a length that lets you maintain a comfortable upright posture, with your arm relaxed at your side, and the search coil parallel to the ground in front of you.
●Wind the cable securely around the stems.
●Push cable into connector on back of housing. Do not twist the cable or plug. Turn knurled cap nut only. Use minimal finger pressure to start the threads. Do not cross- thread. When the cap nut is fully engaged over the threaded connector, give it a very firm turn to make sure that it is very tight. When the cap nut is fully engaged over the threaded connector, the cap nut may not cover all of the threads.
●Tighten both locking collars.
●Secure the cable with the 2 velcro straps provided, one on the lower stem close to the coil, one on the upper stem, close to the housing. Leave just enough slack in the cable, at the coil end, to be able to rotate the searchcoil a small amount about the bolt. After full assembly and upon first use in the field, check this adjustment. It is very important to keep the cable secure against the stem, especially at high sensitivity, as movement in the cable may cause false signals.
Locking | |
Collar |
|
Upper
Stem
Cable ![]()
Locking
![]() Collar
Collar
Knurled
Knob
Velcro
Strap
Coil ![]()
![]()
![]() Bolt
Bolt
4