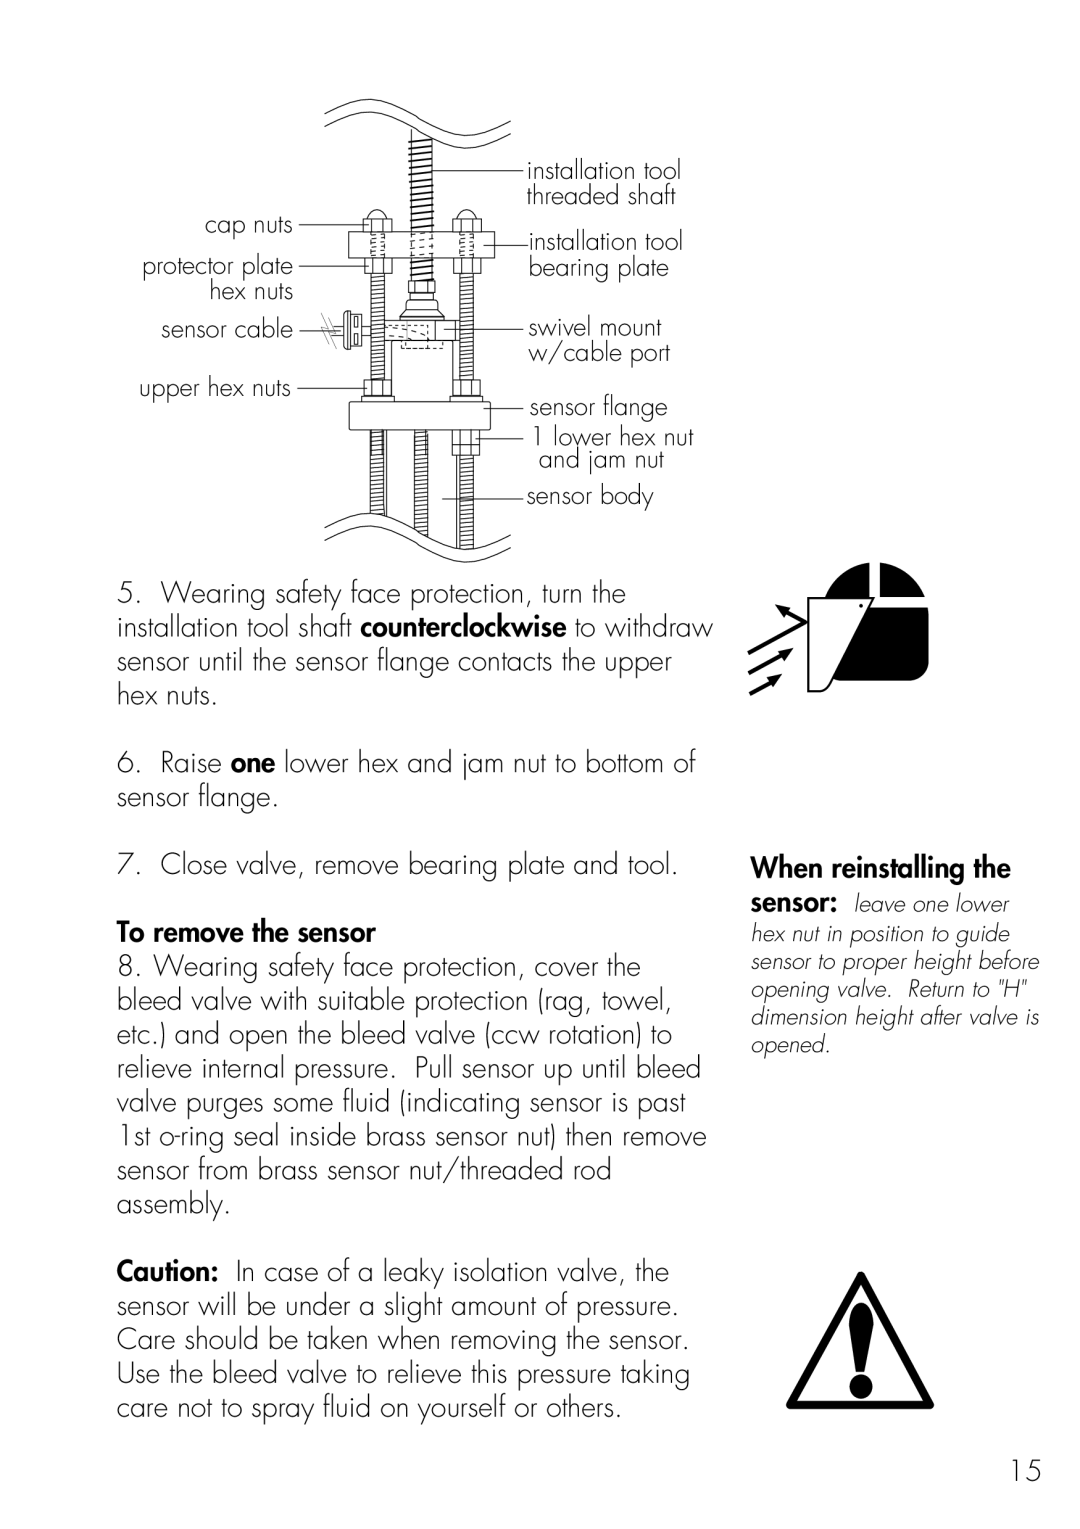
installation tool threaded shaft
cap nuts 
installation tool
protector plate | bearing plate |
hex nuts |
|
sensor cable | swivel mount |
| w/cable port |
upper hex nuts | sensor flange |
|
![]()
![]() 1 lower hex nut
1 lower hex nut ![]() and jam nut
and jam nut
sensor body
5.Wearing safety face protection, turn the installation tool shaft counterclockwise to withdraw sensor until the sensor flange contacts the upper hex nuts.
6.Raise one lower hex and jam nut to bottom of sensor flange.
7.Close valve, remove bearing plate and tool.
To remove the sensor
8.Wearing safety face protection, cover the bleed valve with suitable protection (rag, towel, etc.) and open the bleed valve (ccw rotation) to relieve internal pressure. Pull sensor up until bleed valve purges some fluid (indicating sensor is past 1st
Caution: In case of a leaky isolation valve, the sensor will be under a slight amount of pressure. Care should be taken when removing the sensor. Use the bleed valve to relieve this pressure taking care not to spray fluid on yourself or others.
When reinstalling the sensor: leave one lower hex nut in position to guide sensor to proper height before opening valve. Return to "H" dimension height after valve is opened.
15