3.Wipe the
4.Secure the sensor with
5.Make sure the bleed valve is closed (full clockwise position).
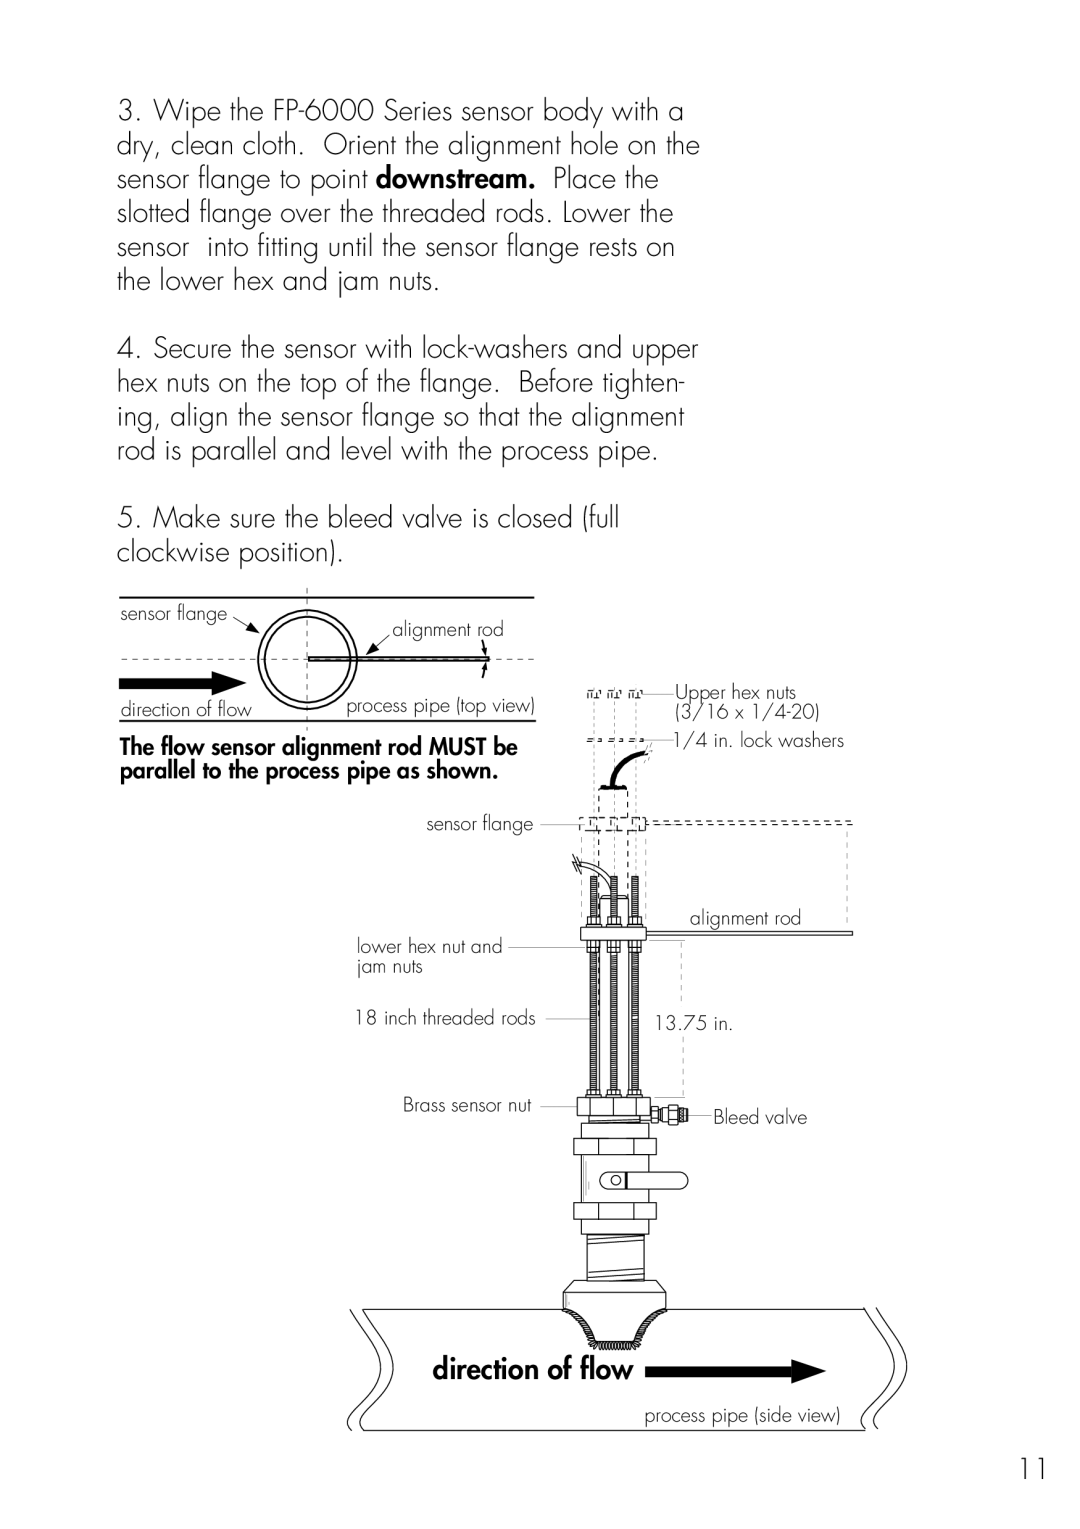
sensor flange | alignment rod |
| |
direction of flow | process pipe (top view) |
The flow sensor alignment rod MUST be parallel to the process pipe as shown.
![]()
![]()
![]()
![]()
![]()
![]()
![]()
![]()
![]()
![]()
![]()
![]() Upper hex nuts (3/16 x
Upper hex nuts (3/16 x
![]() 1/4 in. lock washers
1/4 in. lock washers
sensor flange ![]()
![]()
lower hex nut and jam nuts
18 inch threaded rods
Brass sensor nut
alignment rod
13.75 in. |
Bleed valve |
direction of flow
process pipe (side view)
11