Hardware Setup 3
3.5.1 OM-DAQ-USB-2401 Wall Mounting
In order to mount the
1.Remove the rear screws from the
2.Align the mounting brackets with the rear holes on the DAQ unit (make sure that the ears are facing outwards, like in the figure below).
3.Use the longer screws to reconnect the mounting brackets to the body of the enclosure, in the same direction as the screws that were removed from the DAQ unit.
4.Drill 2 holes for #4 screws, 5.50" apart. Tip: Hold the DAQ unit with mounting brackets attached, up against the wall; use the holes as a guide to mark where you will drill holes in the wall.
5.Install the two screws into the wall.
6.Mount the DAQ unit on the wall by passing the screw head through the larger mounting bracket holes and then sliding it down.
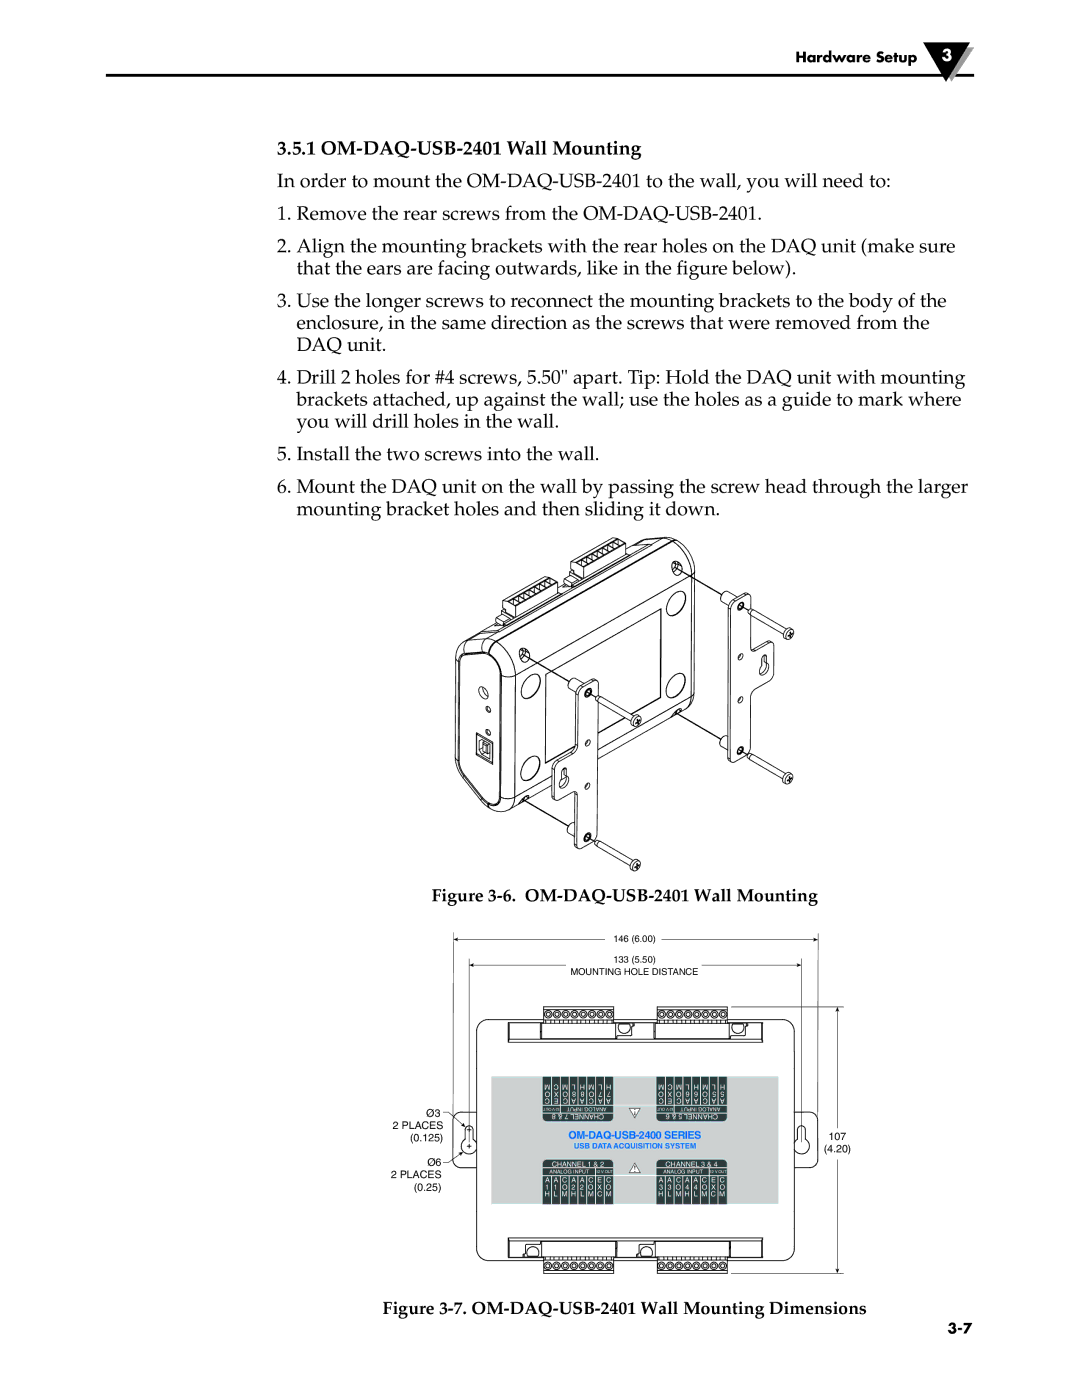
Figure 3-6. OM-DAQ-USB-2401 Wall Mounting
Ø3
2 PLACES
(0.125)
Ø6![]()
2PLACES (0.25)
146 (6.00)
133(5.50)
MOUNTING HOLE DISTANCE
M C M L | H M L | H |
| M C M L | H M L | H |
O X O 8 | 8 O 7 | 7 |
| O X O 6 | 6 O 5 | 5 |
C E C A A C A A |
| C E C A A C A A | ||||
OUT V 12 INPUT ANALOG | ! | OUT V 12 INPUT ANALOG | ||||
8 & 7 CHANNEL |
| 6 & 5 CHANNEL |
| |||
OM-DAQ-USB-2400 SERIES
USB DATA ACQUISITION SYSTEM
|
|
|
| CHANNEL 1 & 2 | ! |
|
| CHANNEL 3 & 4 |
|
|
|
|
|
| ANALOG INPUT 12 V OUT |
|
| ANALOG INPUT 12 V OUT |
|
| |
|
|
|
|
|
|
|
|
| ||
|
|
|
| A A C A A C E C |
|
|
| A A C A A C E C |
|
|
|
|
|
| 1 1 O 2 2 O X O |
|
|
| 3 3 O 4 4 O X O |
|
|
|
|
|
| H L M H L M C M |
|
|
| H L M H L M C M |
|
|
|
|
|
|
|
|
|
|
|
|
|
|
|
|
|
|
|
|
|
|
|
|
|
|
|
|
|
|
|
|
|
|
|
|
|
|
|
|
|
|
|
|
|
|
|
|
|
|
|
|
|
|
|
|
|
107
(4.20)