Manuals
/
Optoma Technology
/
Computer Equipment
/
Projector
Optoma Technology
EP7155
manual
Appendices, Remove the two screws from the lamp module A
Models:
EP7155
1
42
59
59
Download
59 pages
17.06 Kb
39
40
41
42
43
44
45
46
Troubleshooting
Specification
Error codes
Transmits signals to projector
Security Timer
Connecting Input Devices
Dimension
Image Problems
Setup Menu
Adjusting the Projector Level
Page 42
Image 42
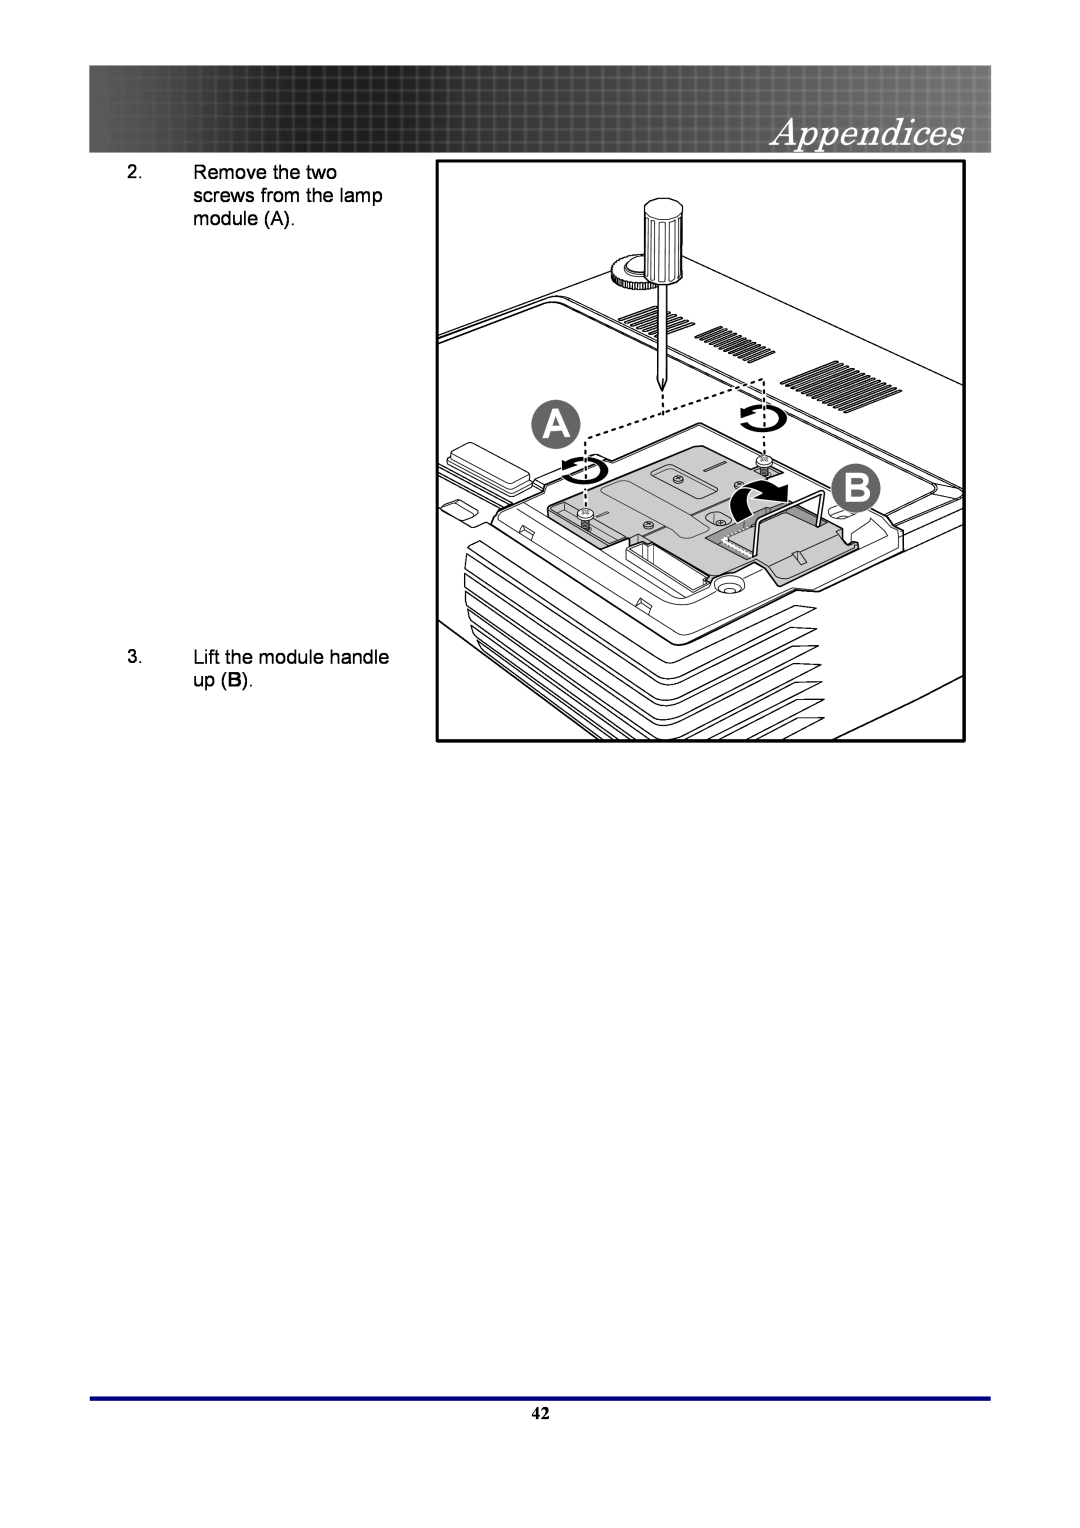
2.
Remove the two screws from the lamp module (A).
3.
Lift the module handle up (
B
).
Appendices
42
Page 41
Page 43
Page 42
Image 42
Page 41
Page 43
Contents
Setup and Operation
Table of Contents
Table of Contents
Menu Setting
Table of Contents
Specifications
Regulatory Compliance
General Safety Information
Precautions
Remote Control
Usage Notice
Environmental Considerations
Power Safety
Cleaning the Projector
Replacing the Lamp
Main Features
About this manual
Packing Checklist
Introduction
Avoid using the projector in dusty environments
Front-right View
Views of Projector
Top view-On-screen Display OSD buttons and LEDs
Rear view
Bottom view
Lights when the remote control is used
Remote Control
Transmits signals to projector
Up arrow when connected through USB to a PC
Introduction
Remote Control Operating Range
Projector and Remote Control Buttons
Inserting the Remote Control Batteries
1. Only use AAA batteries Alkaline battery is preferred
2. Dispose of used batteries according to local ordinance regulations
Setup and Operation
Connecting Input Devices
Starting and Shutting down the Projector
Setting an Access Password Security Lock
3. Press to select Security
6. To change a password, enter the previ- ous password when prompted
Position the projector so that it is perpendicular to the screen
Adjusting the Projector Level
The projector table or stand should be level and sturdy
Ensure the cables are in a safe location. You could trip over them
4. Use the Image-zoom
Adjusting the Zoom, Focus and Keystone
Adjusting the Volume
7. Use the Keystone but- ton to correct image distortion
Navigating the OSD
OSD Menu Controls
Setting the OSD Language
4. Press Enter to select your language and then click Exit
5. Press Menu to close the OSD
Menu Setting
OSD Menu Overview
OSD Sub-Menu Overview
Image Menu
Color Setting
Advanced
Saturation
Image Menu Functions Available for Input Sources
Brilliant Color
Degamma
Display Menu
WXGA XGA
Signal
Display Menu Functions Available for Connected Source
Setup Menu
The Setup menu functions are available to all video sources
Language
繁體中文
简体中文
Capture
Set the number of months the projector can be used
Security Timer
Month
Set the number of days for the projector to be active
Options Menu
Press Enter to open the OPTIONS/Lamp Setting menu
Page
Lamp Setting
1. Loosen the two cap- tive screws on the lamp compartment
Appendices
Replacing the Projection Lamp
cover A. Remove the lamp compartment cover B
Appendices
2. Remove the two screws from the lamp module A
3. Lift the module handle up B
4. Pull firmly on the module handle to re- move the lamp module
5. Reverse steps 1 to 5 to replace the new lamp module
Resetting the Lamp
1. Wipe off dust with a clean dampened cloth
Cleaning the Projector
Using the Kensington Lock
2. Lightly wipe the lens in a circular motion
Common problems and solutions
Tips for Troubleshooting
POWER LED/FLASHES
LED Error Messages
ERROR CODE MESSAGE
LAMP LED/FLASHES
Problem No image appears on the screen
Image Problems
Lamp Problems
Problem The image is blurred
Problem The projector does not respond to the remote control
Remote Control Problems
Audio Problems
Problem There is no sound
Service services@optoma.com.tw
Having the Projector Serviced
Service services@optoma.com
Service service@tsc-europe.com
Scandinavia
Service info@optoma.no
Service info@optoma.de
Latin America
Shaded rows are equivalent measurement in feet and inches
Specifications
Projection Distance V.S. Projection Size
Max. Screen Size Wide
RESOLUTION
Timing Mode Table
SIGNAL
WXGA
compatibility
RATE HZ
Macbook
Mac book Pro
Power Mac
G5 compatibility
G4 compatibility
28.1
33.8
HDTV
60.0
71 mm 2.7 inches
Projector Dimensions
220 mm8.6 inches
178 mm 7 inches
FCC Warning
Safety Certifications
Regulatory Compliance
Canada
Copyright
Disclaimer
Top
Page
Image
Contents