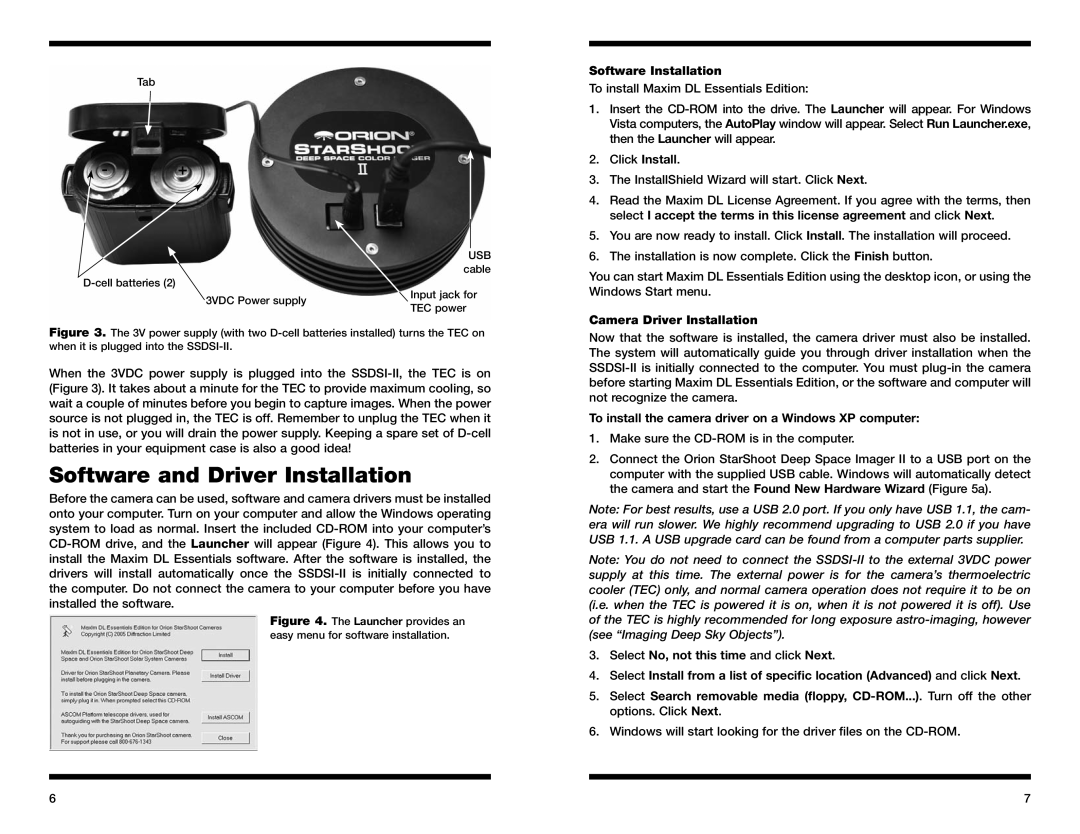
Tab
![]() - +
- +
USB cable
3VDC Power supply | Input jack for | |
TEC power | ||
|
Figure 3. The 3V power supply (with two D-cell batteries installed) turns the TEC on when it is plugged into the SSDSI-II.
When the 3VDC power supply is plugged into the
Software and Driver Installation
Before the camera can be used, software and camera drivers must be installed onto your computer. Turn on your computer and allow the Windows operating system to load as normal. Insert the included
Figure 4. The Launcher provides an easy menu for software installation.
Software Installation
To install Maxim DL Essentials Edition:
1.Insert the
2.Click Install.
3.The InstallShield Wizard will start. Click Next.
4.Read the Maxim DL License Agreement. If you agree with the terms, then select I accept the terms in this license agreement and click Next.
5.You are now ready to install. Click Install. The installation will proceed.
6.The installation is now complete. Click the Finish button.
You can start Maxim DL Essentials Edition using the desktop icon, or using the Windows Start menu.
Camera Driver Installation
Now that the software is installed, the camera driver must also be installed. The system will automatically guide you through driver installation when the
To install the camera driver on a Windows XP computer:
1.Make sure the
2.Connect the Orion StarShoot Deep Space Imager II to a USB port on the computer with the supplied USB cable. Windows will automatically detect the camera and start the Found New Hardware Wizard (Figure 5a).
Note: For best results, use a USB 2.0 port. If you only have USB 1.1, the cam- era will run slower. We highly recommend upgrading to USB 2.0 if you have USB 1.1. A USB upgrade card can be found from a computer parts supplier.
Note: You do not need to connect the
3.Select No, not this time and click Next.
4.Select Install from a list of specific location (Advanced) and click Next.
5.Select Search removable media (floppy,
6.Windows will start looking for the driver files on the
6 | 7 |