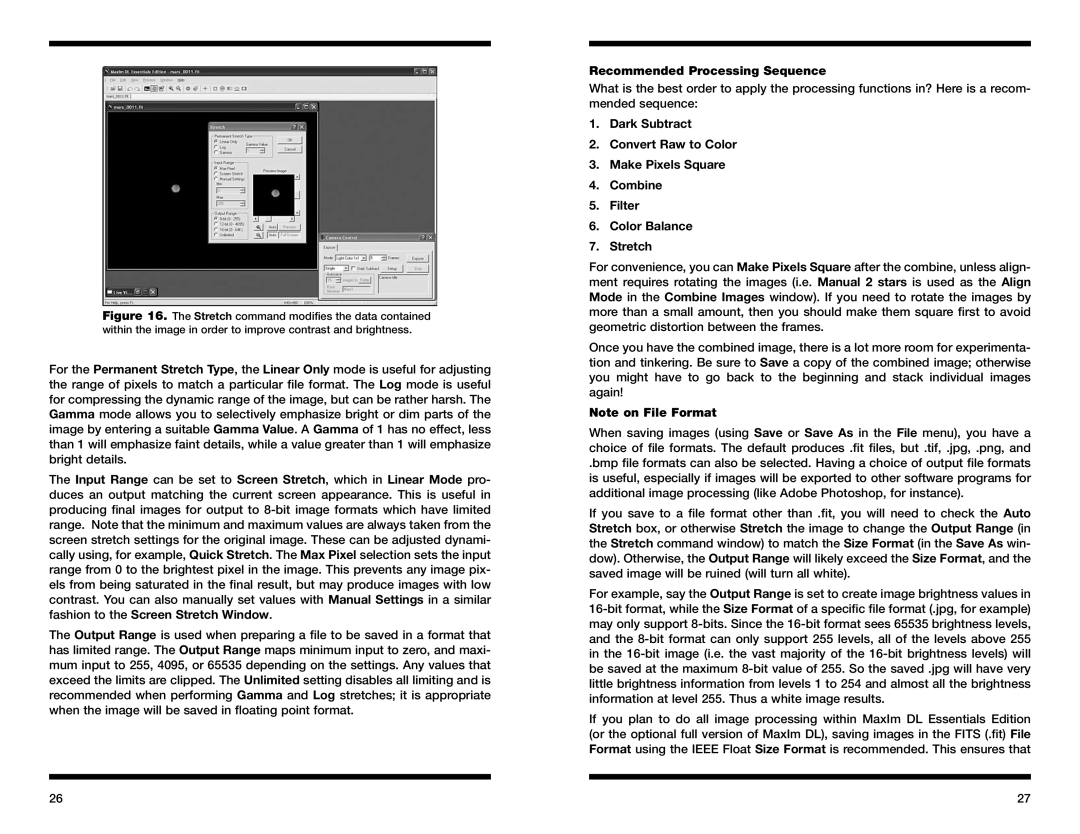
Figure 16. The Stretch command modifies the data contained within the image in order to improve contrast and brightness.
For the Permanent Stretch Type, the Linear Only mode is useful for adjusting the range of pixels to match a particular file format. The Log mode is useful for compressing the dynamic range of the image, but can be rather harsh. The Gamma mode allows you to selectively emphasize bright or dim parts of the image by entering a suitable Gamma Value. A Gamma of 1 has no effect, less than 1 will emphasize faint details, while a value greater than 1 will emphasize bright details.
The Input Range can be set to Screen Stretch, which in Linear Mode pro- duces an output matching the current screen appearance. This is useful in producing final images for output to
The Output Range is used when preparing a file to be saved in a format that has limited range. The Output Range maps minimum input to zero, and maxi- mum input to 255, 4095, or 65535 depending on the settings. Any values that exceed the limits are clipped. The Unlimited setting disables all limiting and is recommended when performing Gamma and Log stretches; it is appropriate when the image will be saved in floating point format.
Recommended Processing Sequence
What is the best order to apply the processing functions in? Here is a recom- mended sequence:
1.Dark Subtract
2.Convert Raw to Color
3.Make Pixels Square
4.Combine
5.Filter
6.Color Balance
7.Stretch
For convenience, you can Make Pixels Square after the combine, unless align- ment requires rotating the images (i.e. Manual 2 stars is used as the Align Mode in the Combine Images window). If you need to rotate the images by more than a small amount, then you should make them square first to avoid geometric distortion between the frames.
Once you have the combined image, there is a lot more room for experimenta- tion and tinkering. Be sure to Save a copy of the combined image; otherwise you might have to go back to the beginning and stack individual images again!
Note on File Format
When saving images (using Save or Save As in the File menu), you have a choice of file formats. The default produces .fit files, but .tif, .jpg, .png, and
.bmp file formats can also be selected. Having a choice of output file formats is useful, especially if images will be exported to other software programs for additional image processing (like Adobe Photoshop, for instance).
If you save to a file format other than .fit, you will need to check the Auto Stretch box, or otherwise Stretch the image to change the Output Range (in the Stretch command window) to match the Size Format (in the Save As win- dow). Otherwise, the Output Range will likely exceed the Size Format, and the saved image will be ruined (will turn all white).
For example, say the Output Range is set to create image brightness values in
If you plan to do all image processing within MaxIm DL Essentials Edition (or the optional full version of MaxIm DL), saving images in the FITS (.fit) File Format using the IEEE Float Size Format is recommended. This ensures that
26 | 27 |