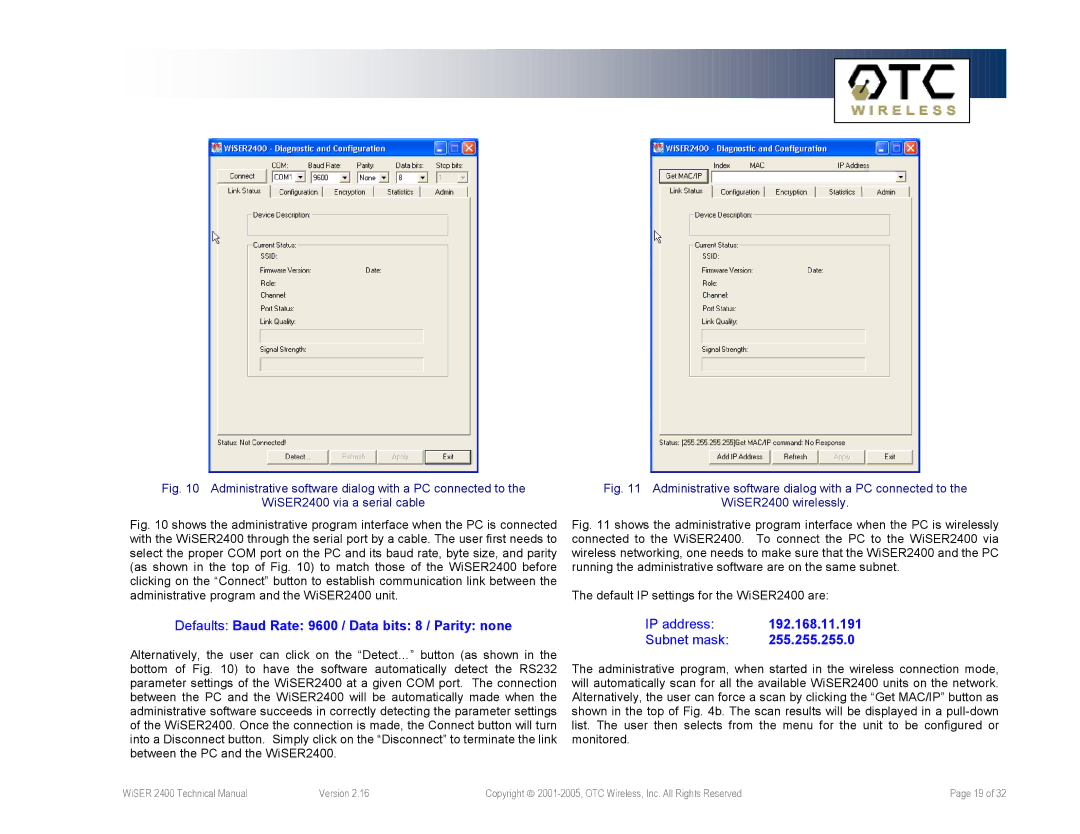
Fig. 10 Administrative software dialog with a PC connected to the
WiSER2400 via a serial cable
Fig. 10 shows the administrative program interface when the PC is connected with the WiSER2400 through the serial port by a cable. The user first needs to select the proper COM port on the PC and its baud rate, byte size, and parity (as shown in the top of Fig. 10) to match those of the WiSER2400 before clicking on the “Connect” button to establish communication link between the administrative program and the WiSER2400 unit.
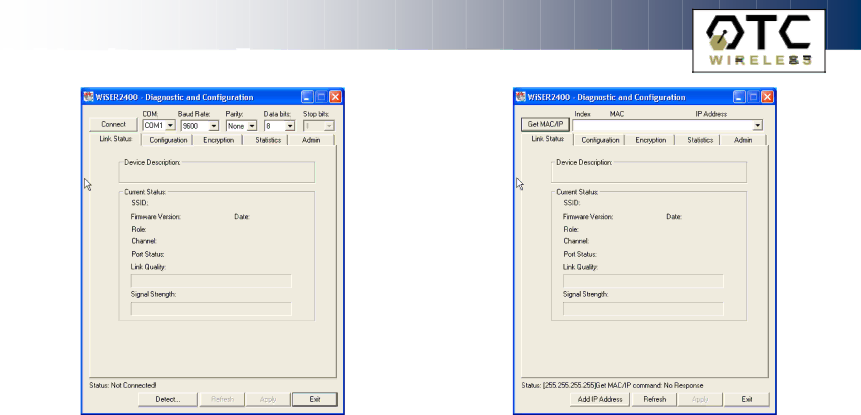
Fig. 11 Administrative software dialog with a PC connected to the
WiSER2400 wirelessly.
Fig. 11 shows the administrative program interface when the PC is wirelessly connected to the WiSER2400. To connect the PC to the WiSER2400 via wireless networking, one needs to make sure that the WiSER2400 and the PC running the administrative software are on the same subnet.
The default IP settings for the WiSER2400 are:
Defaults: Baud Rate: 9600 / Data bits: 8 / Parity: none
Alternatively, the user can click on the “Detect…” button (as shown in the bottom of Fig. 10) to have the software automatically detect the RS232 parameter settings of the WiSER2400 at a given COM port. The connection between the PC and the WiSER2400 will be automatically made when the administrative software succeeds in correctly detecting the parameter settings of the WiSER2400. Once the connection is made, the Connect button will turn into a Disconnect button. Simply click on the “Disconnect” to terminate the link between the PC and the WiSER2400.
IP address: | 192.168.11.191 |
Subnet mask: | 255.255.255.0 |
The administrative program, when started in the wireless connection mode, will automatically scan for all the available WiSER2400 units on the network. Alternatively, the user can force a scan by clicking the “Get MAC/IP” button as shown in the top of Fig. 4b. The scan results will be displayed in a
WiSER 2400 Technical Manual | Version 2.16 | Copyright | Page 19 of 32 |