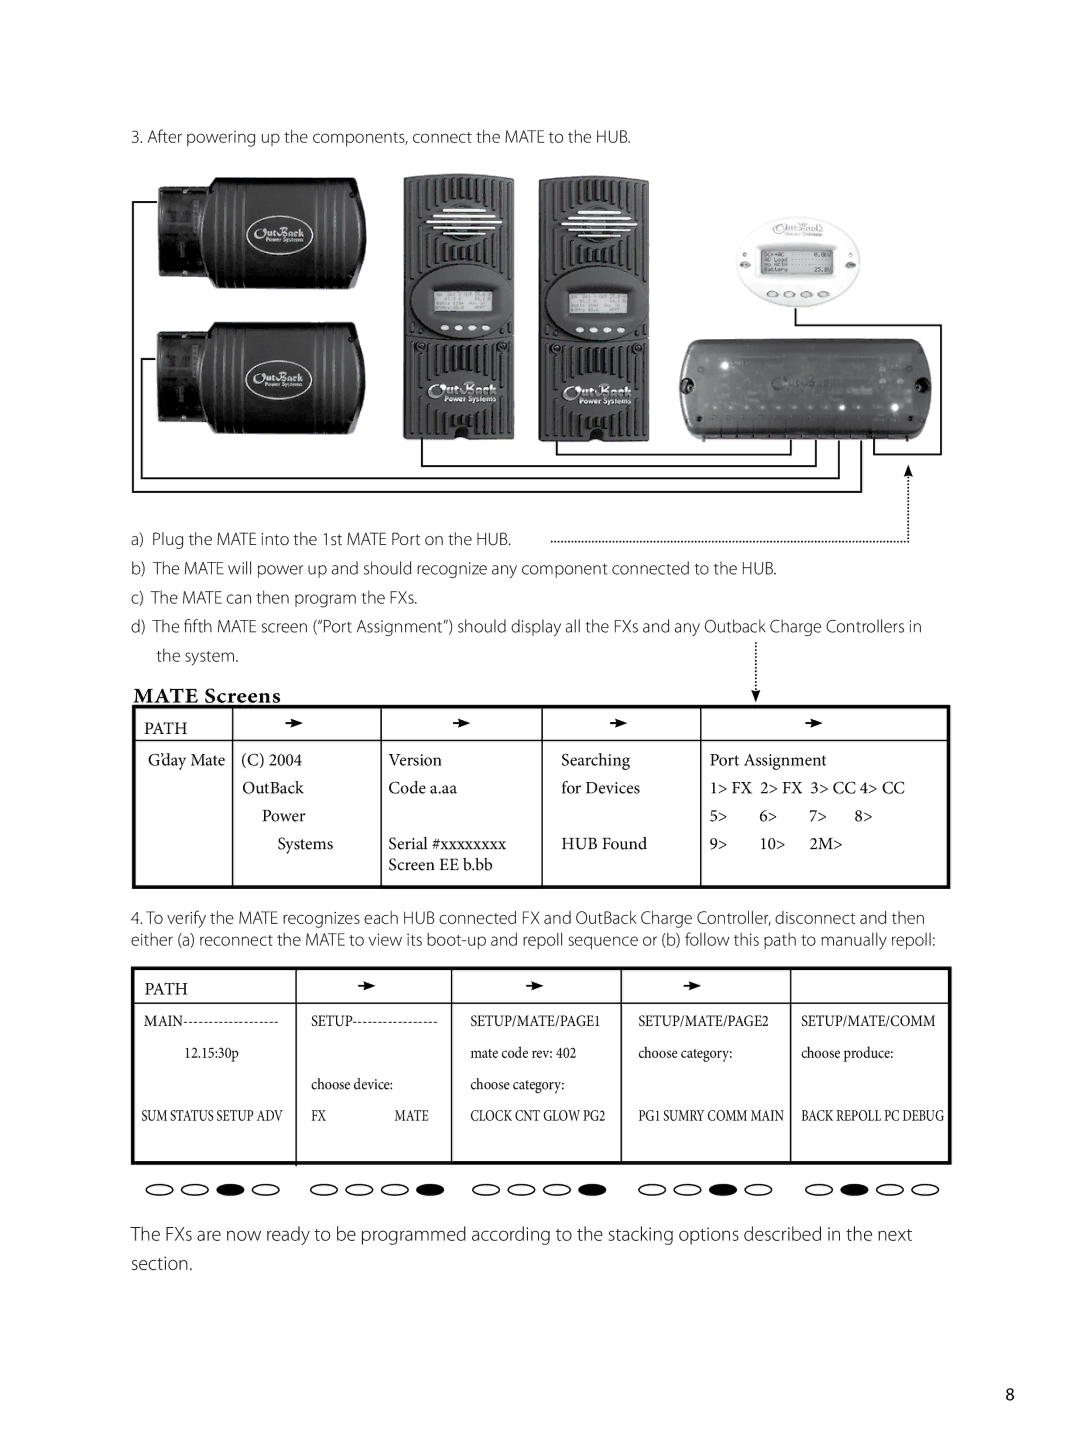
3. After powering up the components, connect the MATE to the HUB.
a)Plug the MATE into the 1st MATE Port on the HUB.
b)The MATE will power up and should recognize any component connected to the HUB.
c)The MATE can then program the FXs.
d)The fifth MATE screen (“Port Assignment”) should display all the FXs and any Outback Charge Controllers in the system.
MATE Screens
PATH |
|
|
|
|
|
|
|
|
|
|
|
|
|
|
|
|
|
|
|
|
|
|
|
| |||
G’day Mate | (C) 2004 | Version | Searching | Port Assignment | |||||||||
| OutBack | Code a.aa | for Devices | 1> FX 2> FX 3> CC 4> CC | |||||||||
| Power |
|
|
|
|
|
| 5> | 6> | 7> 8> | |||
| Systems | Serial #xxxxxxxx | HUB Found | 9> | 10> | 2M> | |||||||
|
|
|
| Screen EE b.bb |
|
|
|
|
|
|
| ||
|
|
|
|
|
|
|
|
|
|
|
|
|
|
4.To verify the MATE recognizes each HUB connected FX and OutBack Charge Controller, disconnect and then either (a) reconnect the MATE to view its
PATH |
|
|
|
|
|
|
|
|
|
|
|
|
|
|
|
|
|
|
|
|
|
| |
SETUP/MATE/PAGE1 | SETUP/MATE/PAGE2 | SETUP/MATE/COMM | |||||||||
12.15:30p |
|
|
|
| mate code rev: 402 | choose category: | choose produce: | ||||
| choose device: |
| choose category: |
|
|
|
| ||||
SUM STATUS SETUP ADV | FX | MATE | CLOCK CNT GLOW PG2 | PG1 SUMRY COMM MAIN | BACK REPOLL PC DEBUG | ||||||
|
|
|
|
|
|
|
|
|
|
|
|
The FXs are now ready to be programmed according to the stacking options described in the next section.
8