DERAILLEUR GEARED BICYCLES
Includes 20", 24” and 26" Wheel Mountain Bikes Assembly is the same for men’s
and women’s bikes.
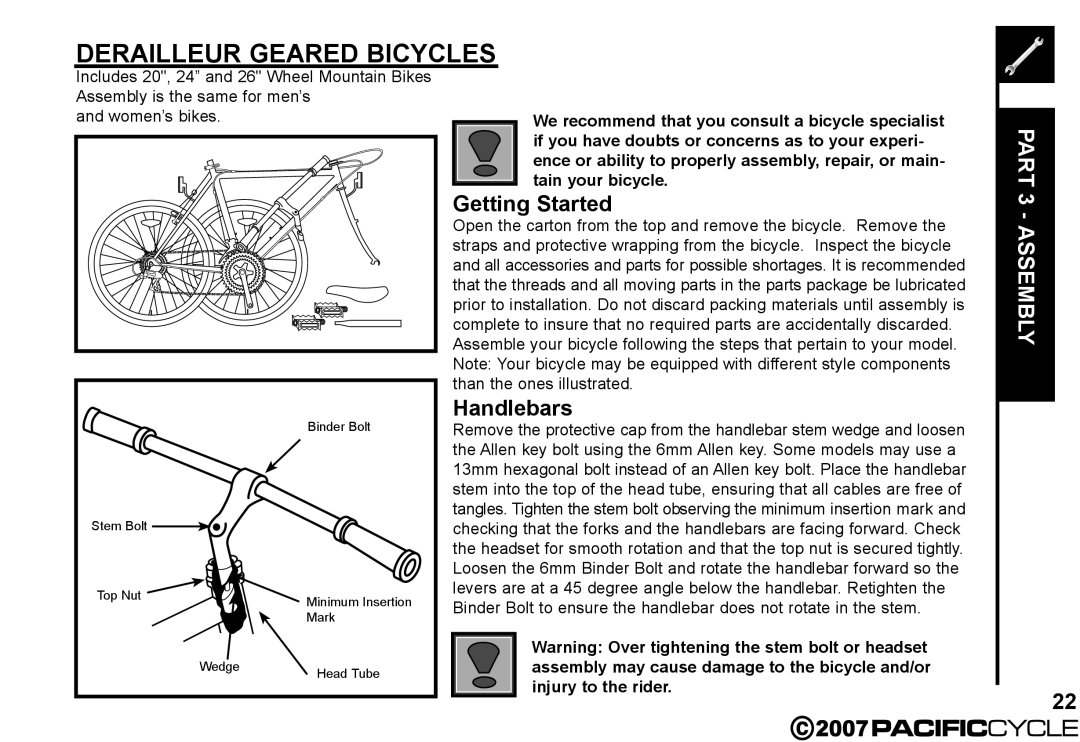
Binder Bolt
Stem Bolt |
|
|
Top Nut |
| Minimum Insertion |
|
| |
|
| Mark |
| Wedge | Head Tube |
|
|
We recommend that you consult a bicycle specialist if you have doubts or concerns as to your experi- ence or ability to properly assembly, repair, or main- tain your bicycle.
Getting Started
Open the carton from the top and remove the bicycle. Remove the straps and protective wrapping from the bicycle. Inspect the bicycle and all accessories and parts for possible shortages. It is recommended that the threads and all moving parts in the parts package be lubricated prior to installation. Do not discard packing materials until assembly is complete to insure that no required parts are accidentally discarded. Assemble your bicycle following the steps that pertain to your model. Note: Your bicycle may be equipped with different style components than the ones illustrated.
Handlebars
Remove the protective cap from the handlebar stem wedge and loosen the Allen key bolt using the 6mm Allen key. Some models may use a 13mm hexagonal bolt instead of an Allen key bolt. Place the handlebar stem into the top of the head tube, ensuring that all cables are free of tangles. Tighten the stem bolt observing the minimum insertion mark and checking that the forks and the handlebars are facing forward. Check the headset for smooth rotation and that the top nut is secured tightly. Loosen the 6mm Binder Bolt and rotate the handlebar forward so the levers are at a 45 degree angle below the handlebar. Retighten the Binder Bolt to ensure the handlebar does not rotate in the stem.
Warning: Over tightening the stem bolt or headset assembly may cause damage to the bicycle and/or injury to the rider.
PART 3 - ASSEMBLY
22