29
Adjusting | Quick Release |
|
| |||||||
Axle | Quick | |||||||||
Nut |
|
|
|
|
|
|
|
| Release | |
|
|
|
|
|
|
|
|
| ||
|
|
|
|
|
|
|
|
| Lever | |
|
|
|
|
|
|
|
|
|
|
|
|
|
|
|
|
|
|
|
|
|
|
|
|
|
|
|
|
|
|
|
|
|
|
|
|
|
|
|
|
|
|
|
|
|
|
|
|
|
|
|
|
|
|
|
|
|
|
|
|
|
|
|
|
|
|
|
|
|
|
|
|
|
|
|
|
|
Hub | Hub | Spring |
Axle |
|
|
Closed Position
Open Position
Front Wheel
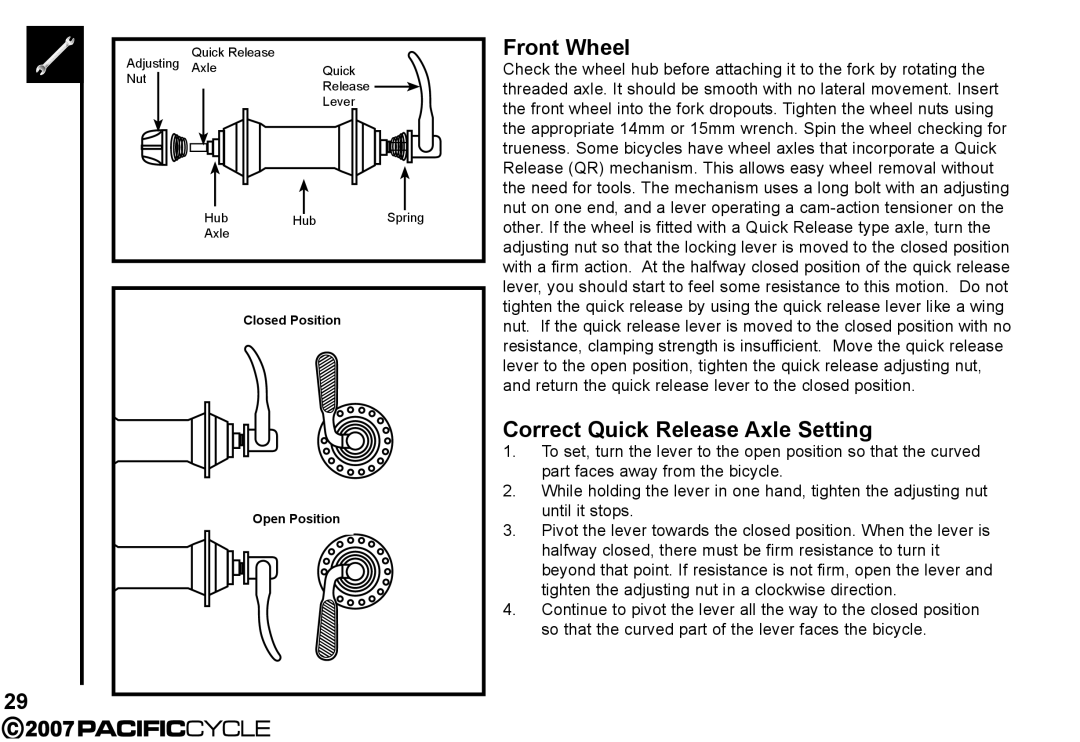
Check the wheel hub before attaching it to the fork by rotating the threaded axle. It should be smooth with no lateral movement. Insert the front wheel into the fork dropouts. Tighten the wheel nuts using the appropriate 14mm or 15mm wrench. Spin the wheel checking for trueness. Some bicycles have wheel axles that incorporate a Quick Release (QR) mechanism. This allows easy wheel removal without the need for tools. The mechanism uses a long bolt with an adjusting nut on one end, and a lever operating a
Correct Quick Release Axle Setting
1.To set, turn the lever to the open position so that the curved part faces away from the bicycle.
2.While holding the lever in one hand, tighten the adjusting nut until it stops.
3.Pivot the lever towards the closed position. When the lever is halfway closed, there must be firm resistance to turn it beyond that point. If resistance is not firm, open the lever and tighten the adjusting nut in a clockwise direction.
4.Continue to pivot the lever all the way to the closed position so that the curved part of the lever faces the bicycle.
