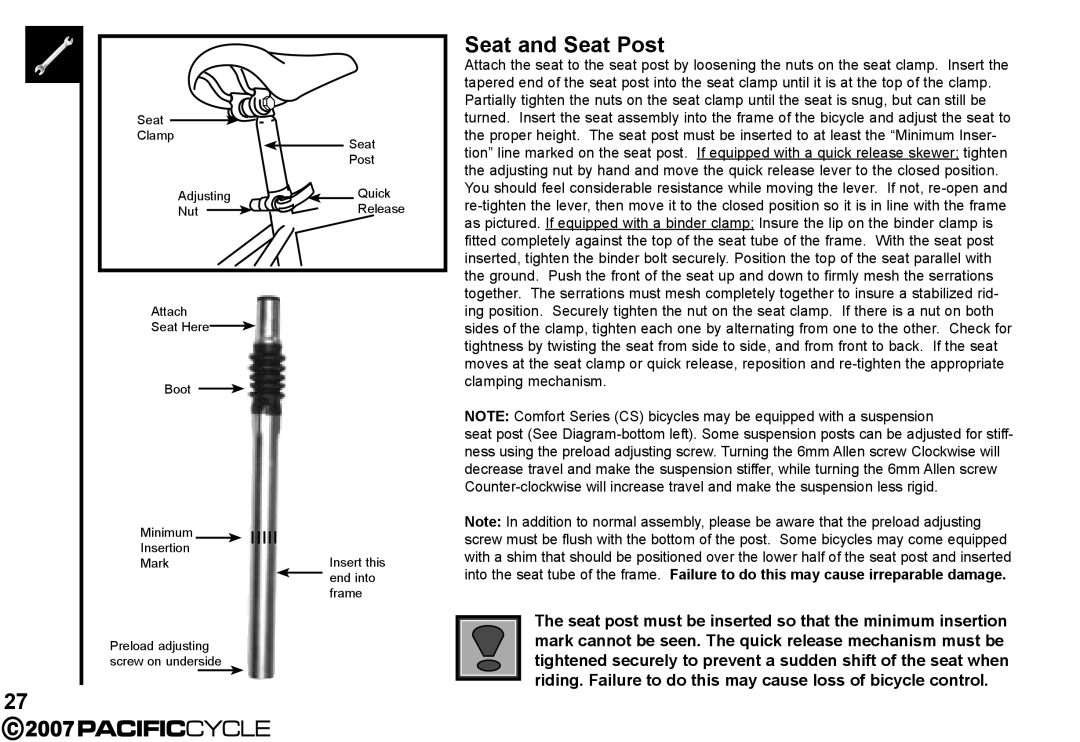
Seat
Clamp
Seat
Post
Adjusting | Quick |
Nut | Release |
Attach
Seat Here![]()
Boot
Minimum
Insertion
MarkInsert this end into frame
Preload adjusting screw on underside
27
Seat and Seat Post
Attach the seat to the seat post by loosening the nuts on the seat clamp. Insert the tapered end of the seat post into the seat clamp until it is at the top of the clamp. Partially tighten the nuts on the seat clamp until the seat is snug, but can still be turned. Insert the seat assembly into the frame of the bicycle and adjust the seat to the proper height. The seat post must be inserted to at least the “Minimum Inser- tion” line marked on the seat post. If equipped with a quick release skewer; tighten the adjusting nut by hand and move the quick release lever to the closed position. You should feel considerable resistance while moving the lever. If not,
NOTE: Comfort Series (CS) bicycles may be equipped with a suspension
seat post (See
Note: In addition to normal assembly, please be aware that the preload adjusting screw must be flush with the bottom of the post. Some bicycles may come equipped with a shim that should be positioned over the lower half of the seat post and inserted into the seat tube of the frame. Failure to do this may cause irreparable damage.
The seat post must be inserted so that the minimum insertion mark cannot be seen. The quick release mechanism must be tightened securely to prevent a sudden shift of the seat when riding. Failure to do this may cause loss of bicycle control.