7 Press [3, 4] to select “Start
Dubbing” and press [ENTER].
Press [2, 1] to select “Yes” and press [ENTER] to start transferring (dubbing).
Transferring (dubbing) list indicators
Titles and play lists that can be transferred (dubbed) in high speed mode to
|
| Title with “One time only recording” restriction |
|
| |
|
| Titles erased from the HDD after transferring |
|
| |
|
| (dubbing) by recording restrictions. |
|
| Title or play list contains still picture(s) |
|
| ≥Still picture(s) cannot be transferred (dubbed). |
(NTSC) | Title or play list recorded using a different | |
|
| encoding system from that of the TV system |
≥Operations and on screen displays during transfer (dubbing) are also recorded.
≥Almost all
≥The following cannot be transferred (dubbed):
Video CD, Audio CD and so on.
After performing steps
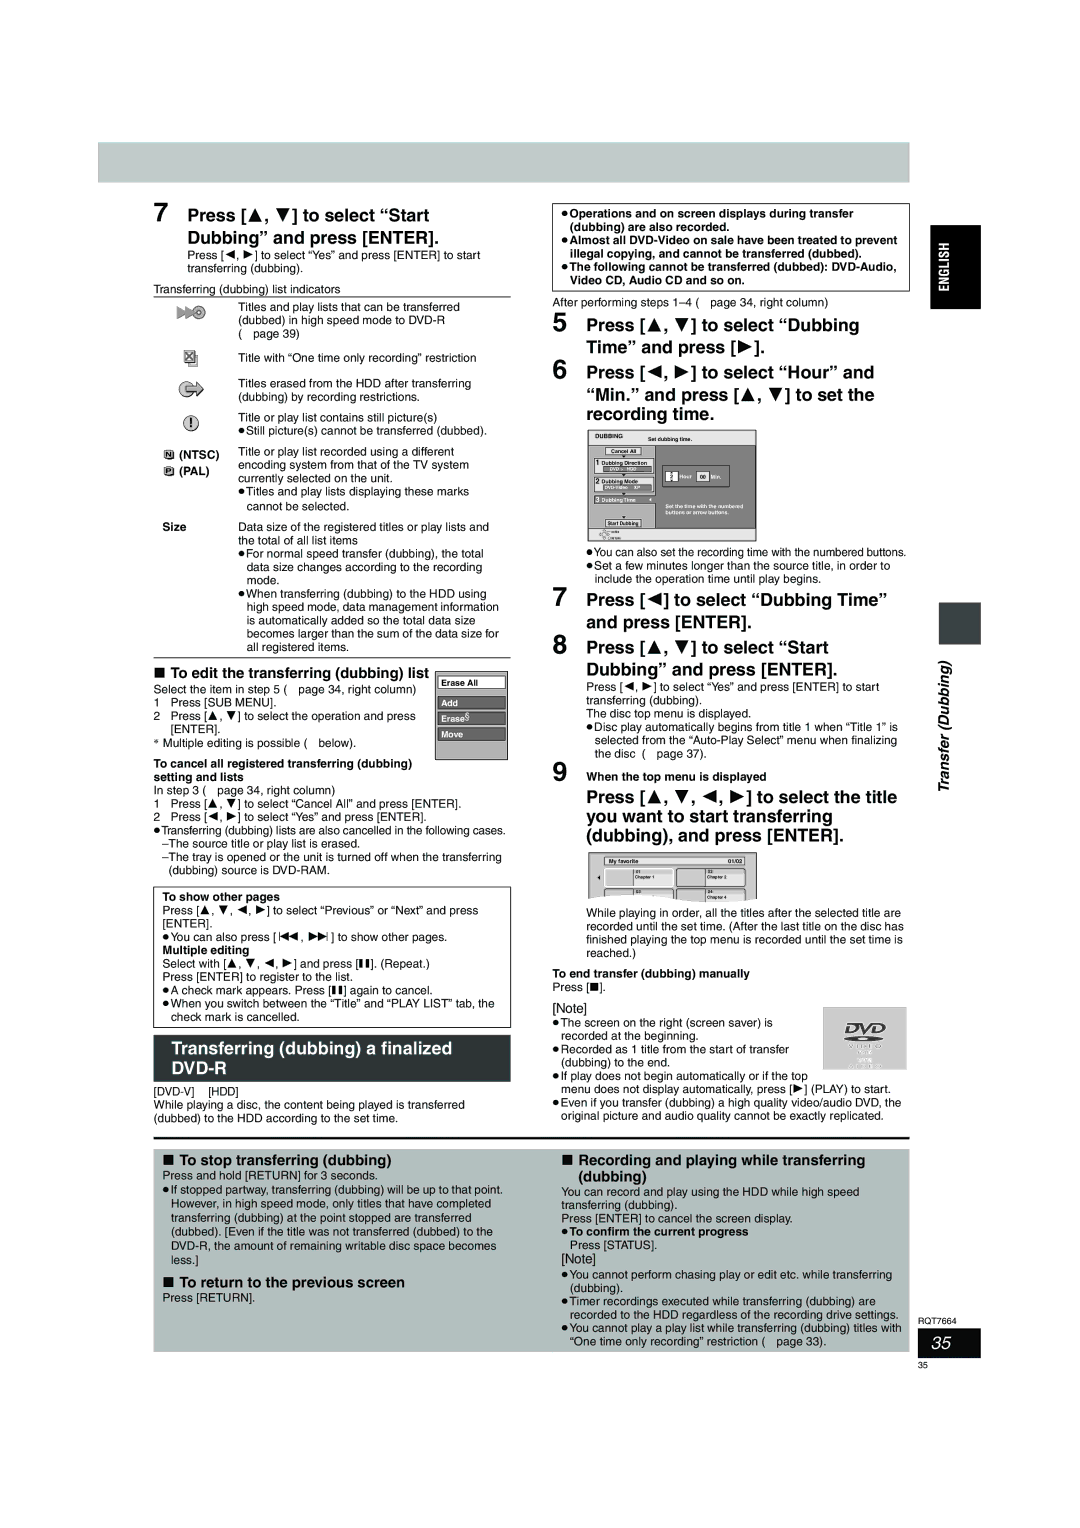
5 Press [3, 4] to select “Dubbing Time” and press [1].
6 Press [2, 1] to select “Hour” and “Min.” and press [3, 4] to set the recording time.
DUBBING | Set dubbing time. |
Cancel All
1 Dubbing Direction
(PAL) | currently selected on the unit. |
|
DVD > HDD
2 Dubbing Mode
2 Hour 00 Min.
| ≥Titles and play lists displaying these marks |
| cannot be selected. |
Size | Data size of the registered titles or play lists and |
| the total of all list items |
| ≥For normal speed transfer (dubbing), the total |
| data size changes according to the recording |
| mode. |
| ≥When transferring (dubbing) to the HDD using |
| high speed mode, data management information |
| is automatically added so the total data size |
| becomes larger than the sum of the data size for |
| all registered items. |
|
|
∫To edit the transferring (dubbing) list
Select the item in step 5 (➡page 34, right column) | Erase All | ||
| |||
1 | Press [SUB MENU]. | Add | |
2 | Press [3, 4] to select the operation and press |
| |
Erase§ | |||
| [ENTER]. |
| |
| Move | ||
§ | Multiple editing is possible (➡below). | ||
| |||
To cancel all registered transferring (dubbing) setting and lists
In step 3 (➡page 34, right column)
1Press [3, 4] to select “Cancel All” and press [ENTER].
2Press [2, 1] to select “Yes” and press [ENTER].
≥Transferring (dubbing) lists are also cancelled in the following cases.
To show other pages
Press [3, 4, 2, 1] to select “Previous” or “Next” and press [ENTER].
≥You can also press [:, 9] to show other pages.
Multiple editing
Select with [3, 4, 2, 1] and press [;]. (Repeat.) Press [ENTER] to register to the list.
≥A check mark appears. Press [;] again to cancel.
≥When you switch between the “Title” and “PLAY LIST” tab, the check mark is cancelled.
Transferring (dubbing) a finalized DVD-R
While playing a disc, the content being played is transferred (dubbed) to the HDD according to the set time.
3 Dubbing Time
Set the time with the numbered buttons or arrow buttons.
Start Dubbing
![]() ENTER
ENTER
![]() RETURN
RETURN
≥You can also set the recording time with the numbered buttons. ≥Set a few minutes longer than the source title, in order to
include the operation time until play begins.
7 Press [2] to select “Dubbing Time” and press [ENTER].
8 Press [3, 4] to select “Start
Dubbing” and press [ENTER].
Press [2, 1] to select “Yes” and press [ENTER] to start transferring (dubbing).
The disc top menu is displayed.
≥Disc play automatically begins from title 1 when “Title 1” is selected from the
9 When the top menu is displayed
Press [3, 4, 2, 1] to select the title you want to start transferring (dubbing), and press [ENTER].
My favorite | 01/02 |
01 | 02 |
Chapter 1 | Chapter 2 |
03 | 04 |
Chapter 3 | Chapter 4 |
While playing in order, all the titles after the selected title are recorded until the set time. (After the last title on the disc has finished playing the top menu is recorded until the set time is reached.)
To end transfer (dubbing) manually
Press [∫].
[Note]
≥The screen on the right (screen saver) is
recorded at the beginning. ≥Recorded as 1 title from the start of transfer (dubbing) to the end.
≥If play does not begin automatically or if the top
menu does not display automatically, press [1] (PLAY) to start. ≥Even if you transfer (dubbing) a high quality video/audio DVD, the original picture and audio quality cannot be exactly replicated.
Transfer (Dubbing)
∫ To stop transferring (dubbing) | ∫ Recording and playing while transferring |
|
Press and hold [RETURN] for 3 seconds. | (dubbing) |
|
≥If stopped partway, transferring (dubbing) will be up to that point. | You can record and play using the HDD while high speed |
|
However, in high speed mode, only titles that have completed | transferring (dubbing). |
|
transferring (dubbing) at the point stopped are transferred | Press [ENTER] to cancel the screen display. |
|
(dubbed). [Even if the title was not transferred (dubbed) to the | ≥To confirm the current progress |
|
Press [STATUS]. |
| |
less.] | [Note] |
|
∫ To return to the previous screen | ≥You cannot perform chasing play or edit etc. while transferring |
|
(dubbing). |
| |
Press [RETURN]. | ≥Timer recordings executed while transferring (dubbing) are |
|
|
| |
| recorded to the HDD regardless of the recording drive settings. | RQT7664 |
| ≥You cannot play a play list while transferring (dubbing) titles with | |
|
| |
| 35 | |
| “One time only recording” restriction (➡page 33). | |
|
|
|
35