Installation of Optional Card and Unit
DISA Card (KX-T20691) Connection
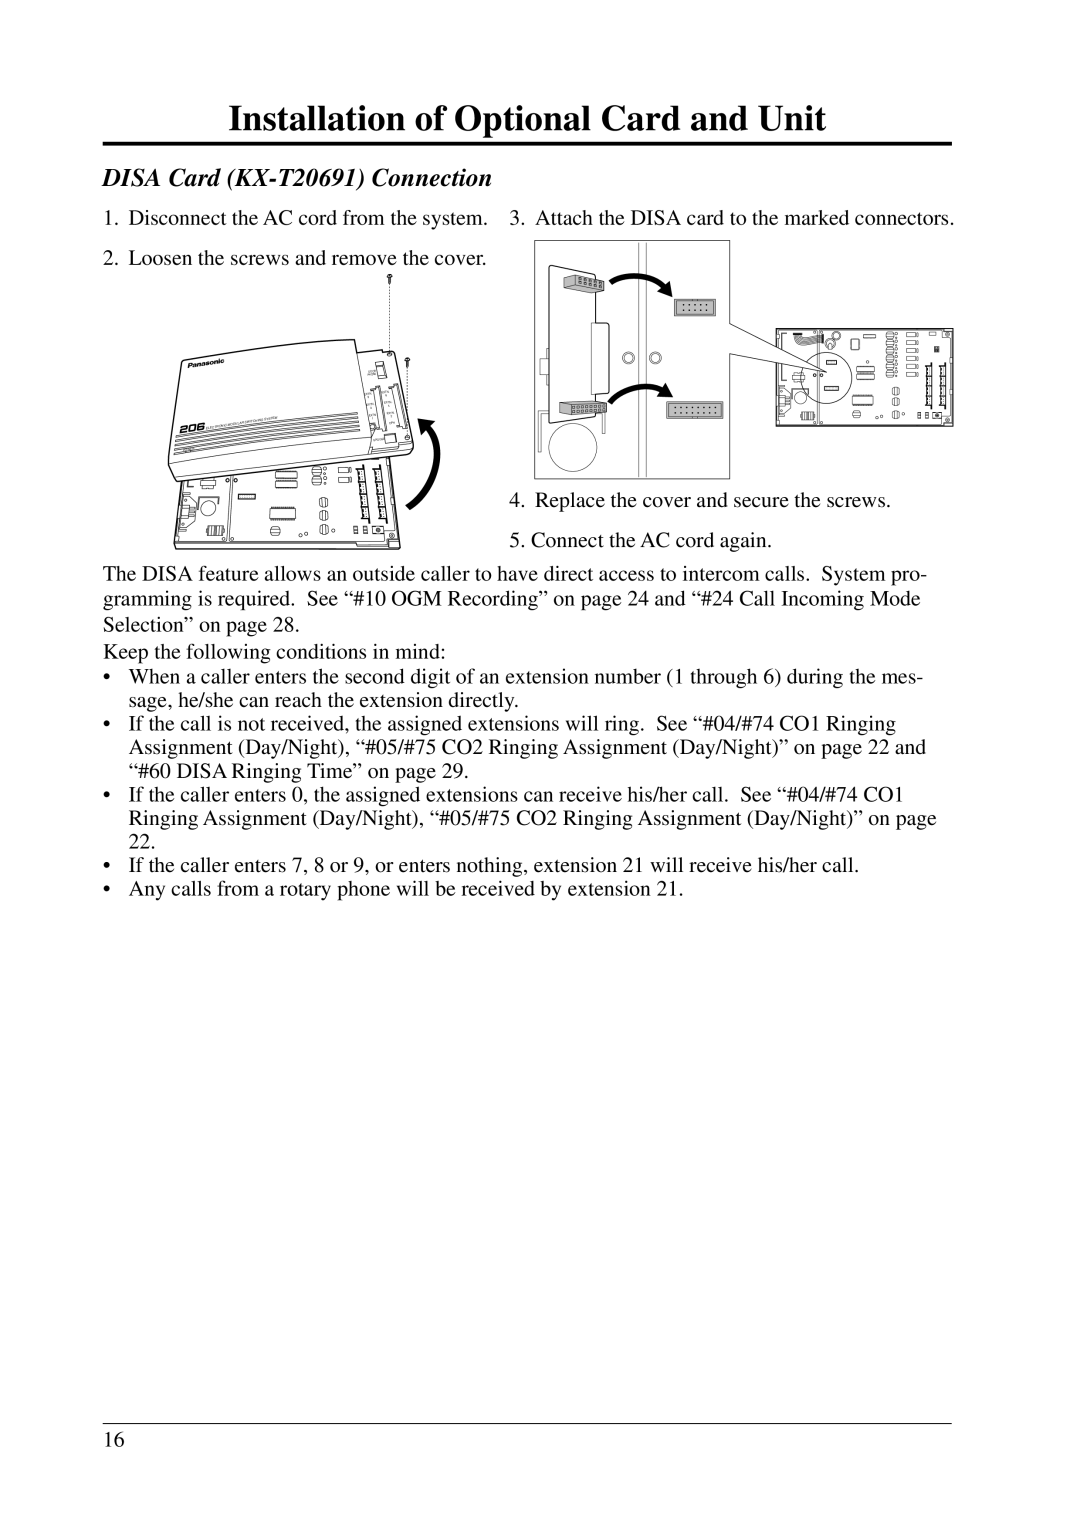
1.Disconnect the AC cord from the system. 3. Attach the DISA card to the marked connectors.
2.Loosen the screws and remove the cover.
|
| ULAR SWI | TCHING | SYSTEM |
ELECTR | ONIC MOD |
|
| |
|
|
| ||
POWER |
|
|
|
|
DOOR |
|
PHONE |
|
EXTN. | EXTN. |
6 | |
5 |
|
EXTN. | EXTN. |
4 | |
3 |
|
EXTN | EXTN. |
2 | |
1 |
|
CO2 | DPH |
CO 1 |
|
GROUND | |
4. Replace the cover and secure the screws.
5. Connect the AC cord again.
The DISA feature allows an outside caller to have direct access to intercom calls. System pro- gramming is required. See “#10 OGM Recording” on page 24 and “#24 Call Incoming Mode Selection” on page 28.
Keep the following conditions in mind:
•When a caller enters the second digit of an extension number (1 through 6) during the mes- sage, he/she can reach the extension directly.
•If the call is not received, the assigned extensions will ring. See “#04/#74 CO1 Ringing Assignment (Day/Night), “#05/#75 CO2 Ringing Assignment (Day/Night)” on page 22 and “#60 DISA Ringing Time” on page 29.
•If the caller enters 0, the assigned extensions can receive his/her call. See “#04/#74 CO1 Ringing Assignment (Day/Night), “#05/#75 CO2 Ringing Assignment (Day/Night)” on page 22.
•If the caller enters 7, 8 or 9, or enters nothing, extension 21 will receive his/her call.
•Any calls from a rotary phone will be received by extension 21.
16
