Installation of Optional Card and Unit
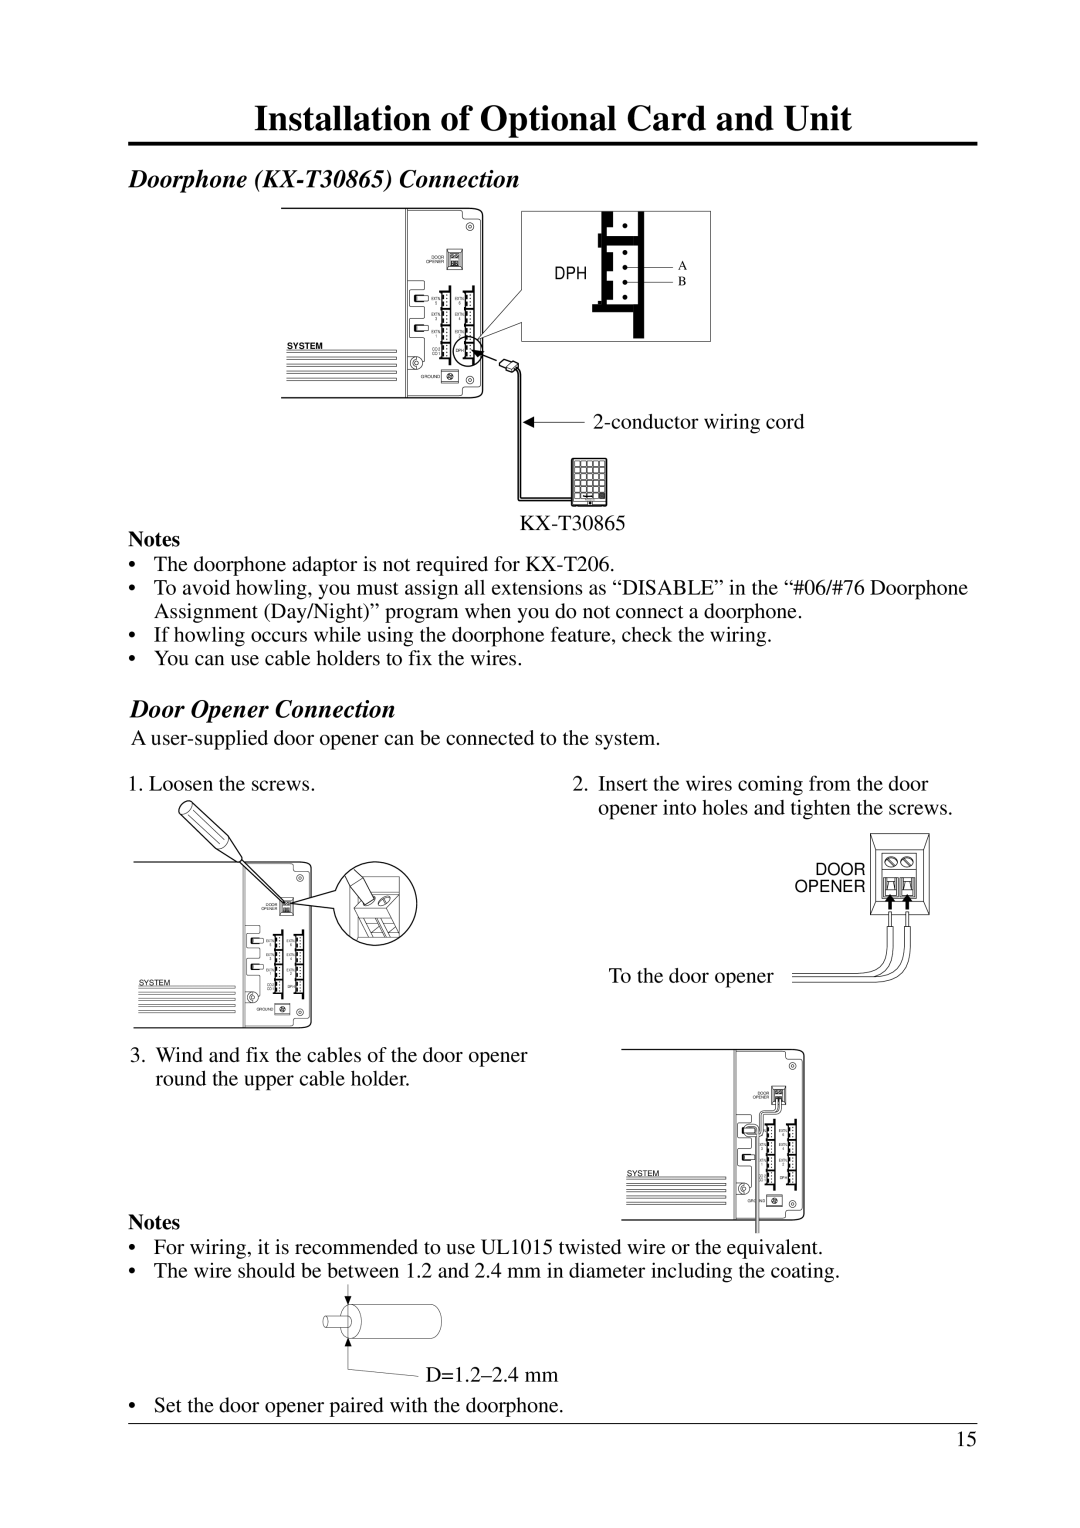
Doorphone (KX-T30865) Connection
DOOR |
|
OPENER | DPH |
| |
EXTN. | EXTN. |
5 | 6 |
EXTN. | EXTN. |
3 | 4 |
EXTN. | EXTN. |
1 | 2 |
SYSTEM | CO 2 | DPH |
| CO 1 |
|
| GROUND |
|
A B
![]()
Panasonic
Panasonic
Notes
•The doorphone adaptor is not required for
•To avoid howling, you must assign all extensions as “DISABLE” in the “#06/#76 Doorphone Assignment (Day/Night)” program when you do not connect a doorphone.
•If howling occurs while using the doorphone feature, check the wiring.
•You can use cable holders to fix the wires.
Door Opener Connection
A
1. Loosen the screws.
| DOOR |
|
| OPENER |
|
| EXTN. | EXTN. |
| 5 | 6 |
| EXTN. | EXTN. |
| 3 | 4 |
| EXTN. | EXTN. |
| 1 | 2 |
SYSTEM | CO 2 | DPH |
| CO 1 |
|
2.Insert the wires coming from the door opener into holes and tighten the screws.
DOOR
OPENER
To the door opener
GROUND
3.Wind and fix the cables of the door opener round the upper cable holder.
| DOOR |
|
| OPENER |
|
| EXTN. | EXTN. |
| 5 | 6 |
| EXTN. | EXTN. |
| 3 | 4 |
| EXTN. | EXTN. |
| 1 | 2 |
SYSTEM | CO 2 | DPH |
| CO 1 |
|
| GROUND |
|
Notes
•For wiring, it is recommended to use UL1015 twisted wire or the equivalent.
•The wire should be between 1.2 and 2.4 mm in diameter including the coating.
• Set the door opener paired with the doorphone.
15
