If you are connecting your VCR to a TV using Method 1, follow the operations explained below.
Auto Setup Function
The Auto Setup function automatically tunes all available TV stations and sets the VCR’s clock to the current date and time. If the tuning and time/date settings are not correct, performing timer recordings is not possible.
Hint:
≥If you select “Schweiz”, “Suisse” or “Svizzera” on the Country setting menu, the Display setting menu appears automatically to let you set the item “Power save” to “ON”. In this setting, the VCR’s power consumption is minimised when it is off (Standby mode).To turn the VCR on, keep the
1 | Switch the TV on. | |
2 | Select the AV input on your TV. | |
3 | Set the VCR/TV switch P to “VCR”. | |
4 | Press the | |
| 1 to switch the VCR on. |
|
|
| |
| The Country setting menu |
|
| appears on the TV screen. |
|
5 | Press the Cursor buttons |
|
| (3421) R to select the |
|
| country where you are using |
|
|
| |
| the VCR. | |
6 | Press the OK button T and the | |
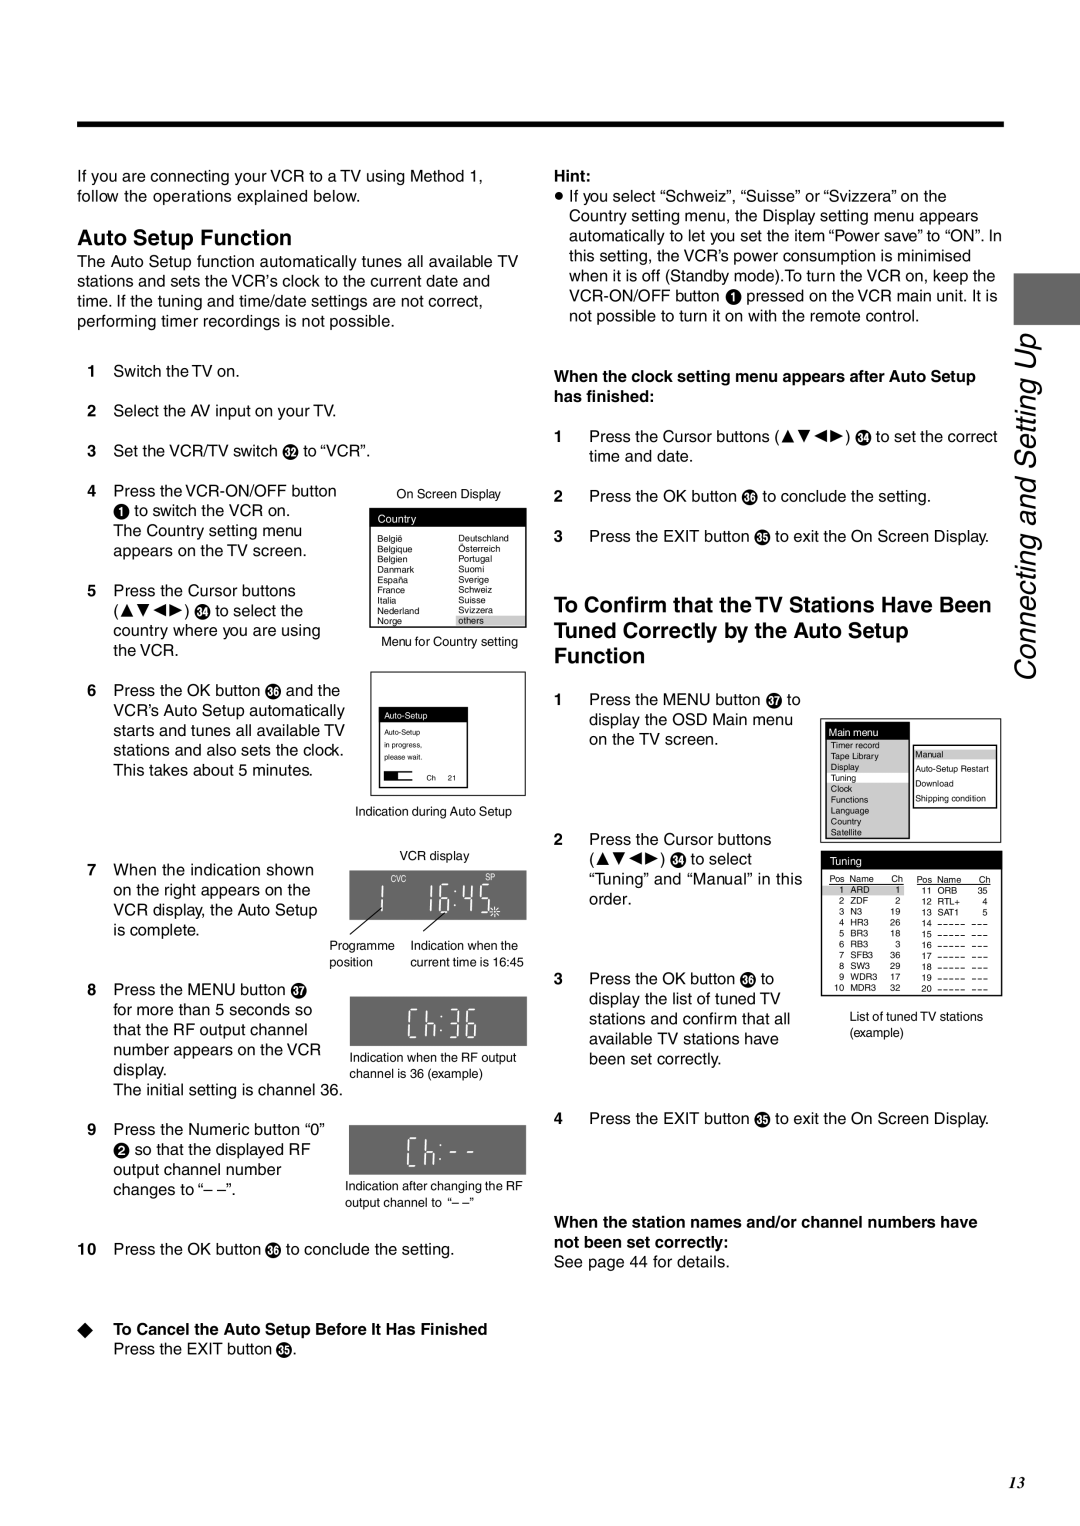
On Screen Display
Country
België | Deutschland |
Belgique | Österreich |
Belgien | Portugal |
Danmark | Suomi |
España | Sverige |
France | Schweiz |
Italia | Suisse |
Nederland | Svizzera |
Norge | others |
Menu for Country setting
When the clock setting menu appears after Auto Setup has finished:
1Press the Cursor buttons (3421) R to set the correct time and date.
2Press the OK button T to conclude the setting.
3Press the EXIT button S to exit the On Screen Display.
To Confirm that the TV Stations Have Been Tuned Correctly by the Auto Setup Function
Connecting and Setting Up
VCR’s Auto Setup automatically |
starts and tunes all available TV |
stations and also sets the clock. |
This takes about 5 minutes. |
in progress,
please wait.
Ch 21
1 Press the MENU button U to |
display the OSD Main menu |
on the TV screen. |
Main menu |
|
|
|
| |
Timer record |
|
|
|
| |
Tape Library |
| Manual |
Display |
| |
Tuning |
| Download |
Clock |
| |
| Shipping condition | |
Functions |
|
| Indication during Auto Setup | ||
7 When the indication shown | VCR display | ||
|
| ||
CVC | SP | ||
on the right appears on the | |||
|
| ||
VCR display, the Auto Setup |
|
| |
is complete. |
| ||
Programme | Indication when the | ||
position | current time is 16:45 | ||
2 | Press the Cursor buttons |
| (3421) R to select |
| “Tuning” and “Manual” in this |
| order. |
3 | Press the OK button T to |
Language |
Country |
Satellite |
Tuning
| Pos Name | Ch | Pos Name | Ch | |||
| 1 | ARD | 1 |
| 11 | ORB | 35 |
2 | ZDF | 2 | 12 | RTL+ | 4 | ||
3 | N3 | 19 | 13 | SAT1 | 5 | ||
4 | HR3 | 26 | 14 | s s s s s | s s s | ||
5 | BR3 | 18 | 15 | s s s s s | s s s | ||
6 | RB3 | 3 | 16 | s s s s s | s s s | ||
7 | SFB3 | 36 | 17 | s s s s s | s s s | ||
8 | SW3 | 29 | 18 | s s s s s | s s s | ||
9 | WDR3 | 17 | 19 | s s s s s | s s s | ||
8 Press the MENU button U |
for more than 5 seconds so |
that the RF output channel |
number appears on the VCR |
display. |
The initial setting is channel 36. |
Indication when the RF output channel is 36 (example)
display the list of tuned TV |
stations and confirm that all |
available TV stations have |
been set correctly. |
10 MDR3 32 | 20 s s s s s s s s |
List of tuned TV stations (example)
9 Press the Numeric button “0” |
2 so that the displayed RF |
output channel number |
changes to “– |
Indication after changing the RF output channel to “–
4Press the EXIT button S to exit the On Screen Display.
10Press the OK button T to conclude the setting.
√To Cancel the Auto Setup Before It Has Finished Press the EXIT button S.
When the station names and/or channel numbers have not been set correctly:
See page 44 for details.
13