Editing Mode
Player:
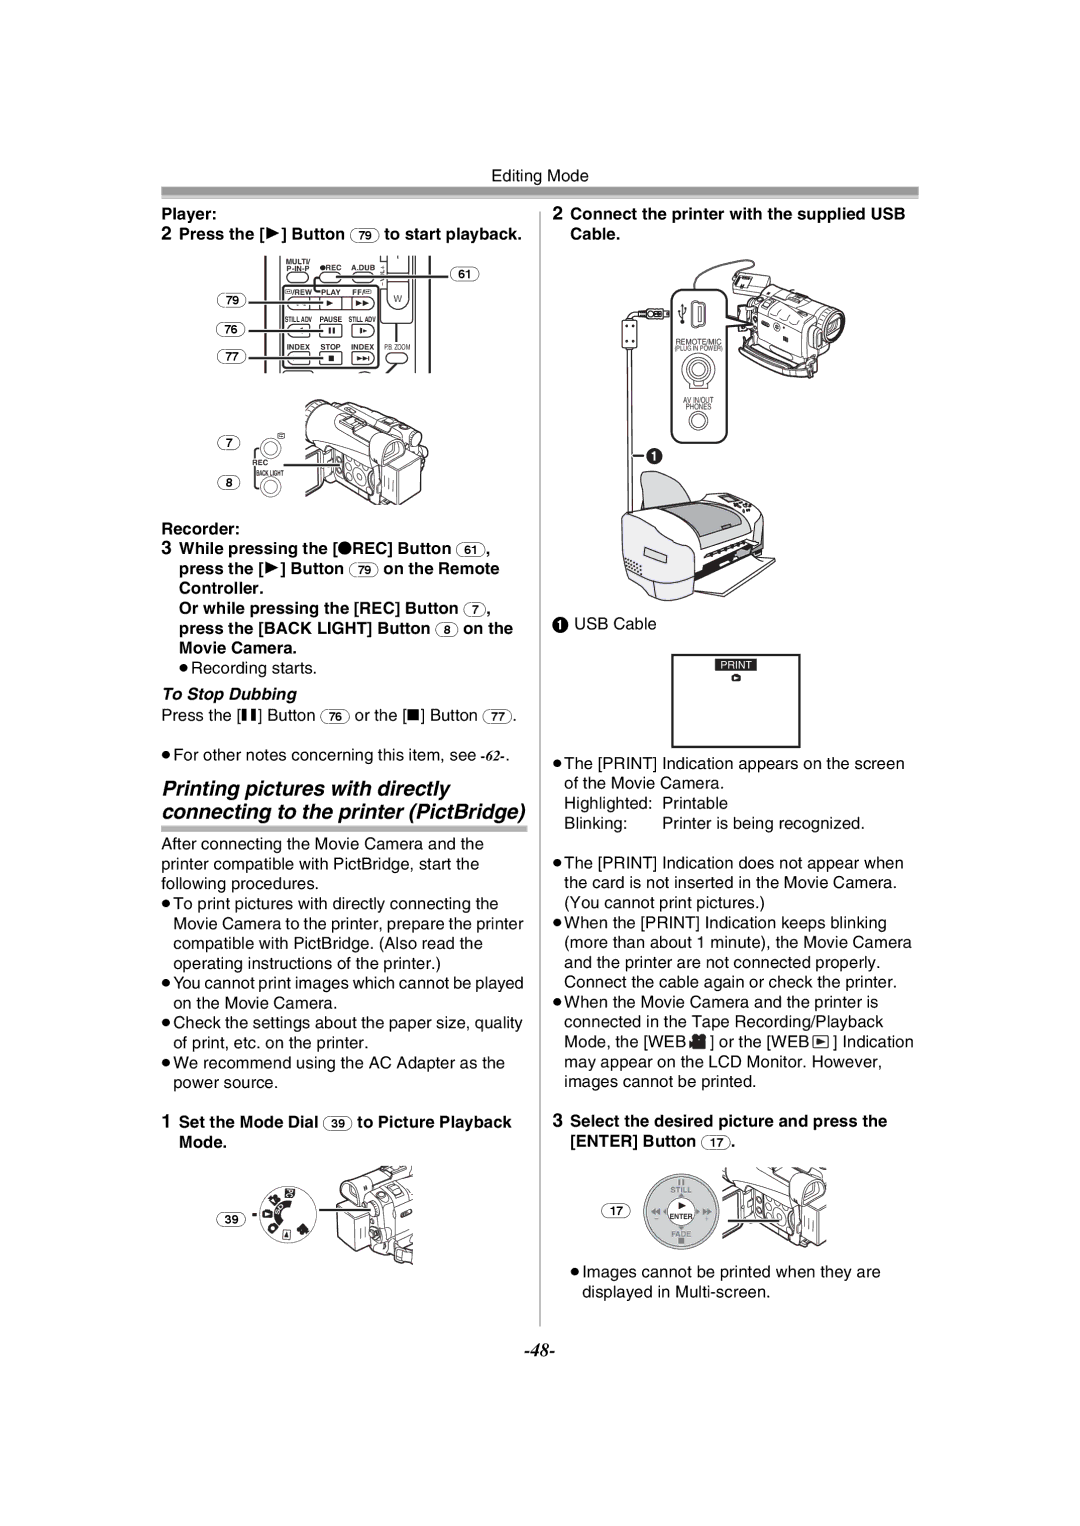
2Press the [1] Button (79) to start playback.
| MULTI/ |
|
|
| T |
| ¥REC | A.DUB |
|
| |
| r | (61) | |||
|
|
|
| sVOL | |
|
|
|
|
| |
(79) | V/REW | PLAY | FF/W |
| W |
6 | 1 | 5 |
| ||
(76) | STILL ADV | PAUSE | STILL ADV |
|
|
E | ; | D |
|
| |
(77) | INDEX | STOP | INDEX |
| P.B. ZOOM |
K | ∫ | L |
|
|
(7)
REC
2Connect the printer with the supplied USB Cable.
REMOTE/MIC
(PLUG IN POWER)
AV IN/OUT
PHONES
![]() 1
1
(8)
Recorder:
BACK LIGHT
3While pressing the [¥REC] Button (61), press the [1] Button (79) on the Remote
Controller.
Or while pressing the [REC] Button (7), press the [BACK LIGHT] Button (8) on the
Movie Camera.
≥Recording starts.
To Stop Dubbing
Press the [;] Button (76) or the [∫] Button (77).
≥For other notes concerning this item, see
Printing pictures with directly connecting to the printer (PictBridge)
After connecting the Movie Camera and the printer compatible with PictBridge, start the following procedures.
≥To print pictures with directly connecting the Movie Camera to the printer, prepare the printer compatible with PictBridge. (Also read the operating instructions of the printer.)
≥You cannot print images which cannot be played on the Movie Camera.
≥Check the settings about the paper size, quality
of print, etc. on the printer.
≥We recommend using the AC Adapter as the power source.
1Set the Mode Dial (39) to Picture Playback
Mode.
1USB Cable
≥The [PRINT] Indication appears on the screen of the Movie Camera.
Highlighted: Printable
Blinking: | Printer is being recognized. |
≥The [PRINT] Indication does not appear when the card is not inserted in the Movie Camera. (You cannot print pictures.)
≥When the [PRINT] Indication keeps blinking (more than about 1 minute), the Movie Camera and the printer are not connected properly. Connect the cable again or check the printer.
≥When the Movie Camera and the printer is connected in the Tape Recording/Playback Mode, the [WEB![]() ] or the [WEB
] or the [WEB![]() ] Indication may appear on the LCD Monitor. However, images cannot be printed.
] Indication may appear on the LCD Monitor. However, images cannot be printed.
3Select the desired picture and press the [ENTER] Button (17).
P
C
| D |
(39) | S |
|
(17)
STILL
s ENTER i
FADE
≥Images cannot be printed when they are displayed in
