Editing Mode
3Press the [;] Button (76) on the Remote
Controller where you want to add new sound.
MULTI/ |
|
|
| T |
¥REC | A.DUB |
|
| |
r | (62) | |||
|
|
| sVOL | |
V/REW | PLAY | FF/W |
| W |
6 | 1 | 5 |
| |
|
| |||
STILL ADV | PAUSE | STILL ADV |
| (76) |
E | ; | D |
| |
INDEX | STOP | INDEX |
| P.B. ZOOM |
K | ∫ | L |
|
|
4Press the [A.DUB] Button (62) on the
Remote Controller.
5To start Audio Dubbing, press the [;] Button (76) on the Remote Controller.
To Cancel Audio Dubbing
Press the [;] Button (76) on the Remote Controller.
The Movie Camera is in the Still Playback Mode again.
To Play Back the Sound Recorded by 12bit Audio Dubbing
Set [TAPE PLAYBACK MENU] >> [PLAYBACK] >> [12bit AUDIO] >> [ST2] or [MIX].
ST1: It plays back only the original sound.
ST2: It plays back only the sound added by Audio Dubbing.
MIX: It plays back both the original sound and the sound added by Audio Dubbing simultaneously.
To Dub Audio While Listening to a
Pre-recorded Sound
When pausing the audio dubbing, set the
[12bit AUDIO] on the [PLAYBACK]
≥For other notes concerning this item, see
Copying on an S-VHS (or a VHS) Cassette
(Dubbing)
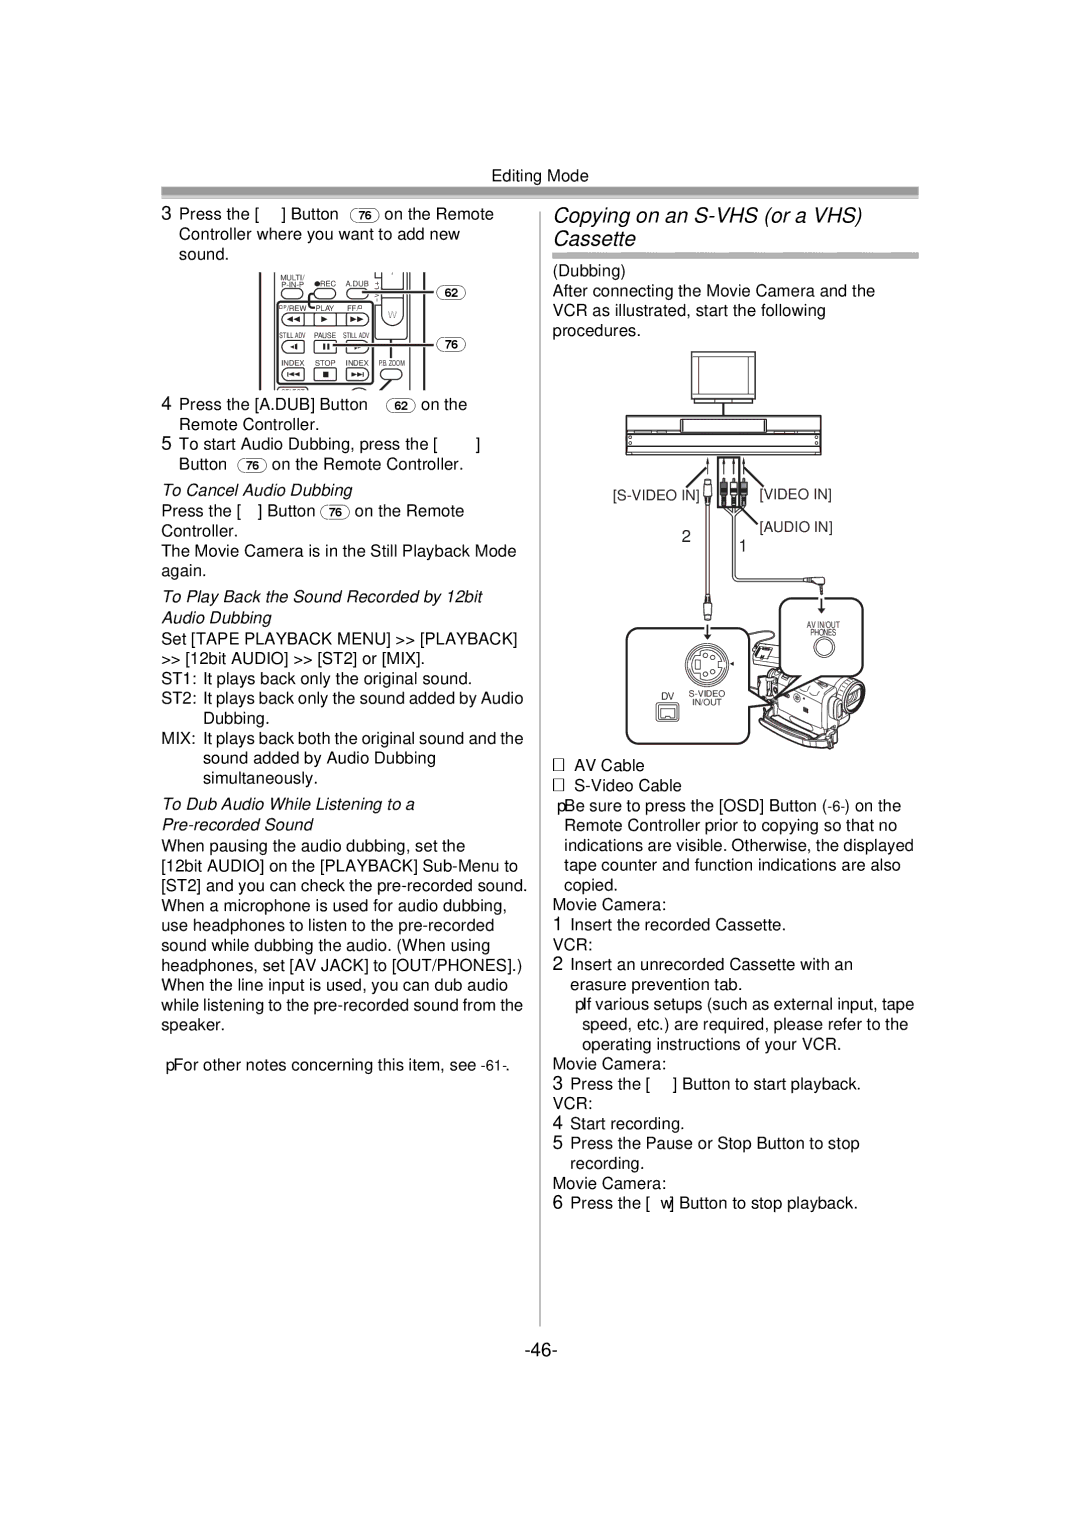
After connecting the Movie Camera and the VCR as illustrated, start the following procedures.
[VIDEO IN] | ||
2 | [AUDIO IN] | |
1 | ||
|
AV IN/OUT
PHONES
DV
IN/OUT
1AV Cable
2
≥Be sure to press the [OSD] Button
Movie Camera:
1Insert the recorded Cassette. VCR:
2Insert an unrecorded Cassette with an erasure prevention tab.
≥If various setups (such as external input, tape speed, etc.) are required, please refer to the
operating instructions of your VCR.
Movie Camera:
3Press the [1] Button to start playback.
VCR:
4Start recording.
5Press the Pause or Stop Button to stop
recording. Movie Camera:
6Press the [∫] Button to stop playback.
