Before Use
(1)LCD Monitor Open Knob [OPEN4] -13-
(2)LCD Monitor -13-, -55-
Due to limitations in LCD production technology, there may be some tiny bright or dark spots on the LCD Monitor screen. However, this is not a malfunction and does not affect the recorded picture.
(3)Card Slot Cover Open Lever [OPEN]
(4)Card Slot
(5)Card Slot Cover
(6)Recording Check Button [S]
Recording Button [REC]
(7)Colour Night View Button [COLOUR NIGHT VIEW]
(8)Soft Skin Button [SOFT SKIN]
(9)Reset Button [RESET]
(10)Multi Button [MULTI]
(11)Speaker
(12)Backlight Button [BACK LIGHT]
(13)Light Button [LIGHT]
(14)Card Access Lamp
(15)Pause Button [;]
Still Button [STILL]
(16)Fast Forward/Cue Button [5]
(17)Play Button [1]
Enter Button [ENTER]
(18)Stop Button [∫]
Fade Button [FADE]
(19)Rewind/Review Button [6]
(20)Menu Button [MENU]
(21)Mode Selector Switch [AUTO/MANUAL/FOCUS]
(22) | (25) |
(23)
(24)
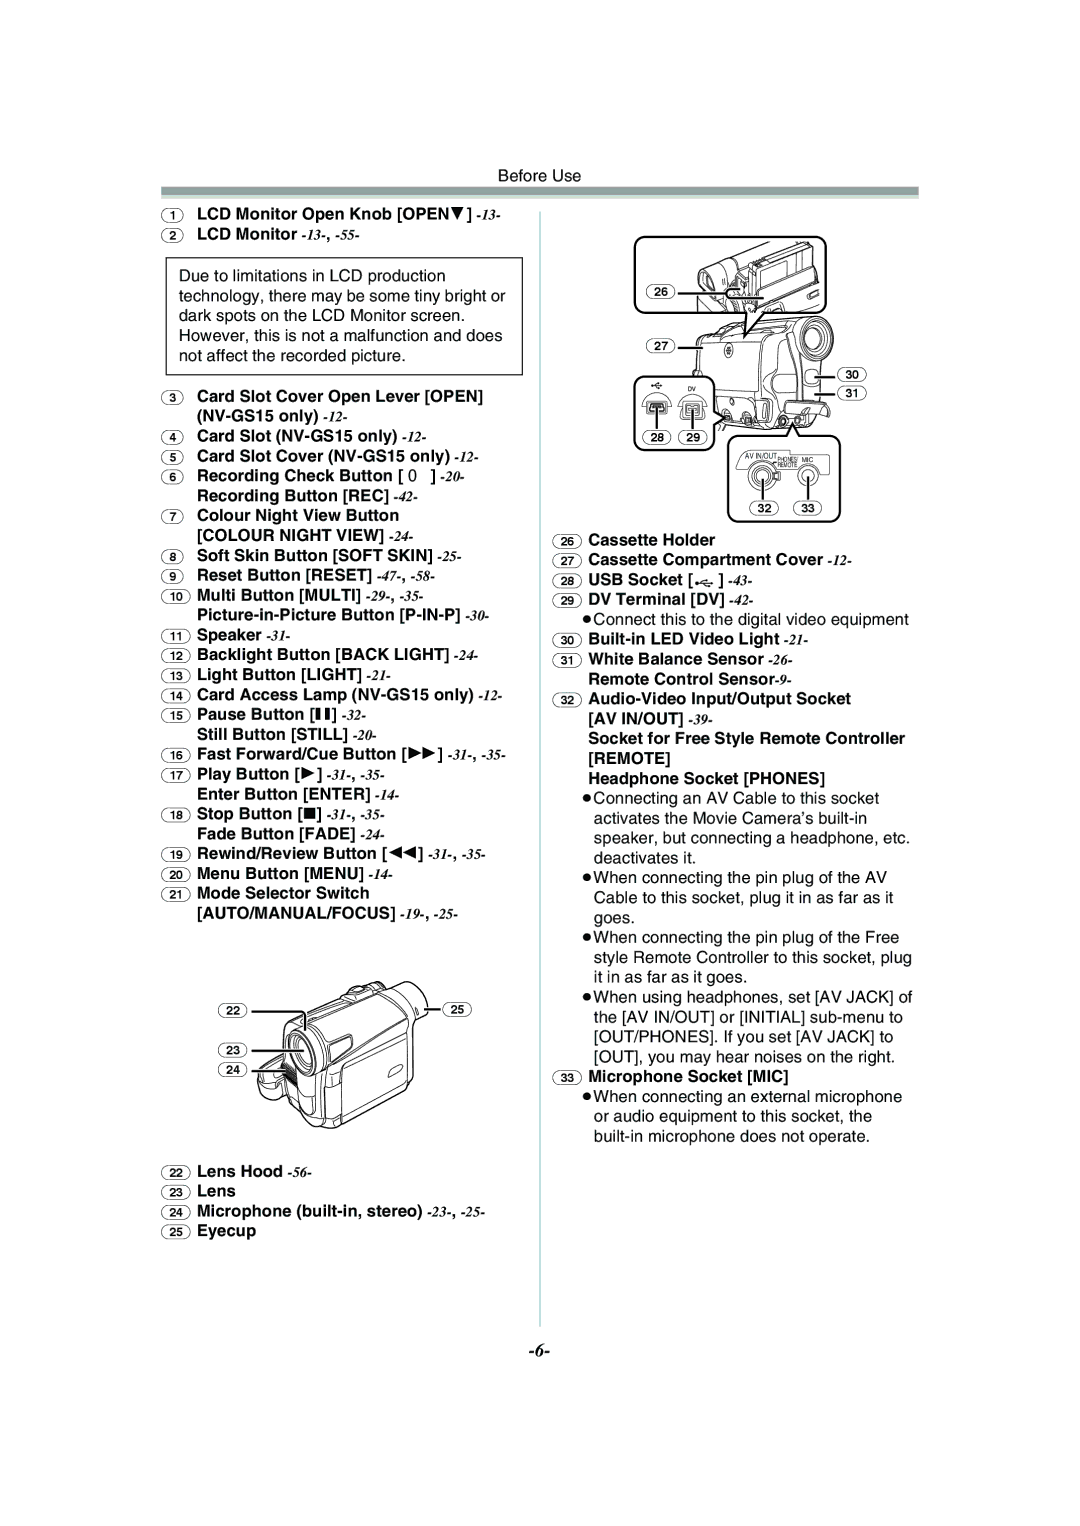
(22)Lens Hood
(23)Lens
(24)Microphone
(25)Eyecup
(26)![]()
(27) ![]()
![]() (30)
(30) ![]() (31)
(31)
(28) (29)
AV IN/OUTPHONES/ MIC
REMOTE
(32) (33)
(26)Cassette Holder
(27)Cassette Compartment Cover
(28)USB Socket [![]()
![]() ]
]
(29)DV Terminal [DV]
≥Connect this to the digital video equipment
(30)Built-in LED Video Light -21-
(31)White Balance Sensor
(32)
Socket for Free Style Remote Controller [REMOTE]
Headphone Socket [PHONES]
≥Connecting an AV Cable to this socket activates the Movie Camera’s
≥When connecting the pin plug of the AV Cable to this socket, plug it in as far as it goes.
≥When connecting the pin plug of the Free style Remote Controller to this socket, plug it in as far as it goes.
≥When using headphones, set [AV JACK] of the [AV IN/OUT] or [INITIAL]
(33)Microphone Socket [MIC]
≥When connecting an external microphone or audio equipment to this socket, the