Connections
Notes on connections
BRead the instruction manual for each peripheral device carefully before connecting it.
BTurn off the power supply for all peripheral devices before making any connections.
BIf the cables necessary for connection are not included with the peripheral device or available as an option, you may need to prepare a proper cable for the device concerned.
BRefer to the list on page 58 for details on compatible signals which can be input to the projector.
BAn audio system circuit is not provided with this projector. Connect the audio output of the connected equipment to a separate audio system.
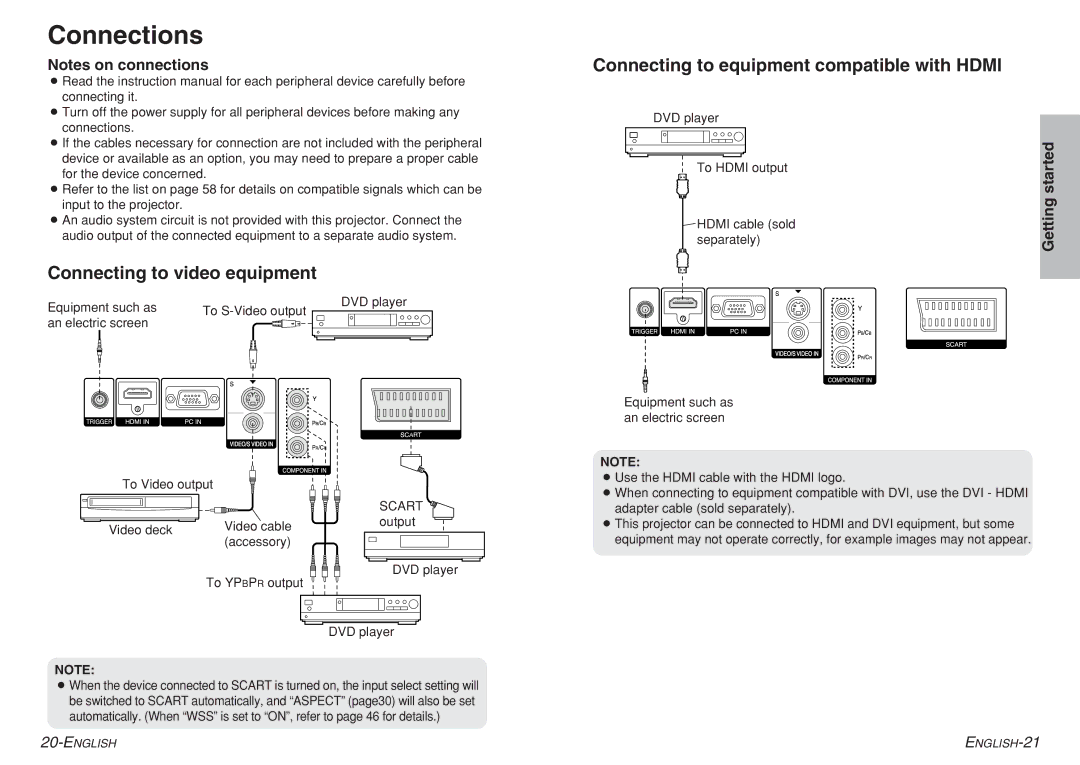
Connecting to video equipment
Equipment such as | DVD player |
To | |
an electric screen |
|
To Video output |
| |
|
| SCART |
Video deck | Video cable | output |
| ||
| (accessory) |
|
| To YPBPR output | DVD player |
|
| |
|
| DVD player |
NOTE:
BWhen the device connected to SCART is turned on, the input select setting will be switched to SCART automatically, and “ASPECT” (page30) will also be set automatically. (When “WSS” is set to “ON”, refer to page 46 for details.)
Connecting to equipment compatible with HDMI
DVD player | started | |
To HDMI output | ||
Getting | ||
HDMI cable (sold | ||
| ||
separately) |
|
Equipment such as an electric screen
NOTE:
BUse the HDMI cable with the HDMI logo.
BWhen connecting to equipment compatible with DVI, use the DVI - HDMI adapter cable (sold separately).
BThis projector can be connected to HDMI and DVI equipment, but some equipment may not operate correctly, for example images may not appear.
