Notes on use
In order to get the best picture quality
Draw curtains or blinds over any windows and turn off any lights near the screen to prevent outside light or light from indoor lamps from shining onto the screen.
Do not touch the surfaces of the lens with your bare hands.
If the surface of the lens becomes dirty from fingerprints or anything else, this will be magnified and projected onto the screen. Moreover, when not using the projector, retract the lens and then cover it with the lens cover.
Screen
Do not apply any volatile substances which may cause discolouration to the screen, and do not let it become dirty or damaged.
Lamp
The lamp may need to be replaced earlier due to variables such as individual lamp characteristics, usage conditions and the installation environment, especially when the projector is subjected to continuous use for more than 10 hours or the power is frequently turned on and off.
Liquid crystal panel
BDo not project the same image for long periods of time, as this may remain as an afterimage on the liquid crystal panel.
BThe liquid crystal panel of the projector is built with very high precision technology to provide fine picture details. Occasionally, a few
Location and function of each part
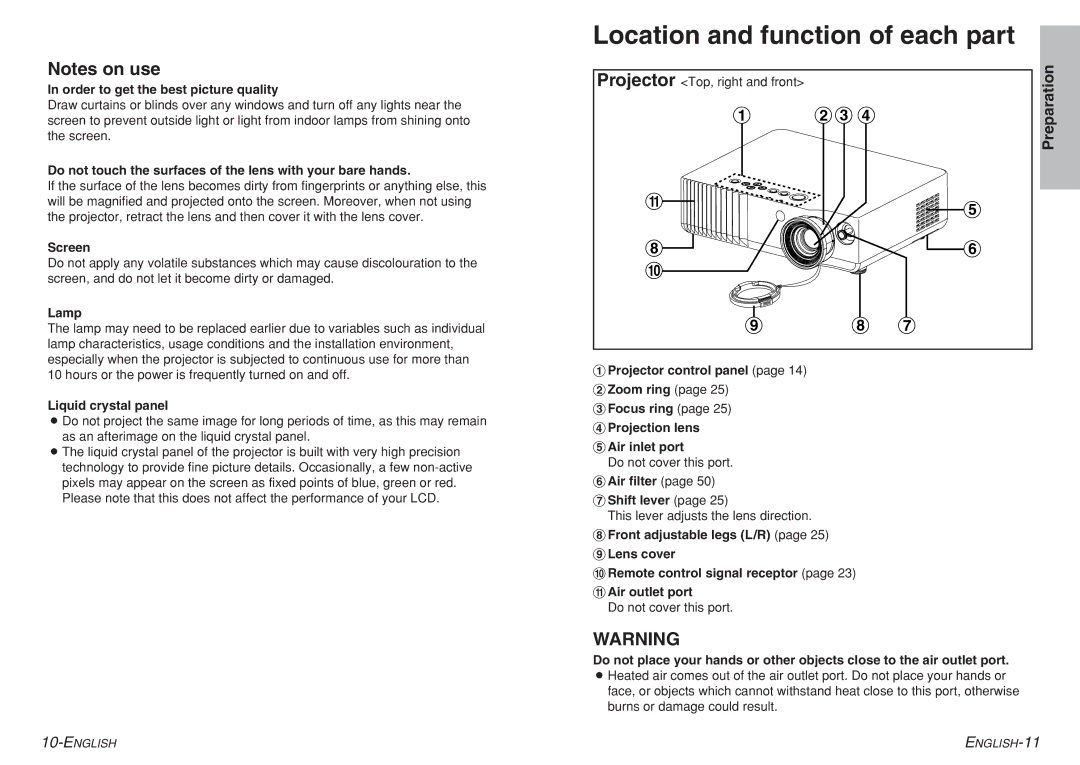
Projector <Top, right and front>
#$% &˛
˛- 
![]()
![]() '
'
˛* | ˛( |
˛, |
|
+˛ | *˛ )˛ |
#Projector control panel (page 14)
$Zoom ring (page 25)
%Focus ring (page 25)
&Projection lens
'Air inlet port
Do not cover this port.
(Air filter (page 50)
)Shift lever (page 25)
This lever adjusts the lens direction.
*Front adjustable legs (L/R) (page 25)
+Lens cover
,Remote control signal receptor (page 23)
-Air outlet port
Do not cover this port.
WARNING
Do not place your hands or other objects close to the air outlet port.
BHeated air comes out of the air outlet port. Do not place your hands or face, or objects which cannot withstand heat close to this port, otherwise burns or damage could result.