Using COLOR MANAGEMENT
You can adjust, save, and retrieve the settings for the selected colours of the projected image based on the selected picture mode to suit your preference.
Press the F or G button to select an item, press the I or H button to change the settings, and press the ENTER button for confirmation.
Press the COLOR MANAGEMENT button.
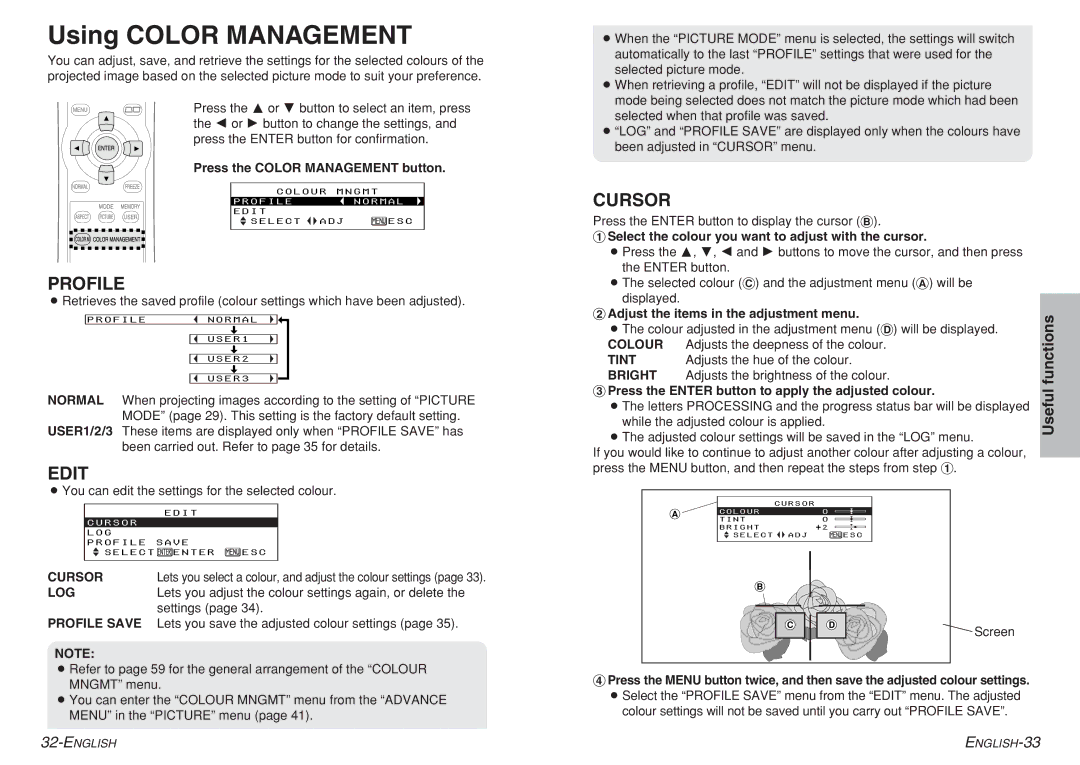
COLOUR MNGMT
PROFILE | NORMAL | ||
EDIT |
| ||
|
| ||
SELECT |
| ADJ | ESC |
PROFILE
BRetrieves the saved profile (colour settings which have been adjusted).
PROFILE NORMAL
[
USER1
[
USER2
[
USER3
NORMAL When projecting images according to the setting of “PICTURE MODE” (page 29). This setting is the factory default setting.
USER1/2/3 These items are displayed only when “PROFILE SAVE” has been carried out. Refer to page 35 for details.
EDIT
BYou can edit the settings for the selected colour.
EDIT
CURSOR
LOG
PROFILE SAVE
![]() SELECT
SELECT ![]() ENTER
ENTER ![]() ESC
ESC
CURSOR | Lets you select a colour, and adjust the colour settings (page 33). |
LOG | Lets you adjust the colour settings again, or delete the |
| settings (page 34). |
PROFILE SAVE Lets you save the adjusted colour settings (page 35).
NOTE:
BRefer to page 59 for the general arrangement of the “COLOUR MNGMT” menu.
BYou can enter the “COLOUR MNGMT” menu from the “ADVANCE MENU” in the “PICTURE” menu (page 41).
BWhen the “PICTURE MODE” menu is selected, the settings will switch automatically to the last “PROFILE” settings that were used for the selected picture mode.
BWhen retrieving a profile, “EDIT” will not be displayed if the picture mode being selected does not match the picture mode which had been selected when that profile was saved.
B“LOG” and “PROFILE SAVE” are displayed only when the colours have been adjusted in “CURSOR” menu.
CURSOR
Press the ENTER button to display the cursor (B).
#Select the colour you want to adjust with the cursor.
BPress the F, G, I and H buttons to move the cursor, and then press the ENTER button.
BThe selected colour (C) and the adjustment menu (A) will be displayed.
$Adjust the items in the adjustment menu. |
| functions | ||||
BThe colour adjusted in the adjustment menu (D) will be displayed. | ||||||
| ||||||
COLOUR |
| Adjusts the deepness of the colour. |
|
| ||
TINT |
| Adjusts the hue of the colour. |
|
| ||
BRIGHT |
| Adjusts the brightness of the colour. |
|
| ||
%Press the ENTER button to apply the adjusted colour. |
| Useful | ||||
BThe letters PROCESSING and the progress status bar will be displayed | ||||||
| ||||||
while the adjusted colour is applied. |
|
| ||||
BThe adjusted colour settings will be saved in the “LOG” menu. |
|
| ||||
If you would like to continue to adjust another colour after adjusting a colour, |
| |||||
press the MENU button, and then repeat the steps from step #. |
|
| ||||
|
| CURSOR |
|
|
| |
| A | COLOUR | 0 |
|
| |
| TINT | 0 |
|
| ||
|
|
|
| |||
|
| BRIGHT | +2 |
|
| |
|
| SELECT ADJ | ESC |
|
| |
|
| B |
|
|
| |
|
| C˛ | D˛ | Screen |
| |
|
|
|
|
| ||
&Press the MENU button twice, and then save the adjusted colour settings.
BSelect the “PROFILE SAVE” menu from the “EDIT” menu. The adjusted colour settings will not be saved until you carry out “PROFILE SAVE”.