Replacement
Replacing the Auto Cleaning Filter (ACF)
Before replacing the ACF
Wait until the cooling fan stops and turn off the POWER switch of the projector in proper way.
Disconnect the mains lead from the mains socket.
Contact an Authorised Service Centre to purchase a replacement ACF
The ACF unit to be replaced should be an unused product.
When to replace the ACF
The ACF unit is consumable product and effects on ventilation. The FILTER indicator will inform you of the replacement timing. You can check the remaining amount of the ACF unit in REMAINING FILTER of STATUS in PROJECTOR SETUP menu.
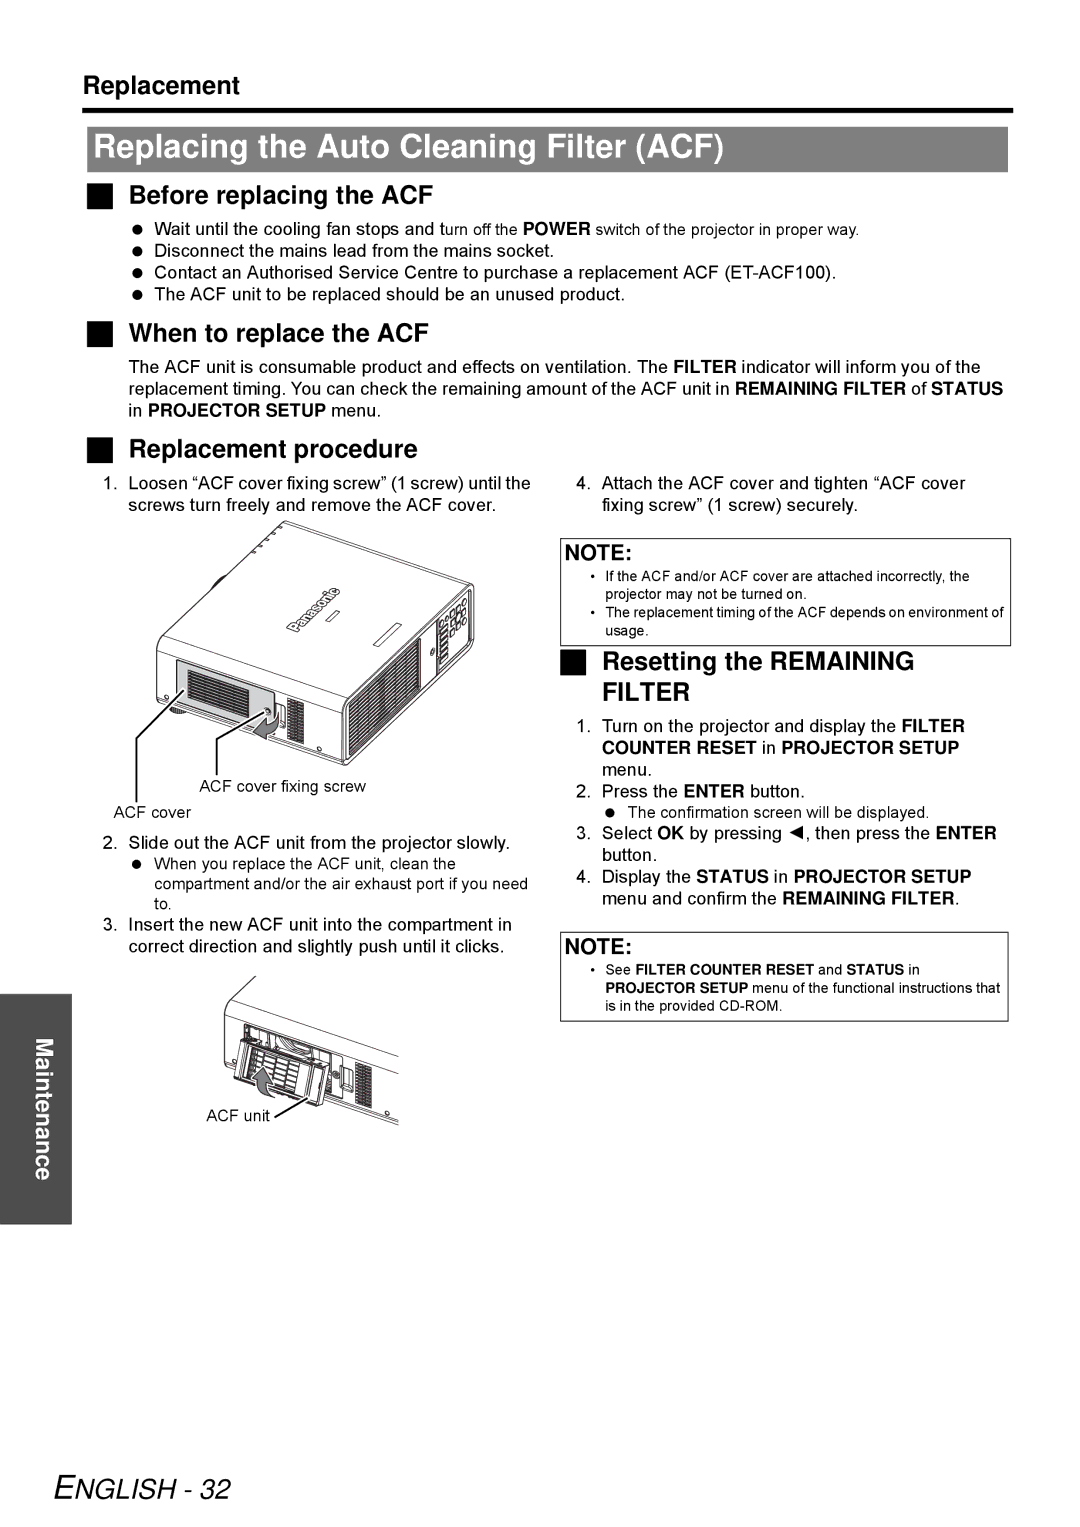
| Replacement procedure |
|
1. | Loosen “ACF cover fixing screw” (1 screw) until the | 4. Attach the ACF cover and tighten “ACF cover |
| screws turn freely and remove the ACF cover. | fixing screw” (1 screw) securely. |
ACF cover fixing screw
ACF cover
2.Slide out the ACF unit from the projector slowly.
When you replace the ACF unit, clean the compartment and/or the air exhaust port if you need to.
3.Insert the new ACF unit into the compartment in correct direction and slightly push until it clicks.
NOTE:
•If the ACF and/or ACF cover are attached incorrectly, the projector may not be turned on.
•The replacement timing of the ACF depends on environment of usage.
Resetting the REMAINING FILTER
1.Turn on the projector and display the FILTER COUNTER RESET in PROJECTOR SETUP menu.
2.Press the ENTER button.
The confirmation screen will be displayed.
3.Select OK by pressing I, then press the ENTER button.
4.Display the STATUS in PROJECTOR SETUP menu and confirm the REMAINING FILTER.
NOTE:
•See FILTER COUNTER RESET and STATUS in PROJECTOR SETUP menu of the functional instructions that is in the provided
Maintenance
ACF unit ![]()
