Before Using
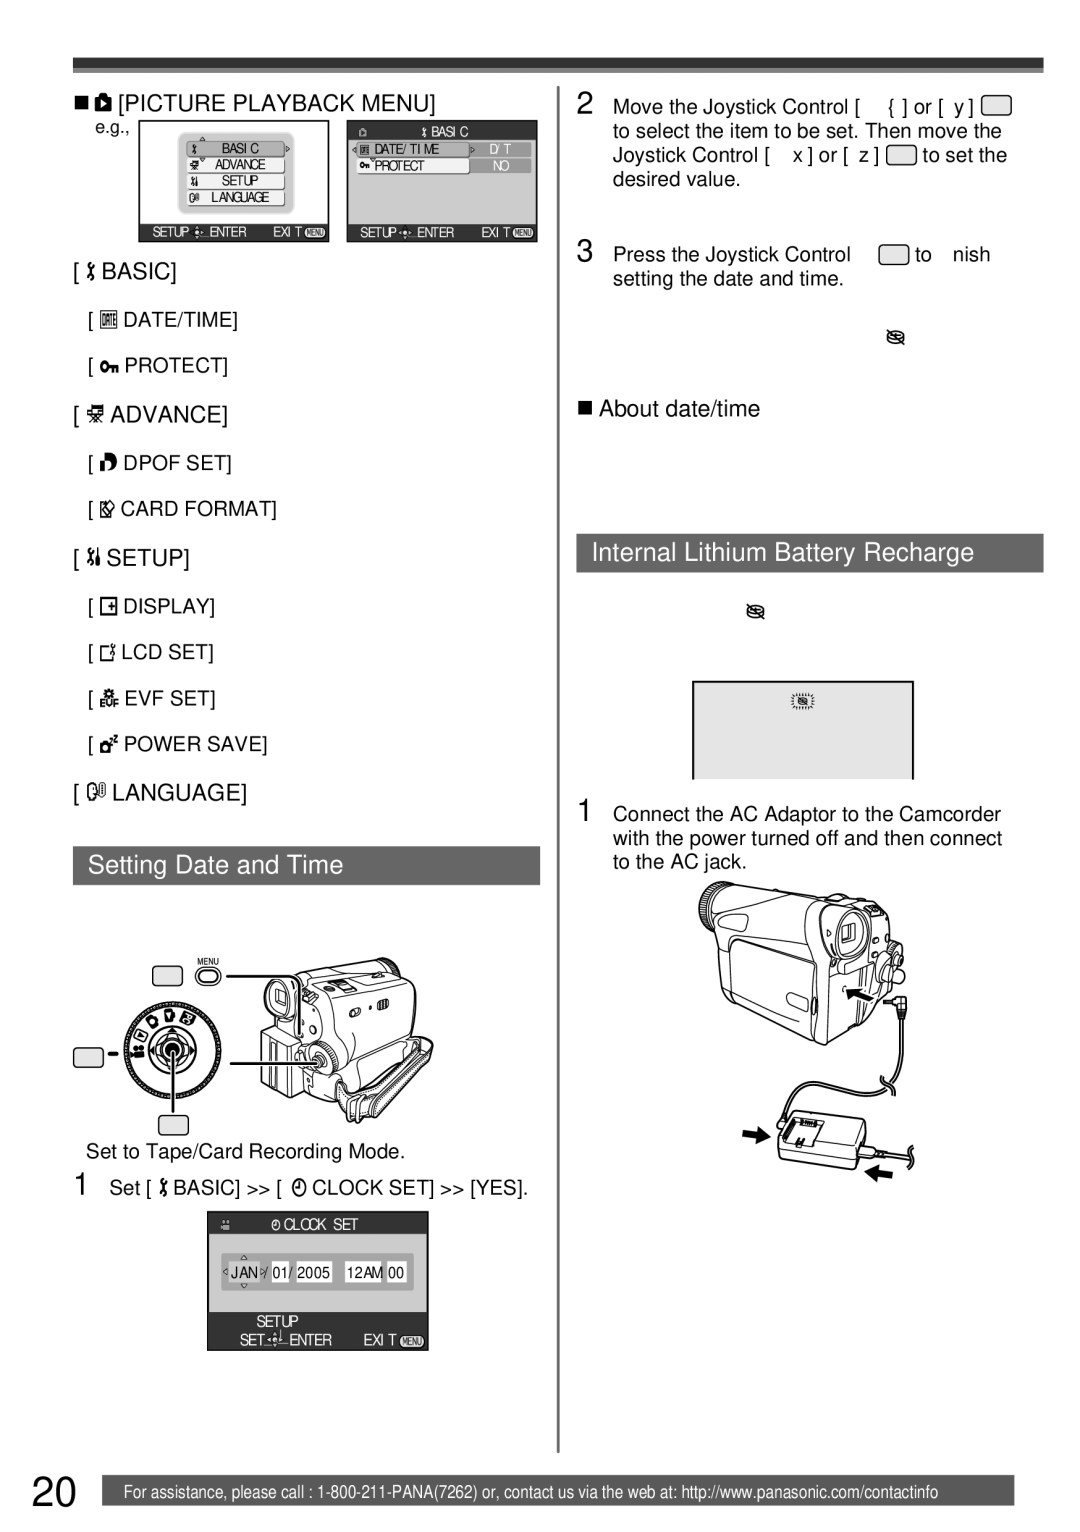
 [PICTURE PLAYBACK MENU]
e.g., |
| BASIC |
|
BASIC |
| DATE/TIME | D/T |
ADVANCE |
| PROTECT | NO |
SETUP |
|
|
|
LANGUAGE |
|
|
|
SETUP ENTER | EXIT | SETUP ENTER | EXIT |
[  BASIC]
Basic Setup
[ ![]() DATE/TIME]
DATE/TIME]
Date and Time Indication (p. 51)
[ ![]() PROTECT]
PROTECT]
Setting the Lock (p. 35)
[  ADVANCE]
Advance Setup
[ ![]() DPOF SET]
DPOF SET]
Setting DPOF (p. 35)
[ CARD FORMAT]
Formatting a Card (p. 36)
[  SETUP]
Setup
[ | DISPLAY] |
Display Mode (p. 51) | |
[ | LCD SET] |
LCD Adjustment (p. 17) | |
[ | EVF SET] |
Viewfinder Adjustment (p. 17) | |
[ | POWER SAVE] |
Power Save Mode (p. 51)
[ ![]()
![]() LANGUAGE]
LANGUAGE]
Language Setup
Setting Date and Time
Since the internal clock of the Camcorder has a slight imprecision make sure to check the time before recording.
28
32
33
• Set to Tape/Card Recording Mode.
1 Set [  BASIC] >> [
  CLOCK SET] >> [YES].
![]() CLOCK SET
CLOCK SET
![]() JAN
JAN ![]() /01/2005 12AM:00
/01/2005 12AM:00
SETUP
SET![]()
![]() ENTER EXIT
ENTER EXIT![]()
2 Move the Joystick Control [◄] or [►] 33 to select the item to be set. Then move the Joystick Control [▲] or [▼] 33 to set the desired value.
•Year will cycle in the order shown below. 2000, 2001, ..., 2089, 2000, ...
3 Press the Joystick Control 33 to finish setting the date and time.
•The clock operation starts from [00] second.
•If the ![]() ] Indication flashes. In this case, charge the
] Indication flashes. In this case, charge the
•The clock uses the
About date/time
•The Date and Time function are driven by a
•Make sure to check the time before recording because the
Internal Lithium Battery Recharge
The internal lithium battery sustains the operation of the clock. If the [ ![]() ] or
] or
1 Connect the AC Adaptor to the Camcorder with the power turned off and then connect to the AC jack.
•After charging for 4 hours, the
•Leave the Camcorder as is for approx. 24 hours, and the battery will drive the Date and Time for approx. 6 months. (Even if the [OFF/ON] Switch is set to [OFF], the battery is still being recharged.)
20 | For assistance, please call : |
|
