Before Using
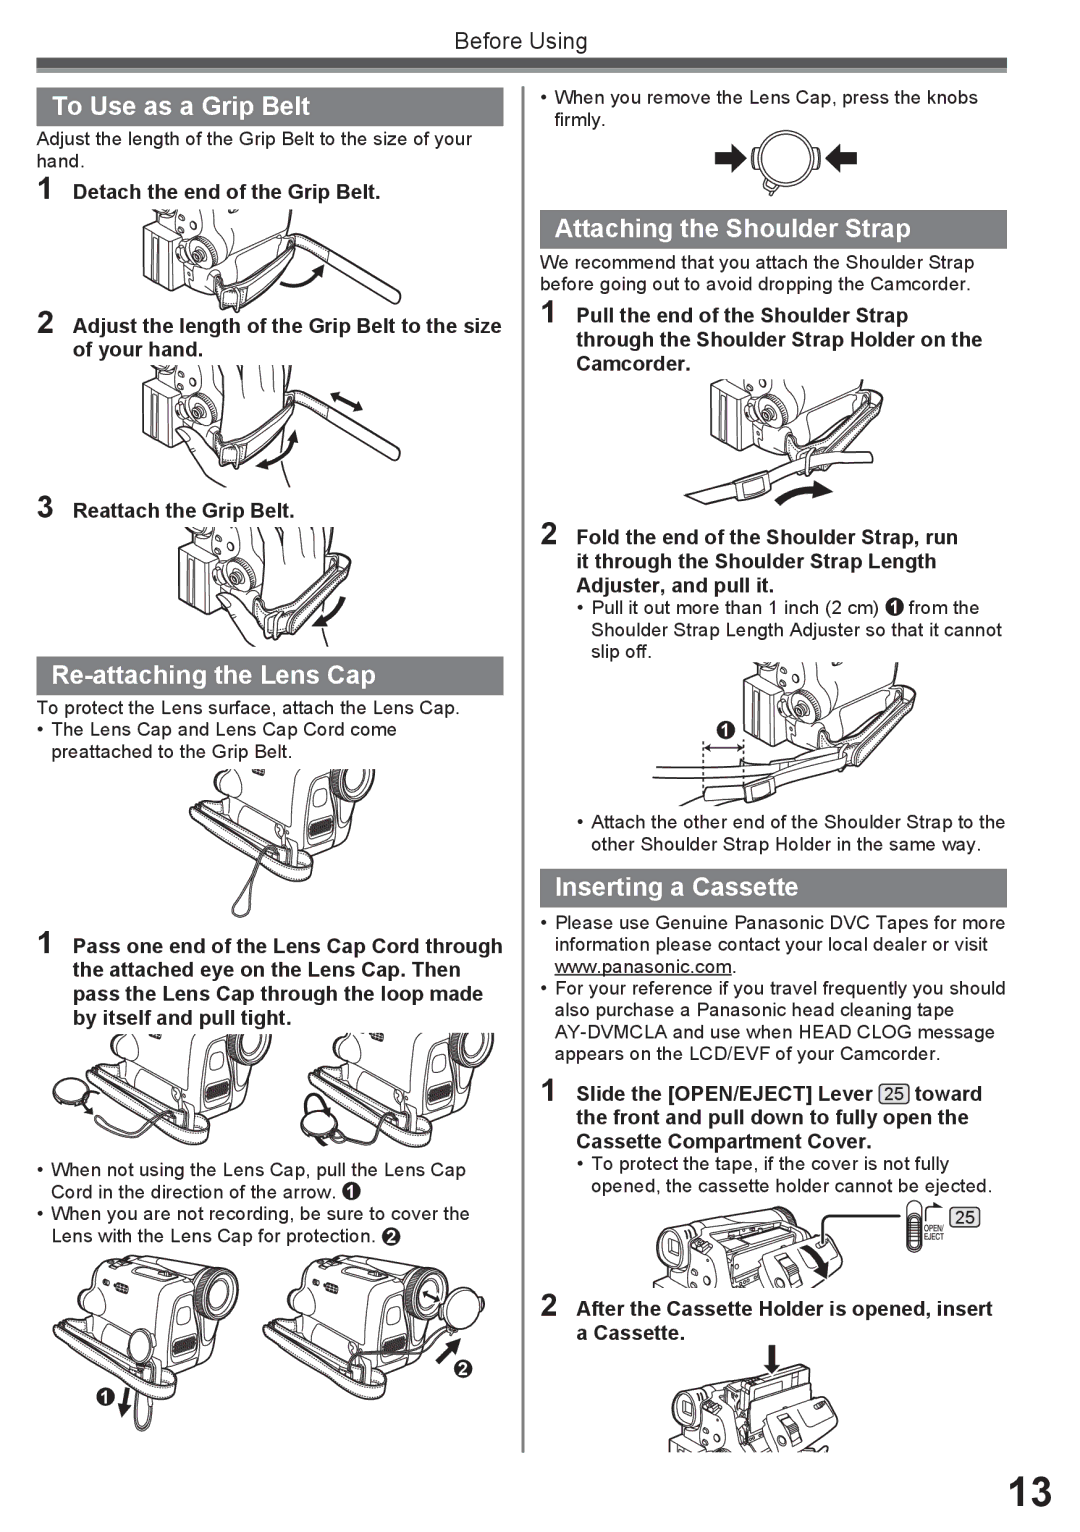
To Use as a Grip Belt
Adjust the length of the Grip Belt to the size of your hand.
1 Detach the end of the Grip Belt.
2 Adjust the length of the Grip Belt to the size of your hand.
3 Reattach the Grip Belt.
Re-attaching the Lens Cap
To protect the Lens surface, attach the Lens Cap.
•The Lens Cap and Lens Cap Cord come preattached to the Grip Belt.
1 Pass one end of the Lens Cap Cord through the attached eye on the Lens Cap. Then pass the Lens Cap through the loop made by itself and pull tight.
•When not using the Lens Cap, pull the Lens Cap Cord in the direction of the arrow. 1
•When you are not recording, be sure to cover the Lens with the Lens Cap for protection. 2
![]()
![]() 2 1
2 1 ![]()
![]()
•When you remove the Lens Cap, press the knobs firmly.
Attaching the Shoulder Strap
We recommend that you attach the Shoulder Strap before going out to avoid dropping the Camcorder.
1 Pull the end of the Shoulder Strap through the Shoulder Strap Holder on the Camcorder.
2 Fold the end of the Shoulder Strap, run it through the Shoulder Strap Length Adjuster, and pull it.
•Pull it out more than 1 inch (2 cm) 1 from the Shoulder Strap Length Adjuster so that it cannot slip off.
1![]()
•Attach the other end of the Shoulder Strap to the other Shoulder Strap Holder in the same way.
Inserting a Cassette
•Please use Genuine Panasonic DVC Tapes for more information please contact your local dealer or visit www.panasonic.com.
•For your reference if you travel frequently you should also purchase a Panasonic head cleaning tape
1 Slide the [OPEN/EJECT] Lever 25 toward the front and pull down to fully open the Cassette Compartment Cover.
•To protect the tape, if the cover is not fully opened, the cassette holder cannot be ejected.
25
2 After the Cassette Holder is opened, insert a Cassette.
13
