Operating Instructions
For assistance, call
Things You Should Know
Unpack your Digital Camera
Do not Expose this Equipment to Rain or Moisture
Safety Precautions
Important Safeguards
Precautions
Table of Contents
Be sure to make a backup copy of important data
Special Digital Camera Features
To PC Terminal
Index of Controls
Front View
Rear View
Bottom View
Top View
Audio
On Screen Display OSD
Slow
REC
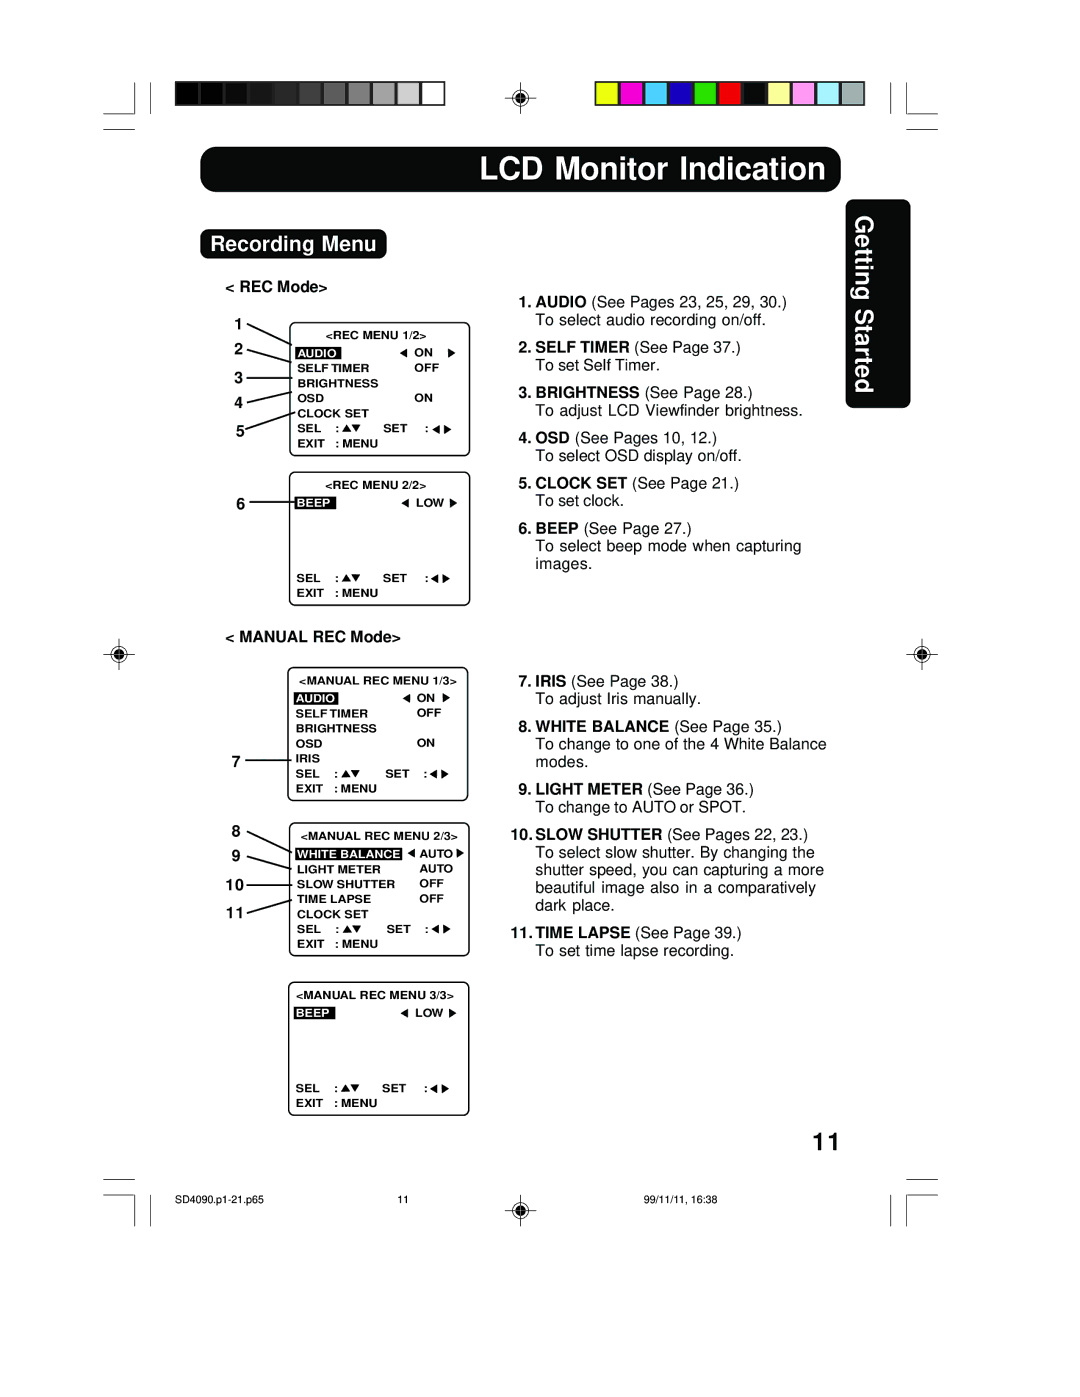
Recording Menu
LCD Monitor Indication
On Screen Display Order
Playback Menu
About the Charge Lamps
Power Supply
Charge the Battery Pack on the AC Adaptor
Operation Time
Loading the Lithium Battery
Battery Notes
Jack Cover AC Adapter 3 supplied AC Cable Supplied
Using AC Adaptor
DC Power
Loosen the strap from the Buckle and create a loop
Adjust the Length
Attaching the Camera Strap
SuperDisk Diskette *Floppy Disk 2HD
Using a Floppy Disk
Access LED
LED
Power
Operating the Menu Screen
Manual REC
Or to set it
Set Power Switch to Play
Press Menu to exit Press Menu to display the Menu Screen
Press Or to select the item
Power LED
Setting the Clock
Press Zoom T or W to zoom In and Out
Capturing Images
LCD Viewfinder
Press Zoom T or W to zoom
REC mode Manual REC mode
Capturing images Audio on
REC
Hold down the Shtr button the rest
Motion Image Rec Mode Burst Rec Mode
Recording Mode
Press Menu to exit Digital Camera will beep
Beep
Before you begin
Press or + to change the brightness of the LCD Viewfinder
Adjusting LCD Viewfinder Brightness
Audio on
Playing Back Captured Images
Manual Playback
Multi Playback
Motion Image Playback
Or previous page of images
To go directly to the next
Press , , , or repeatedly to change the zooming area
Press to set display mode to
Zoom Playback
Zoom
OUT
Auto No indication
Using the Built-in Flash
White Balance
Light Metering
Press Menu to exit Press Shtr
Self Timer Recording
Self-Timer Indicator
Press to display Iris screen
Adjusting the Iris Manually
Super Fine SF, Fine F, Normal N
Time Lapse feature is available with
Press Shtr to start time lapse mode
Time Lapse Recording
Adaptor supplied because this will
To Delete Specific Images
While deleting image, do not turn off
Digital Camera or unplug the AC
Unplug the AC Adaptor supplied
Press Shtr to format
Not turn off the Digital Camera or
To Copy Image Pages
+ 1, 2
Press Shtr to copy
To Copy All Images
Press to display Copy ALL menu Press or to select YES
Select no to return to the Copy
Slide Show
System Requirements
Transferring Your Images Windows
PalmCam File Converter Installation
QuickTimeTM Driver Installation
USB Cable supplied USB Terminal
Power Switch
Connection
Reading the Disk Media
Reading and Writing the Disk Media
Open the image to View the image
Writing to the Disk Media
PalmCam File Conversion
Disconnection
Deleting a File Folder from the SuperDisk Drive
System Requirements
Transferring Your Images Macintosh
QuickTimeTM Driver Installation
USB Cable supplied
Turn on your PC Set Power Switch to PC on the Digital Camera
Before you begin Set the Power Switch to PC
Open the image to View the image
Deleting a File Folder from the SuperDisk Drive
Removing the Disk Media
Type Format Style Explanation
SuperDisk Drive
Media Format Type & Explanation
Write Protecting the Disk Media
Formatting the Disk Media
Using the SuperDisk Drive Windows
Before Formatting
Explorer CopyDisk is only possible with 2HD Floppy Disk
Diskcopy command at the DOS prompt cannot be used
Copying the Disk Media
Disk copy cannot be performed with SuperDisk Diskette
Using the SuperDisk Drive Macintosh
Important Operating Notes
Using the SuperDisk Drive
Print Mark
Press Shtr again to cancel print
Digital Camera Accessory
Visa
Digital Camera Accessory Order Form
Before Requesting Service
If, after Power Switch is set to
Exit
CCD
Specifications
PANASONIC/QUASAR Video Products Limited Warranty
Warranty
Centralized Factory Servicenter
Service Center Directory
Information
Index
Ave de Infantería, Km