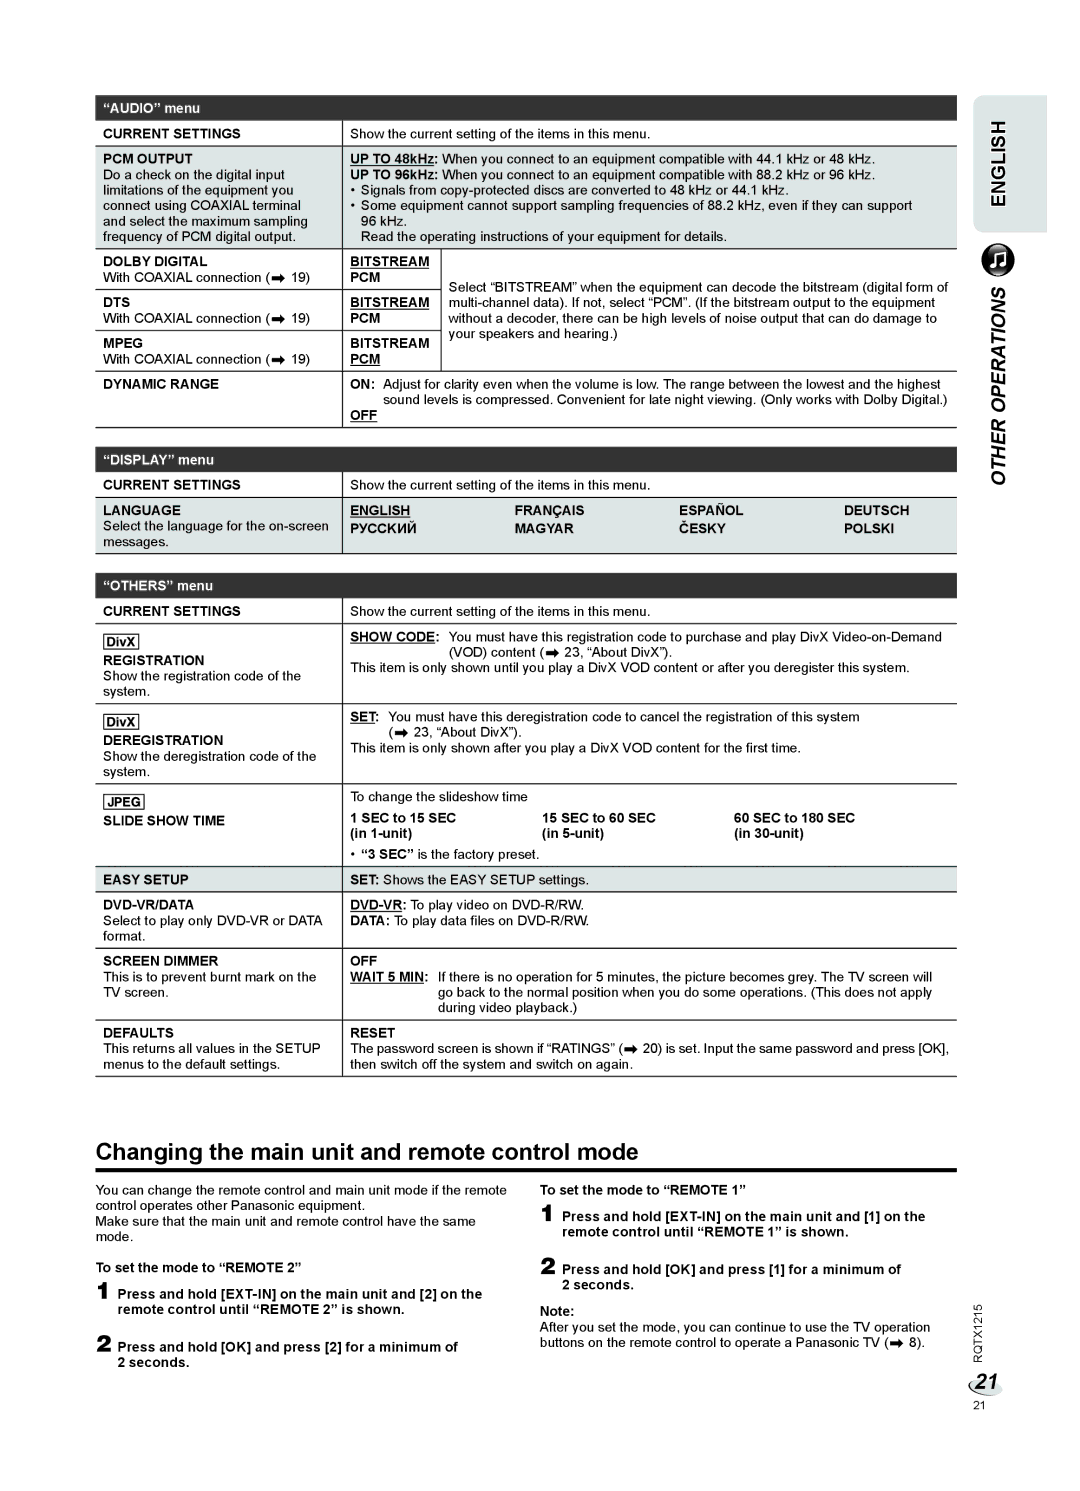
“AUDIO” menu
| CURRENT SETTINGS | Show the current setting of the items in this menu. |
|
| ||||
|
|
|
|
|
| |||
| PCM OUTPUT | UP TO 48kHz: When you connect to an equipment compatible with 44.1 kHz or 48 kHz. | ||||||
| Do a check on the digital input | UP TO 96kHz: When you connect to an equipment compatible with 88.2 kHz or 96 kHz. | ||||||
| limitations of the equipment you | • Signals from |
| |||||
| connect using COAXIAL terminal | • Some equipment cannot support sampling frequencies of 88.2 kHz, even if they can support | ||||||
| and select the maximum sampling | 96 kHz. |
|
|
|
| ||
| frequency of PCM digital output. | Read the operating instructions of your equipment for details. |
| |||||
| DOLBY DIGITAL | BITSTREAM |
|
|
|
| ||
| With COAXIAL connection (Z 19) | PCM | Select “BITSTREAM” when the equipment can decode the bitstream (digital form of | |||||
|
|
|
| BITSTREAM | ||||
| DTS | |||||||
| With COAXIAL connection (Z 19) | PCM | without a decoder, there can be high levels of noise output that can do damage to | |||||
|
|
|
|
| your speakers and hearing.) |
|
| |
| MPEG | BITSTREAM |
|
| ||||
|
|
|
|
| ||||
| With COAXIAL connection (Z 19) | PCM |
|
|
|
| ||
|
|
|
|
|
| |||
| DYNAMIC RANGE | ON: Adjust for clarity even when the volume is low. The range between the lowest and the highest | ||||||
|
|
|
| sound levels is compressed. Convenient for late night viewing. (Only works with Dolby Digital.) | ||||
|
|
|
| OFF |
|
|
|
|
|
|
|
|
|
|
|
|
|
| “DISPLAY” menu |
|
|
|
|
| ||
| CURRENT SETTINGS | Show the current setting of the items in this menu. |
|
| ||||
|
|
|
|
|
|
|
|
|
| LANGUAGE | ENGLISH |
| FRANÇAIS | ESPAÑOL | DEUTSCH | ||
| Select the language for the | PУCCKИЙ |
| MAGYAR | ČESKY | POLSKI | ||
| messages. |
|
|
|
|
| ||
|
|
|
|
|
|
|
|
|
| “OTHERS” menu |
|
|
|
|
| ||
| CURRENT SETTINGS | Show the current setting of the items in this menu. |
|
| ||||
|
|
|
|
| ||||
|
|
|
| SHOW CODE: You must have this registration code to purchase and play DivX | ||||
|
|
|
| |||||
|
|
|
|
| (VOD) content (Z 23, “About DivX”). |
|
| |
| REGISTRATION |
|
|
| ||||
| This item is only shown until you play a DivX VOD content or after you deregister this system. | |||||||
| Show the registration code of the | |||||||
|
|
|
|
|
| |||
| system. |
|
|
|
|
| ||
|
|
|
|
| ||||
|
|
|
| SET: You must have this deregistration code to cancel the registration of this system | ||||
|
|
|
| |||||
|
|
|
| (Z 23, “About DivX”). |
|
| ||
| DEREGISTRATION |
|
| |||||
| This item is only shown after you play a DivX VOD content for the first time. |
| ||||||
| Show the deregistration code of the |
| ||||||
|
|
|
|
|
| |||
| system. |
|
|
|
|
| ||
|
|
|
|
|
|
| ||
|
|
|
| To change the slideshow time |
|
| ||
|
|
|
|
|
| |||
|
|
| 1 SEC to 15 SEC | 15 SEC to 60 SEC | 60 SEC to 180 SEC | |||
| SLIDE SHOW TIME | |||||||
|
|
|
| (in |
| (in | (in |
|
• “3 SEC” is the factory preset.
EASY SETUP | SET: Shows the EASY SETUP settings. |
| |
Select to play only | DATA: To play data files on |
format. |
|
SCREEN DIMMER | OFF |
This is to prevent burnt mark on the | WAIT 5 MIN: If there is no operation for 5 minutes, the picture becomes grey. The TV screen will |
TV screen. | go back to the normal position when you do some operations. (This does not apply |
| during video playback.) |
DEFAULTS | RESET |
This returns all values in the SETUP | The password screen is shown if “RATINGS” (Z 20) is set. Input the same password and press [OK], |
menus to the default settings. | then switch off the system and switch on again. |
ENGLISH
OTHER OPERATIONS
Changing the main unit and remote control mode
You can change the remote control and main unit mode if the remote control operates other Panasonic equipment.
Make sure that the main unit and remote control have the same mode.
To set the mode to “REMOTE 2”
1 Press and hold
2 Press and hold [OK] and press [2] for a minimum of 2 seconds.
To set the mode to “REMOTE 1”
1 Press and hold
2 Press and hold [OK] and press [1] for a minimum of 2 seconds.
Note:
After you set the mode, you can continue to use the TV operation buttons on the remote control to operate a Panasonic TV (Z 8).
RQTX1215
21
21
