Installing the Camera (continued)
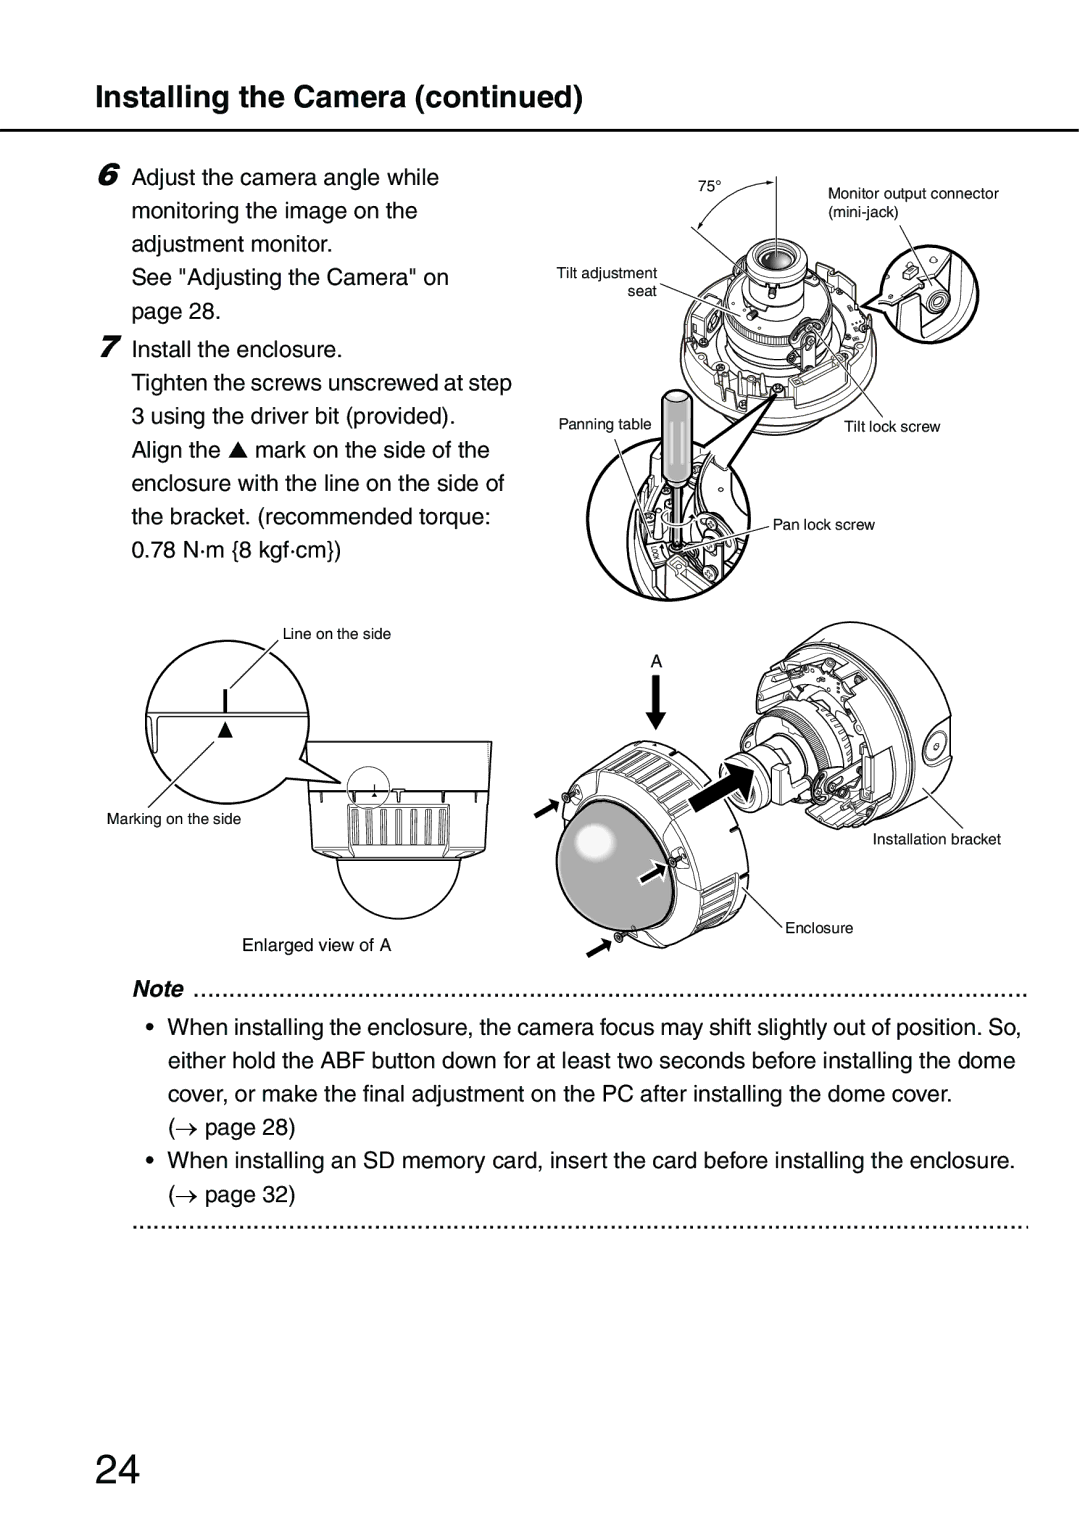
6Adjust the camera angle while monitoring the image on the adjustment monitor.
See "Adjusting the Camera" on page 28.
75°
Tilt adjustment |
seat |
Monitor output connector
7Install the enclosure.
Tighten the screws unscrewed at step 3 using the driver bit (provided). Align the ▲ mark on the side of the enclosure with the line on the side of the bracket. (recommended torque: 0.78 N·m {8 kgf·cm})
Line on the side
Panning table | Tilt lock screw |
Pan lock screw
A
Marking on the side
Installation bracket
Enclosure
Enlarged view of A
Note.........................................................................................................................
•When installing the enclosure, the camera focus may shift slightly out of position. So, either hold the ABF button down for at least two seconds before installing the dome
cover, or make the final adjustment on the PC after installing the dome cover. (→ page 28)
•When installing an SD memory card, insert the card before installing the enclosure.
(→ page 32)
.............................................................................................................................
24