Monitor Images on a PC (continued)
(2/3)
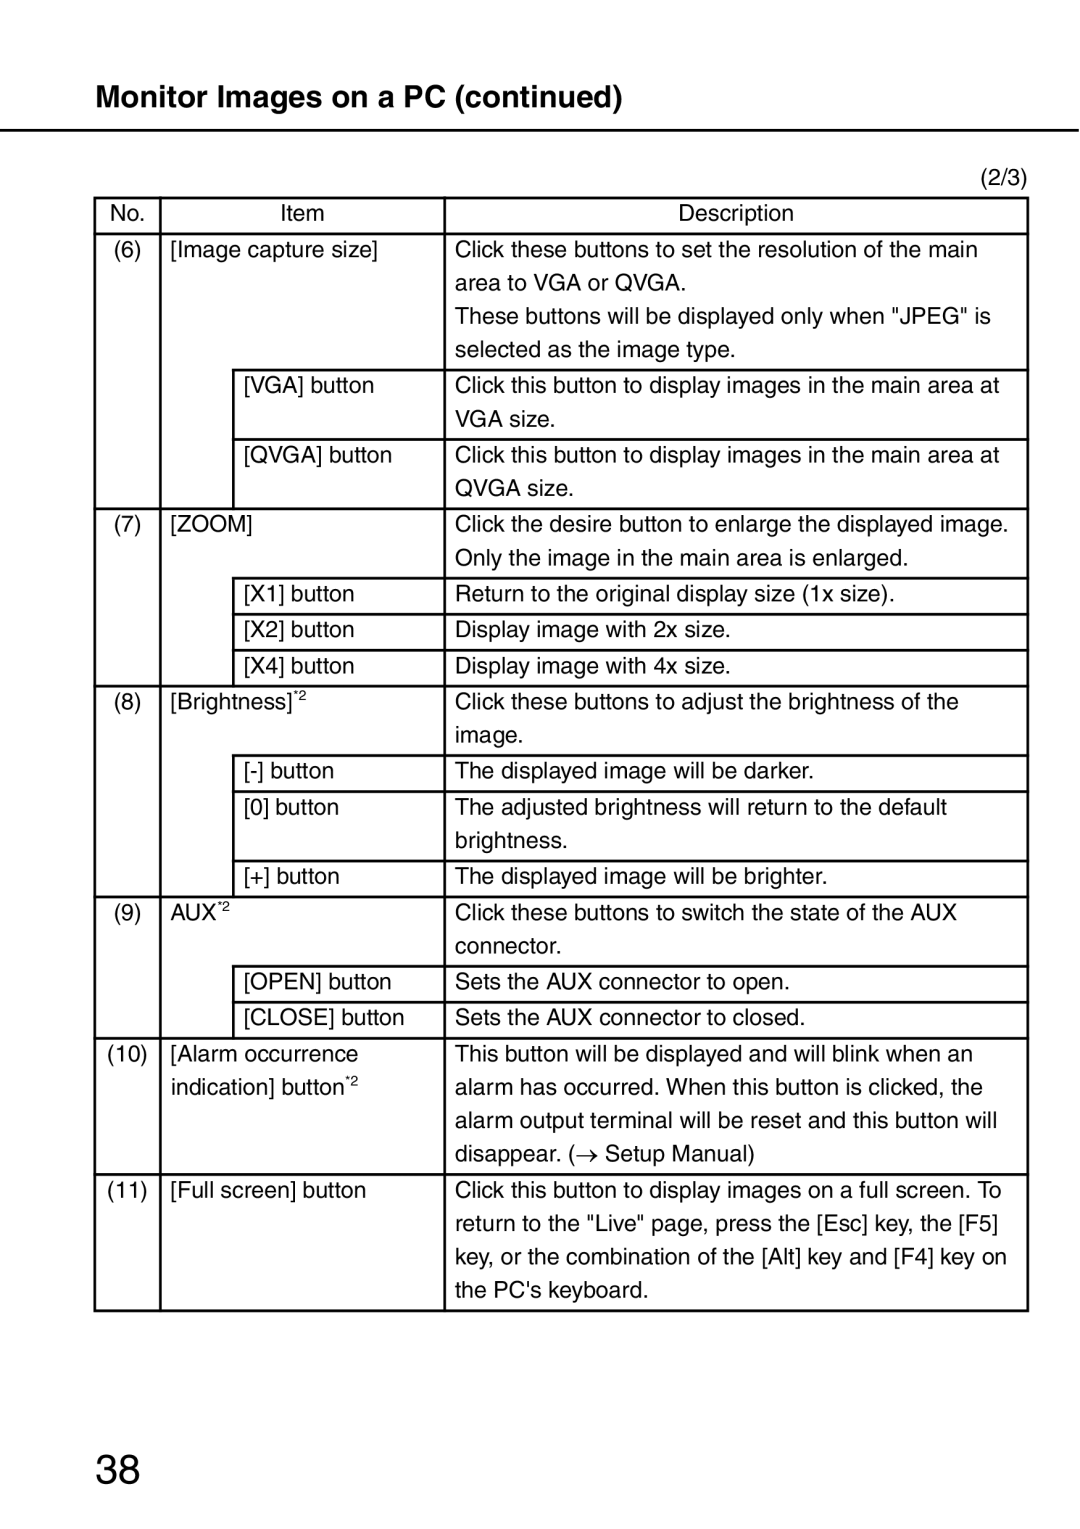
No. |
| Item | Description |
|
|
| |
(6) | [Image capture size] | Click these buttons to set the resolution of the main | |
|
|
| area to VGA or QVGA. |
|
|
| These buttons will be displayed only when "JPEG" is |
|
|
| selected as the image type. |
|
|
|
|
|
| [VGA] button | Click this button to display images in the main area at |
|
|
| VGA size. |
|
|
|
|
|
| [QVGA] button | Click this button to display images in the main area at |
|
|
| QVGA size. |
|
|
|
|
(7) | [ZOOM] | Click the desire button to enlarge the displayed image. | |
|
|
| Only the image in the main area is enlarged. |
|
|
|
|
|
| [X1] button | Return to the original display size (1x size). |
|
|
|
|
|
| [X2] button | Display image with 2x size. |
|
|
|
|
|
| [X4] button | Display image with 4x size. |
|
|
|
|
(8) | [Brightness]*2 | Click these buttons to adjust the brightness of the | |
|
|
| image. |
|
|
|
|
|
| The displayed image will be darker. | |
|
|
|
|
|
| [0] button | The adjusted brightness will return to the default |
|
|
| brightness. |
|
|
|
|
|
| [+] button | The displayed image will be brighter. |
|
|
|
|
(9) | AUX*2 |
| Click these buttons to switch the state of the AUX |
|
|
| connector. |
|
|
|
|
|
| [OPEN] button | Sets the AUX connector to open. |
|
|
|
|
|
| [CLOSE] button | Sets the AUX connector to closed. |
|
|
|
|
(10) | [Alarm occurrence | This button will be displayed and will blink when an | |
| indication] button*2 | alarm has occurred. When this button is clicked, the | |
|
|
| alarm output terminal will be reset and this button will |
|
|
| disappear. (→ Setup Manual) |
|
|
| |
(11) | [Full screen] button | Click this button to display images on a full screen. To | |
|
|
| return to the "Live" page, press the [Esc] key, the [F5] |
|
|
| key, or the combination of the [Alt] key and [F4] key on |
|
|
| the PC's keyboard. |
|
|
|
|
38