Heater Unit
When the heater unit (sold separately) is used, the camera can be used outdoors in low- temperature environments down to
Important
•The camera image may be influenced when the heater unit is turned on and off.
•Before installing and removing the heater unit, be sure to turn off the camera. The heater unit is hot while it is turned on. Disconnect the connector from the camera, and wait for the heater to cool down before removing it.
•When the heater unit is installed and use is started in environments of
•Use 24 V AC or POE to deliver power to a heater unit.
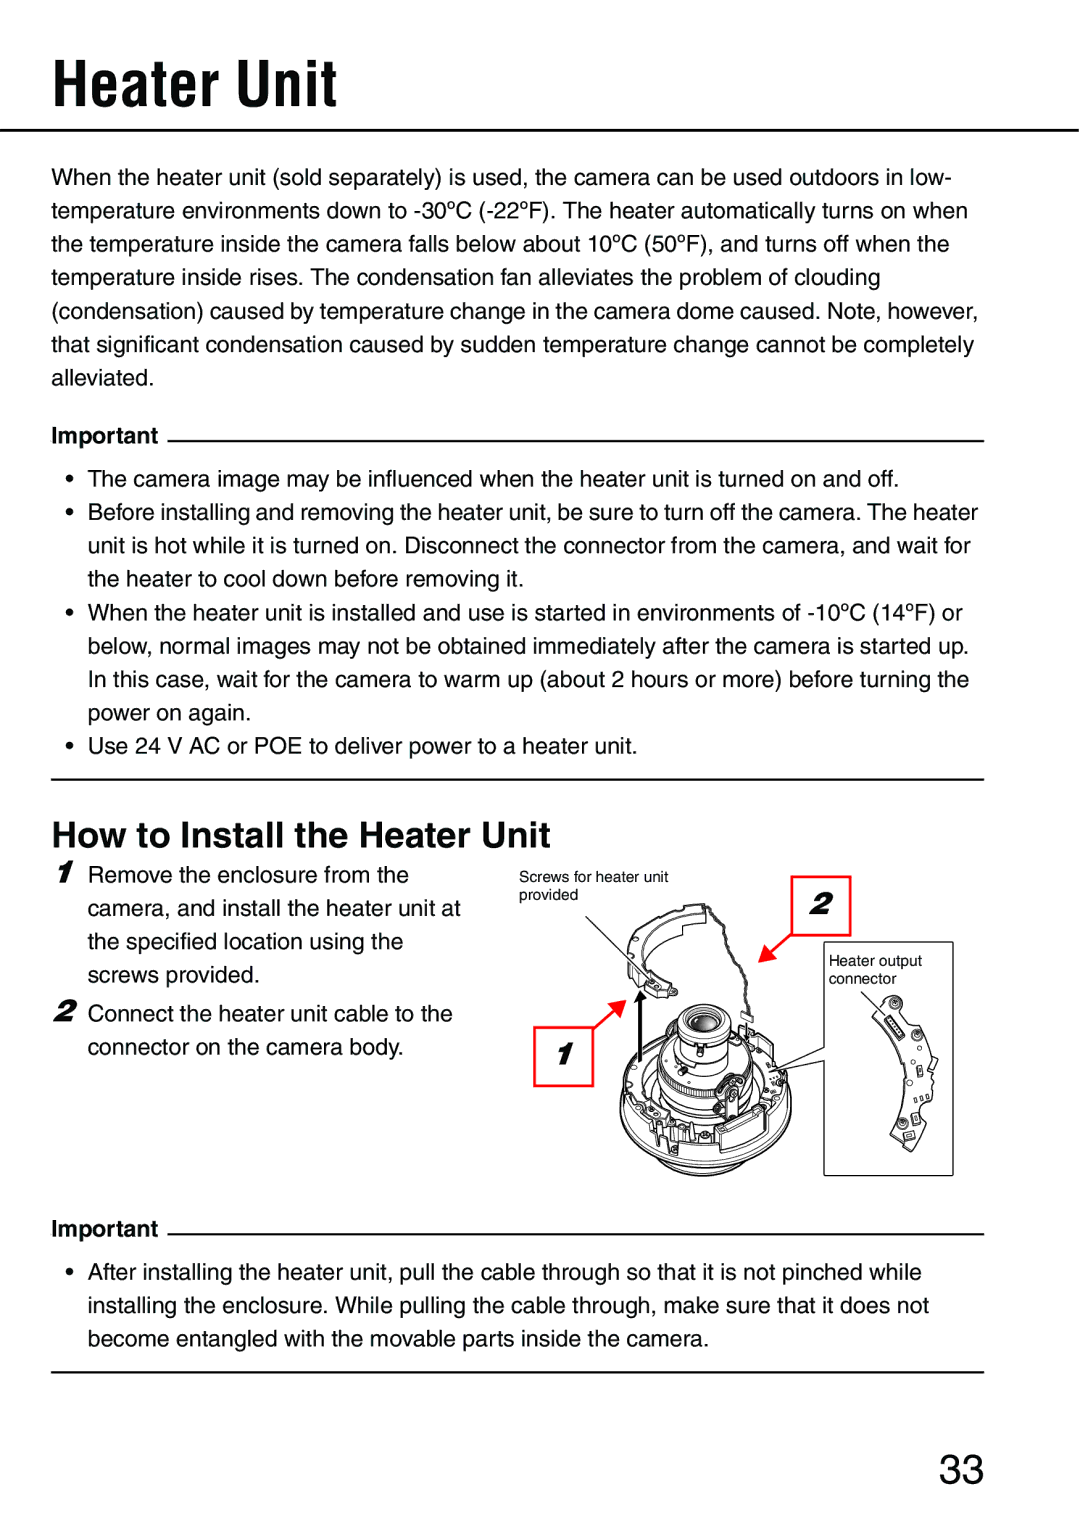
How to Install the Heater Unit
1Remove the enclosure from the camera, and install the heater unit at the specified location using the screws provided.
2Connect the heater unit cable to the connector on the camera body.
Screws for heater unit provided
1
2
Heater output connector
Important
•After installing the heater unit, pull the cable through so that it is not pinched while installing the enclosure. While pulling the cable through, make sure that it does not become entangled with the movable parts inside the camera.
33