22 |
92 |
80 |
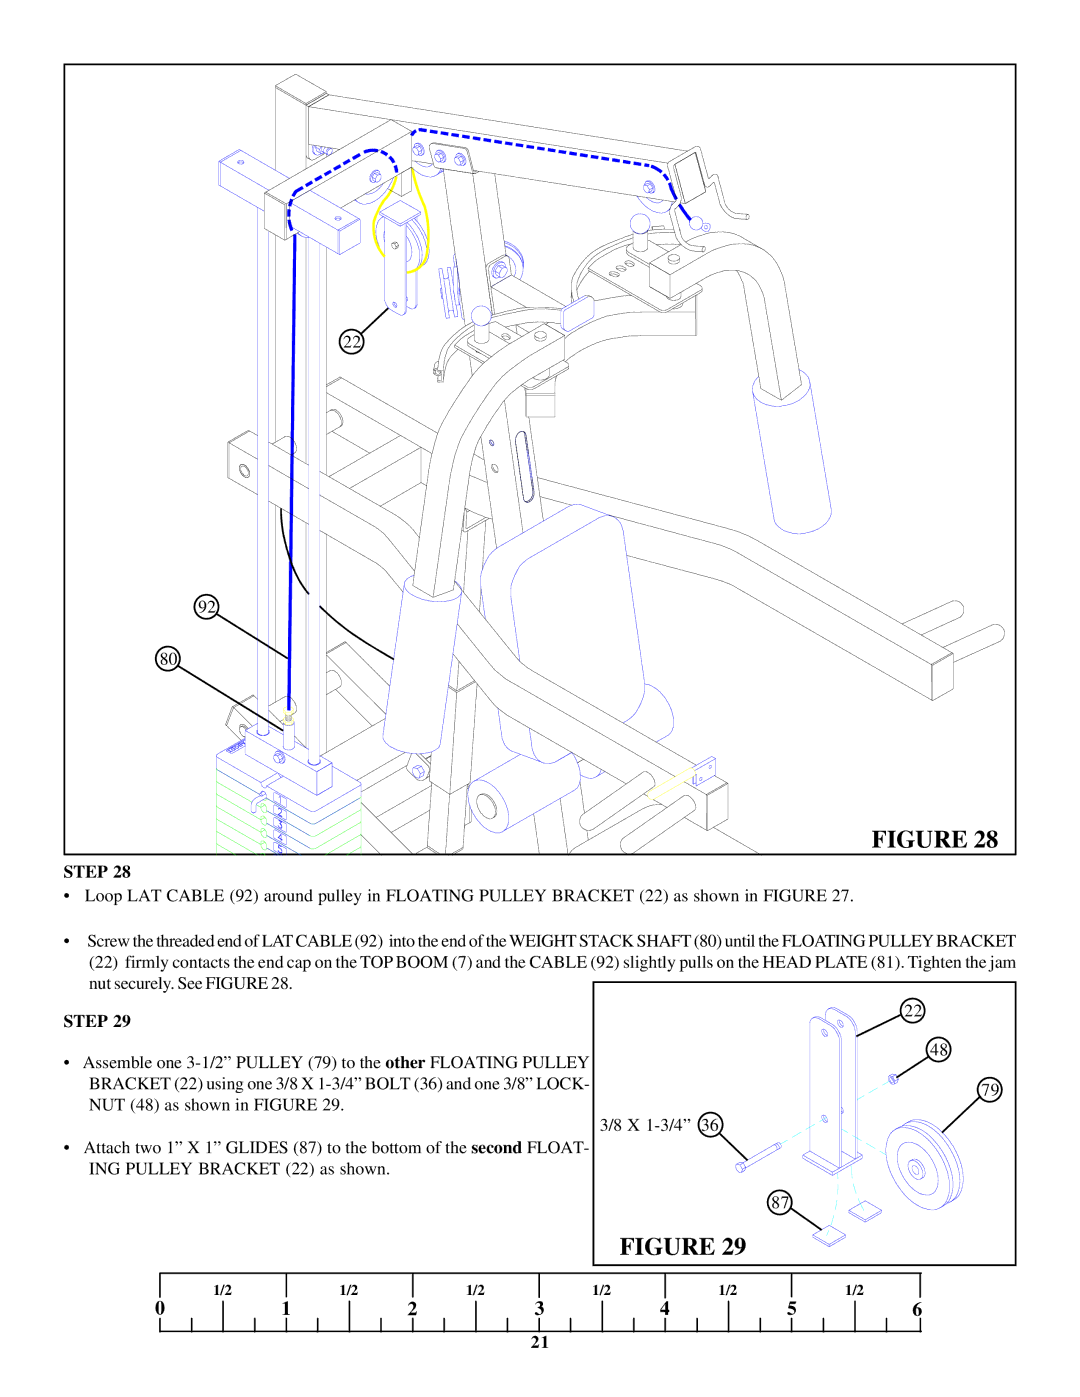
FIGURE 28 |
STEP 28
•Loop LAT CABLE (92) around pulley in FLOATING PULLEY BRACKET (22) as shown in FIGURE 27.
•Screw the threaded end of LAT CABLE (92) into the end of the WEIGHT STACK SHAFT (80) until the FLOATING PULLEY BRACKET
(22)firmly contacts the end cap on the TOP BOOM (7) and the CABLE (92) slightly pulls on the HEAD PLATE (81). Tighten the jam nut securely. See FIGURE 28.
STEP 29 |
|
|
|
|
| 22 |
|
|
|
|
|
| |
• Assemble one |
|
| 48 | |||
|
|
| ||||
BRACKET (22) using one 3/8 X |
|
| 79 | |||
NUT (48) as shown in FIGURE 29. |
|
|
|
| ||
|
| 3/8 X | 36 |
| ||
• Attach two 1” X 1” GLIDES (87) to the bottom of the second FLOAT- |
| |||||
|
|
| ||||
ING PULLEY BRACKET (22) as shown. |
|
|
|
|
| |
|
|
|
|
| 87 |
|
|
|
|
| FIGURE 29 |
| |
1/2 | 1/2 | 2 | 1/2 | 1/2 | 1/2 | 1/2 |
0 | 1 | 3 | 4 | 5 | 6 | |
|
|
| 21 |
|
|
|
