STEP | ~ |
STEP
STEP g
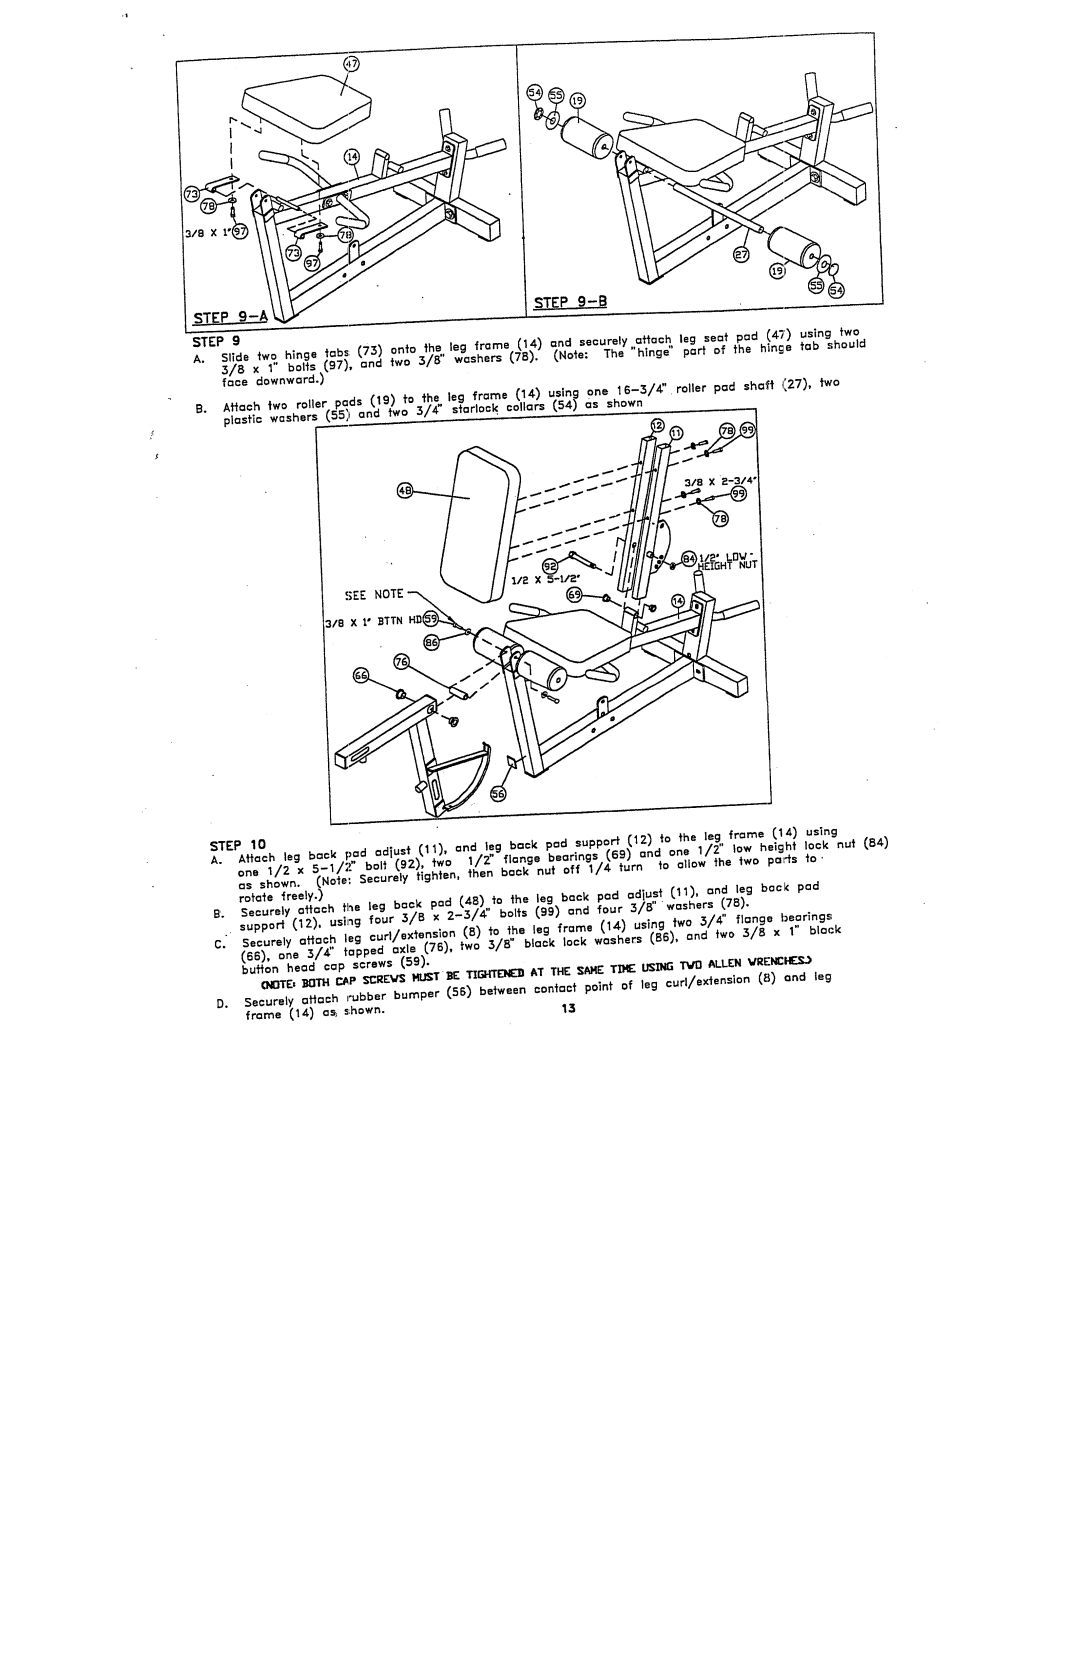
Slide two hinge tabs; (73) onto the leg frame (14) and securely attach leg scat pad (4T) using
A.3/8 x I" bolls (97), and two 5/B" washers (TB). (Nole: The "hinge" part of the hinge tab should face downward.)
B.Atiach$wo rollerp.a, ds (19) to the leg frame(14)
plastic washers (55,1 and two 3/4" starlock, collars
318 X
SEE NOTE
3/B x %" ]~TTN
frame (14) using
STEP 10
Attach leg back pad adust (11), and leg back pad support (12) to the
A.one 1/2 x
rotate ireely.)
B.Securely attach fl~e leg back pad (48) to the leg back pod adiust (11), and leg back
to Jh eg frame 14) using .two ~/
ack lock she~s ~86), one two 3/~
(66), one 3/£' tapped axle (76), bu~on head cop screws
~E= ~ ~'P ~RE~S ~T~ ~~ AT THE S~E T~ ~ ~ ALLEN
Securely aflach rubber bumper (56) between con~act point of leg curl/extension (B) and
D.
frame ~14) a~ s;hown.
