7GETTING STARTED (A Complete Start Guide)
 Installing Windows XP Service Pack 1
DesXcape runs on Microsoft Windows XP Professional Edition with Service Pack 1. If you have not yet installed Windows XP Service Pack 1 (or higher) on your computer, please follow this step. If you already have most recent Windows XP Service Pack installed on your computer, please skip this step and go to the next Hardware Setup section.
To check if you have Windows XP Service Pack 1 |
|
|
|
| |
installed, |
|
|
Properties, General. If you do not see Service Pack |
| 1 |
information is displayed, you do not have Service |
|
|
Pack installed. |
|
|
To install Windows XP Service Pack 1 |
|
|
1 Put the Windows XP Service Pack 1 CD into CD- |
|
|
ROM drive |
|
|
2 Run XPSP1.exe from |
|
|
|
| |
Service Pack 1 is automatically installed. |
| |
Alternative: Open the Start menu. Choose My Computer and dou- |
| |
| ||
If you experience problems with any of your existing applica- | Service | |
tion after the Microsoft Windows XP Service Pack 1 is | Pack1 | |
| ||
installed, please go to the Microsoft website for additional |
| |
information or contact your application provders. |
| |
Hardware Setup
 Cable Setup
In this section, you will set up the initial hardware environment for your DesXcape 150DM.
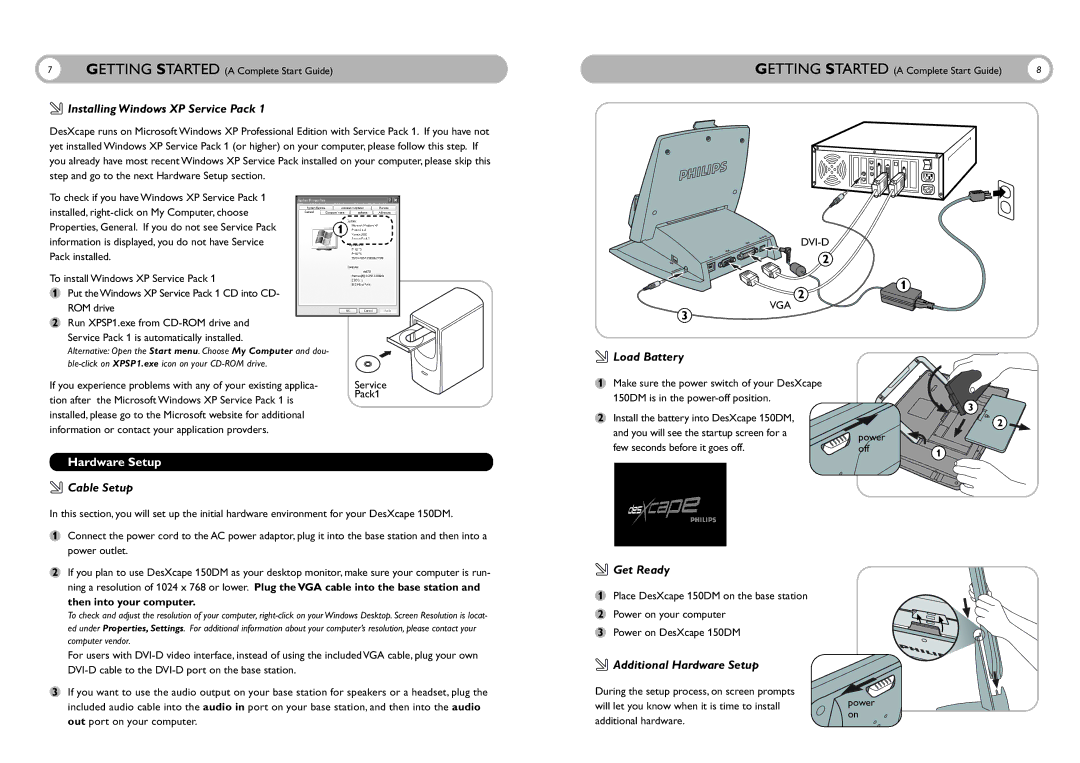
1Connect the power cord to the AC power adaptor, plug it into the base station and then into a power outlet.
2If you plan to use DesXcape 150DM as your desktop monitor, make sure your computer is run- ning a resolution of 1024 x 768 or lower. Plug the VGA cable into the base station and then into your computer.
To check and adjust the resolution of your computer,
For users with
3If you want to use the audio output on your base station for speakers or a headset, plug the included audio cable into the audio in port on your base station, and then into the audio out port on your computer.
GETTING STARTED (A Complete Start Guide) | 8 |
2
1
2
VGA
3
 Load Battery
1Make sure the power switch of your DesXcape 150DM is in the
3
2 Install the battery into DesXcape 150DM, |
| 2 |
and you will see the startup screen for a |
| |
power |
| |
few seconds before it goes off. |
| |
off | 1 | |
|
|
 Get Ready
1 Place DesXcape 150DM on the base station
2 Power on your computer
3 Power on DesXcape 150DM
 Additional Hardware Setup
During the setup process, on screen prompts | power |
will let you know when it is time to install | |
additional hardware. | on |
|