Additional Hook Up Options
BNC and USB Set Ups
BNC
Connections
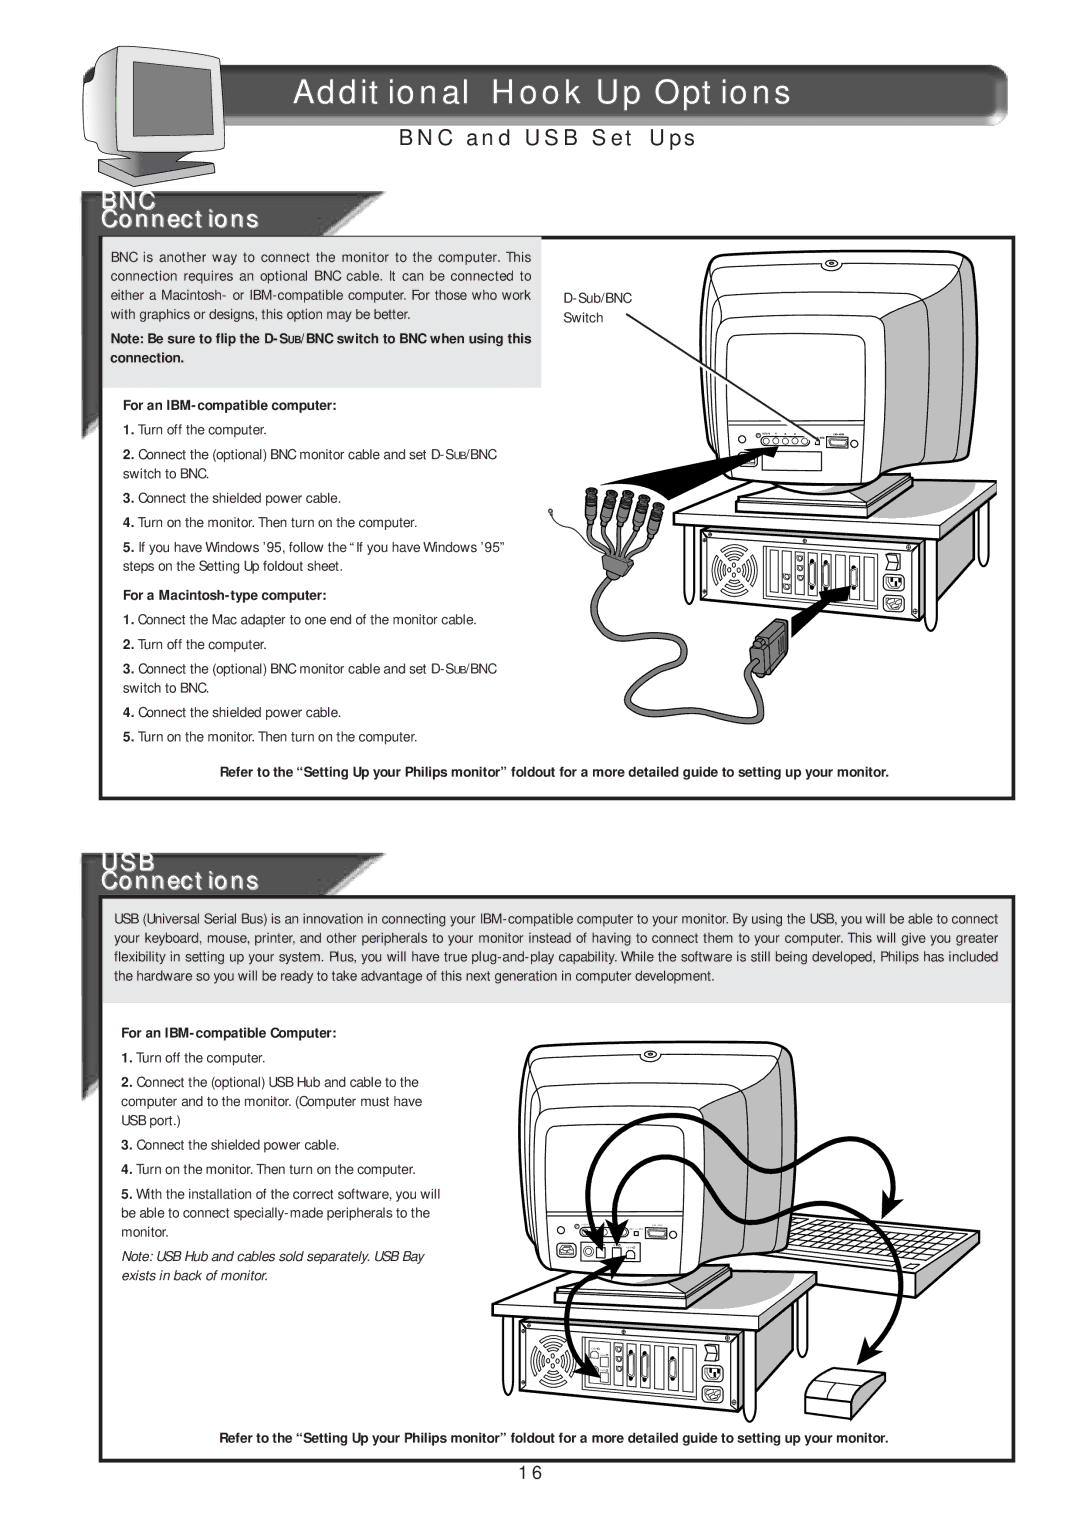
BNC is another way to connect the monitor to the computer. This connection requires an optional BNC cable. It can be connected to either a Macintosh- or
Note: Be sure to flip the
For an IBM-compatible computer:
1.Turn off the computer.
2.Connect the (optional) BNC monitor cable and set
3.Connect the shielded power cable.
4.Turn on the monitor. Then turn on the computer.
5.If you have Windows ’95, follow the “If you have Windows ’95” steps on the Setting Up foldout sheet.
For a Macintosh-type computer:
1.Connect the Mac adapter to one end of the monitor cable.
2.Turn off the computer.
3.Connect the (optional) BNC monitor cable and set
4.Connect the shielded power cable.
5.Turn on the monitor. Then turn on the computer.
D-Sub/BNC Switch
H/H+V | V | R | G | B | |
|
|
|
|
| BNC |
Refer to the “Setting Up your Philips monitor” foldout for a more detailed guide to setting up your monitor.
USB
Connections
USB (Universal Serial Bus) is an innovation in connecting your
For an
1.Turn off the computer.
2.Connect the (optional) USB Hub and cable to the computer and to the monitor. (Computer must have USB port.)
3.Connect the shielded power cable.
4.Turn on the monitor. Then turn on the computer.
5.With the installation of the correct software, you will be able to connect
Note: USB Hub and cables sold separately. USB Bay exists in back of monitor.
H/H+V | V | R | |
|
|
| BNC |
USB ![]()
USB
USB ![]()
USB ![]()
USB![]()
Refer to the “Setting Up your Philips monitor” foldout for a more detailed guide to setting up your monitor.
16