Description of Controls
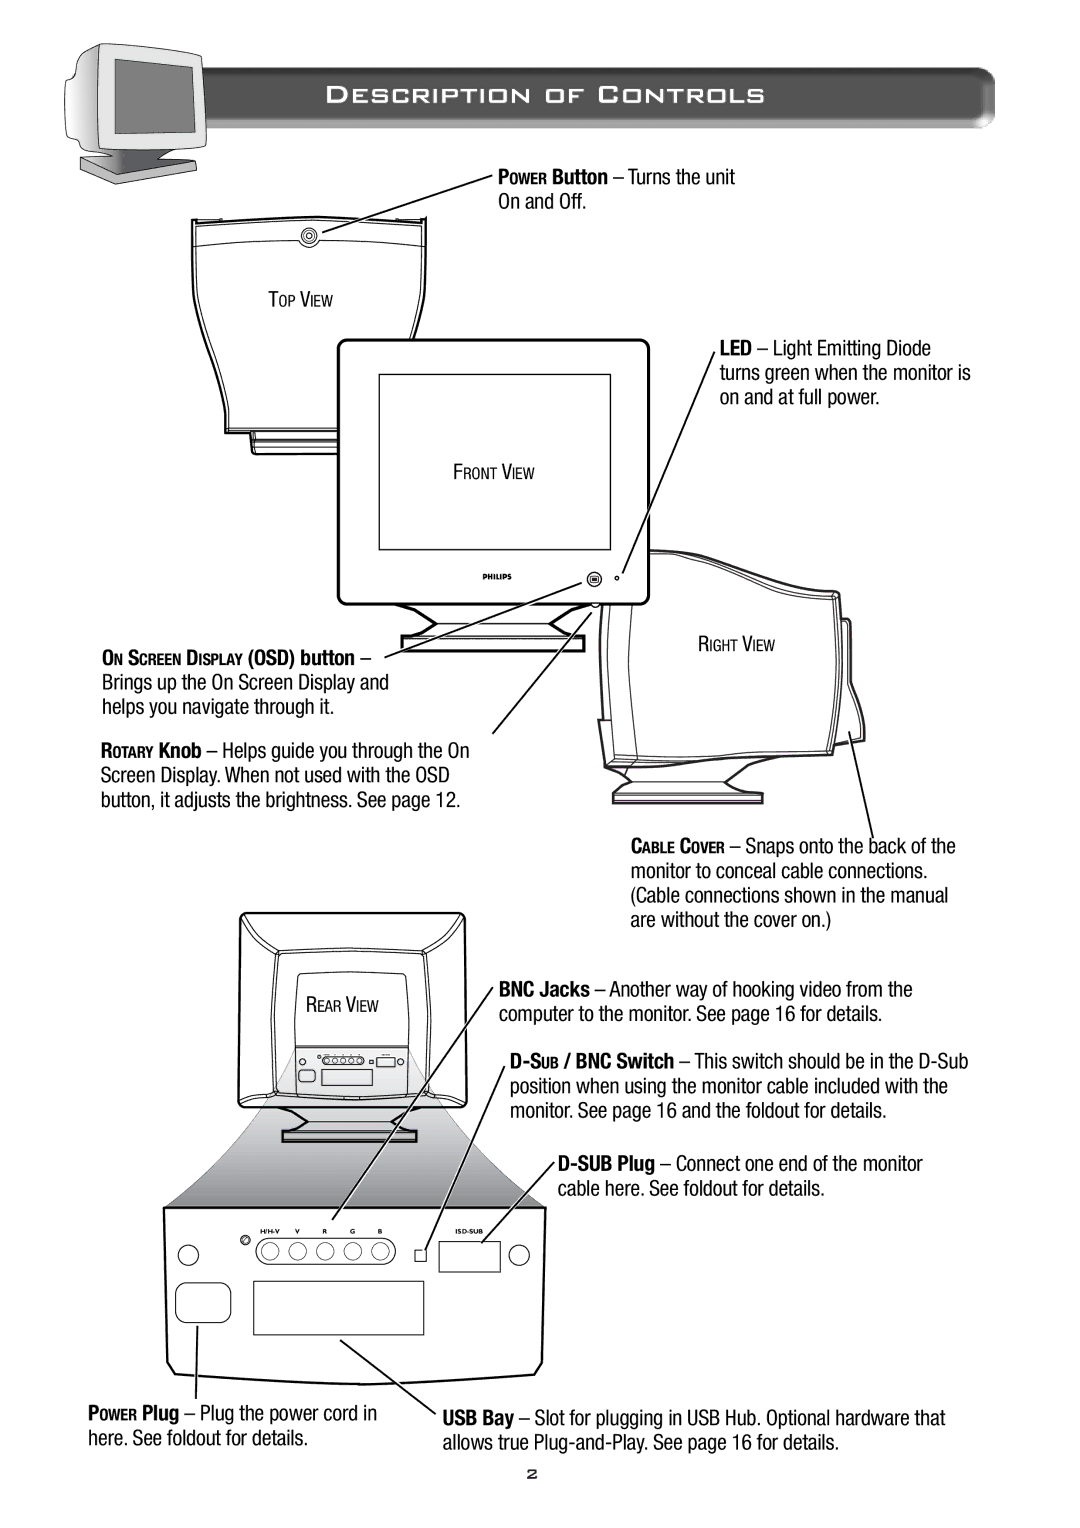
POWER Button – Turns the unit
On and Off.
TOP VIEW
FRONT VIEW
ON SCREEN DISPLAY (OSD) button – Brings up the On Screen Display and helps you navigate through it.
ROTARY Knob – Helps guide you through the On Screen Display. When not used with the OSD button, it adjusts the brightness. See page 12.
LED – Light Emitting Diode turns green when the monitor is on and at full power.
RIGHT VIEW
CABLE COVER – Snaps onto the back of the monitor to conceal cable connections. (Cable connections shown in the manual are without the cover on.)
REAR VIEW
BNC Jacks – Another way of hooking video from the computer to the monitor. See page 16 for details.
POWER Plug – Plug the power cord in here. See foldout for details.
USB Bay – Slot for plugging in USB Hub. Optional hardware that allows true
2