Step 1: Basic Recorder Connections (continued)
English
OR | OR |
Option 2 | |
Option 3 |
|
Option 1
|
|
|
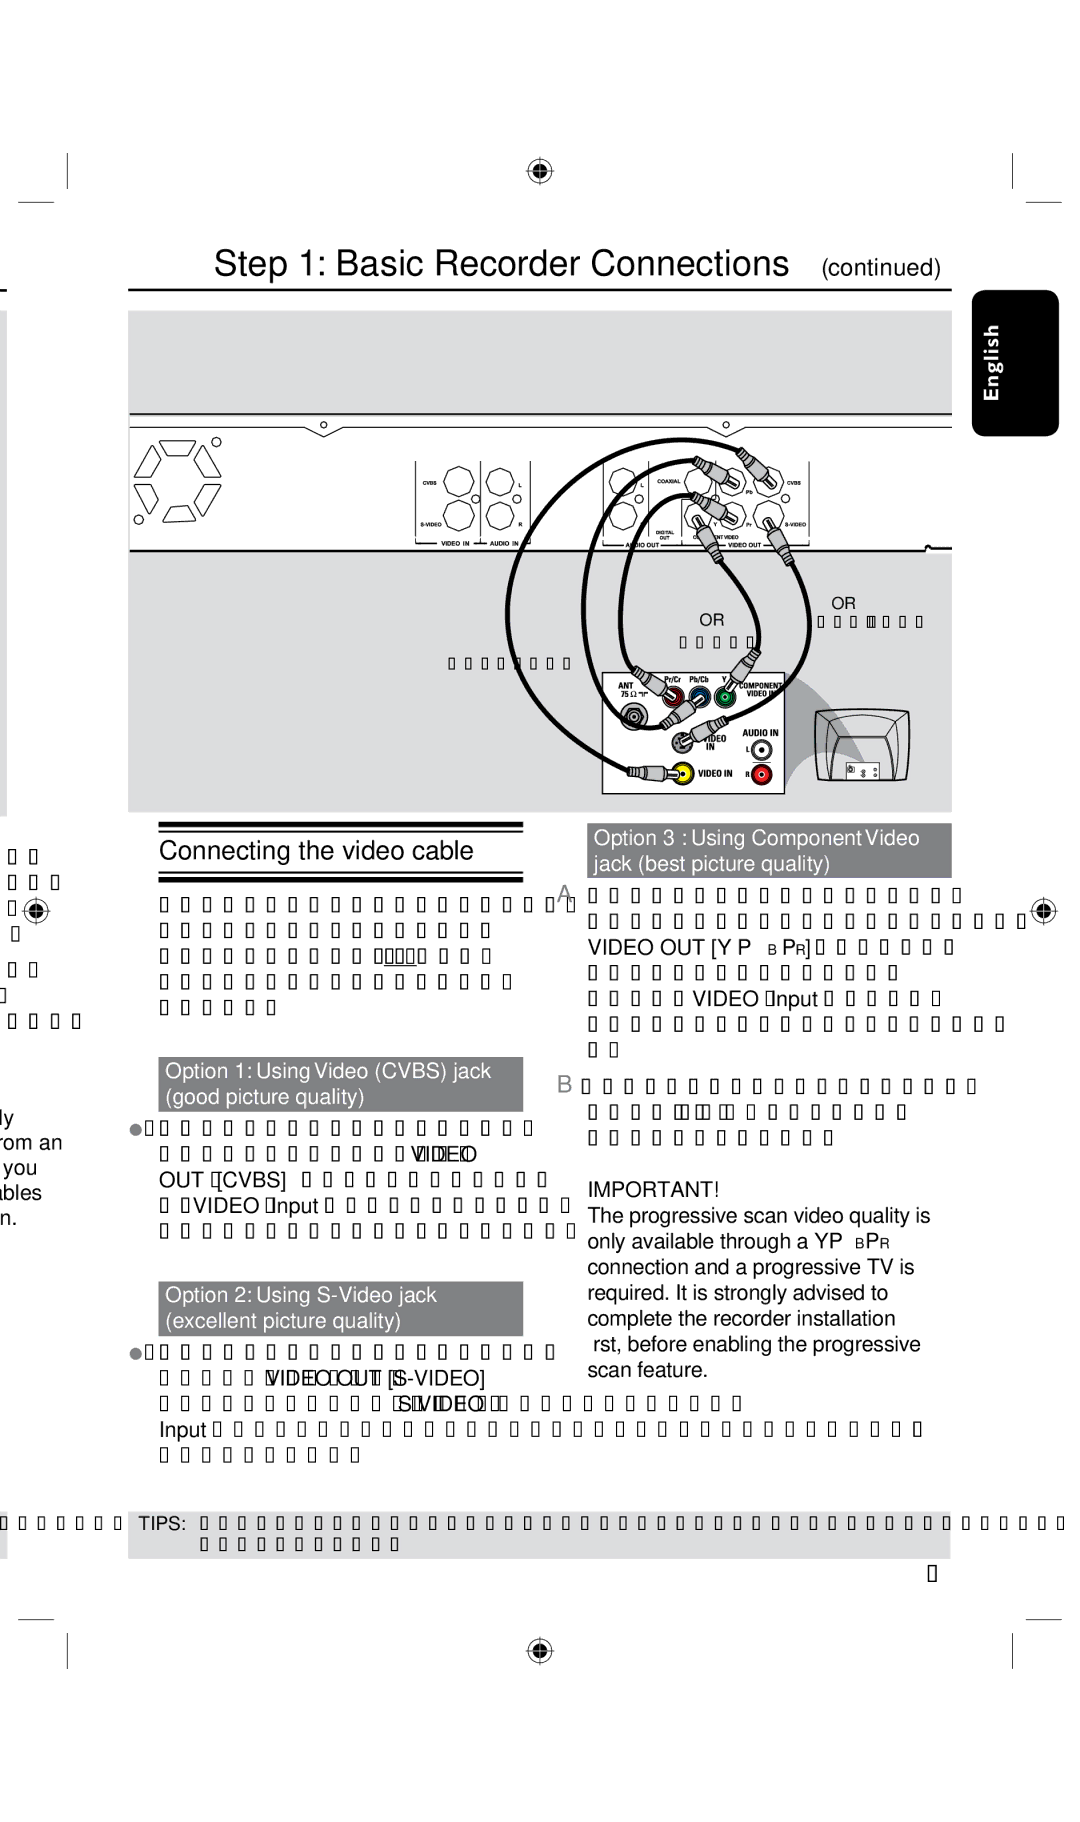
| Connecting the video cable |
|
|
|
|
|
|
|
|
|
|
|
|
|
| This connection enables you to view the |
|
|
|
| |
|
|
|
| |
|
|
|
| disc playback from the recorder. |
|
|
|
| |
|
|
|
| You only need to choose one of the |
|
|
|
| options below to make your video |
n | connection. | |||
| ||||
|
|
|
|
|
|
|
|
| Option 1: Using Video (CVBS) jack |
|
|
|
| (good picture quality) |
•Use the supplied audio/video cable (yellow plug) to connect the VIDEO OUT [CVBS] jack on the recorder to the VIDEO Input jack (or labeled as A/ V In, Video In or Composite) on the TV.
Option 2: Using S-Video jack (excellent picture quality)
•Use an
Option 3 : Using Component Video jack (best picture quality)
A Use the component video cable (red/ blue/green - not supplied) to connect the VIDEO OUT [Y PB PR] jacks on the recorder to the corresponding component VIDEO Input jacks (or labeled as Y Pb/Cb Pr/Cr or YUV) on the TV.
B If your TV accepts Progressive Scan signal, see page 63 for detailed Progressive Scan set up.
IMPORTANT!
The progressive scan video quality is only available through a YPBPR connection and a progressive TV is required. It is strongly advised to complete the recorder installation first, before enabling the progressive scan feature.
TIPS: Before making or changing any connections, make sure that all the devices are disconnected from the power outlet.
15