•For DVD, navigates to title menu.
•For VCD version 2.0 or SVCD with PBC turned on, returns to the menu.
f![]() /
/ ![]()
![]() (Previous/Next)
(Previous/Next)
•Skips to the previous or next title, chapter, or track.
•Press and hold for
g![]() (Mute)
(Mute)
• Mutes or restores audio output.
hNumeric buttons
• Selects an item to play.
iSUBTITLE
• Enables or disables subtitles.
j![]() ZOOM
ZOOM
•Fits the picture format to the TV screen.
•Zooms in or out of the picture.
kVOCAL
•Changes the audio channel of a karaoke disc.
lKARAOKE
• Accesses or exits the karaoke menu.
mAUDIO
• Selects an audio language or channel.
n![]() (Stop)
(Stop)
•Stops disc play.
o![]()
![]() (Play/Pause)
(Play/Pause)
• Starts, pauses or resumes disc play.
p![]() INFO
INFO
•For discs, displays information about the current status or the disc.
•For slideshows, displays a thumbnail view of photo fi les.
qOK
• Confi rms an entry or selection.
rSETUP
• Accesses or exits the setup menu.
3 Connect
Make the following connections to use this product.
Basic connections:
•Video
•Audio
Optional connections:
•Route audio to other devices:
•Digital amplifi er/receiver
•Analog stereo system
![]() Note
Note
•Refer to the type plate at the back or bottom of the product for identifi cation and supply ratings.
•Before you make or change any connections, ensure that all the devices are disconnected from the power outlet.
Connect video cables
Connect this product to TV to view disc play. Select the best video connection that TV can support.
•Option 1: Connect to component video jacks (for a standard TV or Progressive Scan TV).
•Option 2: Connect to video (CVBS) jack (for a standard TV).
![]() Note
Note
•You must connect this product directly to a TV.
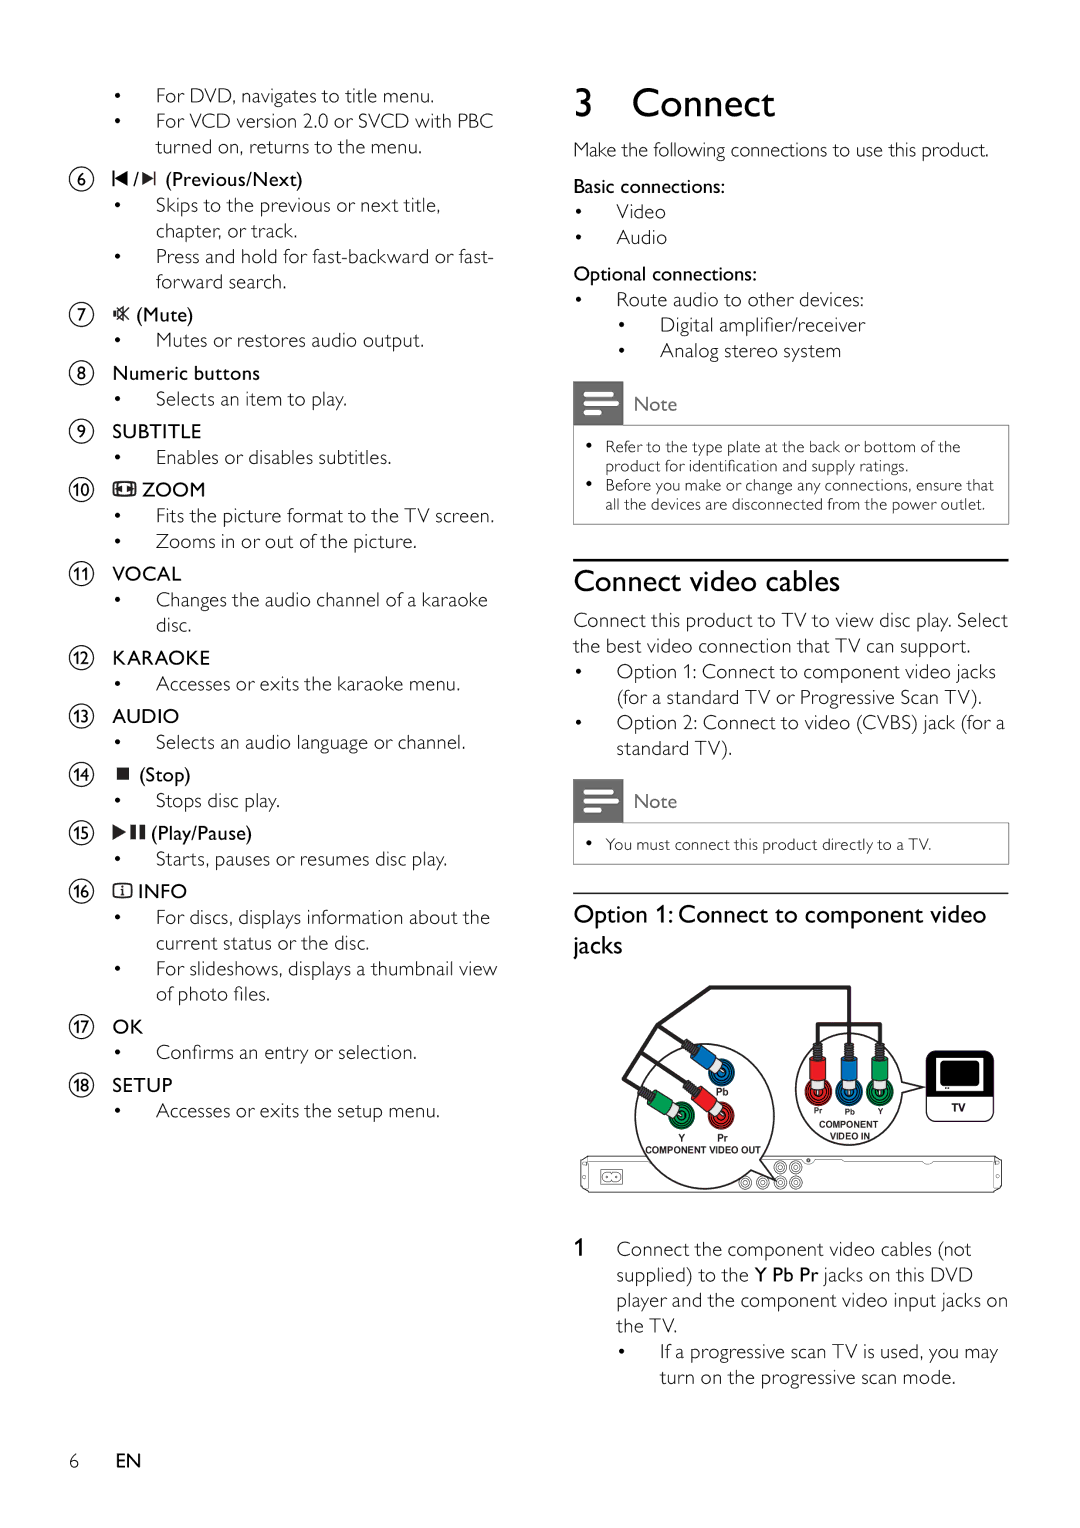
Option 1: Connect to component video jacks
Pb
| Pr | Pb | Y |
| COMPONENT | ||
Y | Pr | VIDEO IN |
|
COMPONENT VIDEO OUT
1Connect the component video cables (not supplied) to the Y Pb Pr jacks on this DVD player and the component video input jacks on the TV.
•If a progressive scan TV is used, you may turn on the progressive scan mode.
6EN
