9.Detect
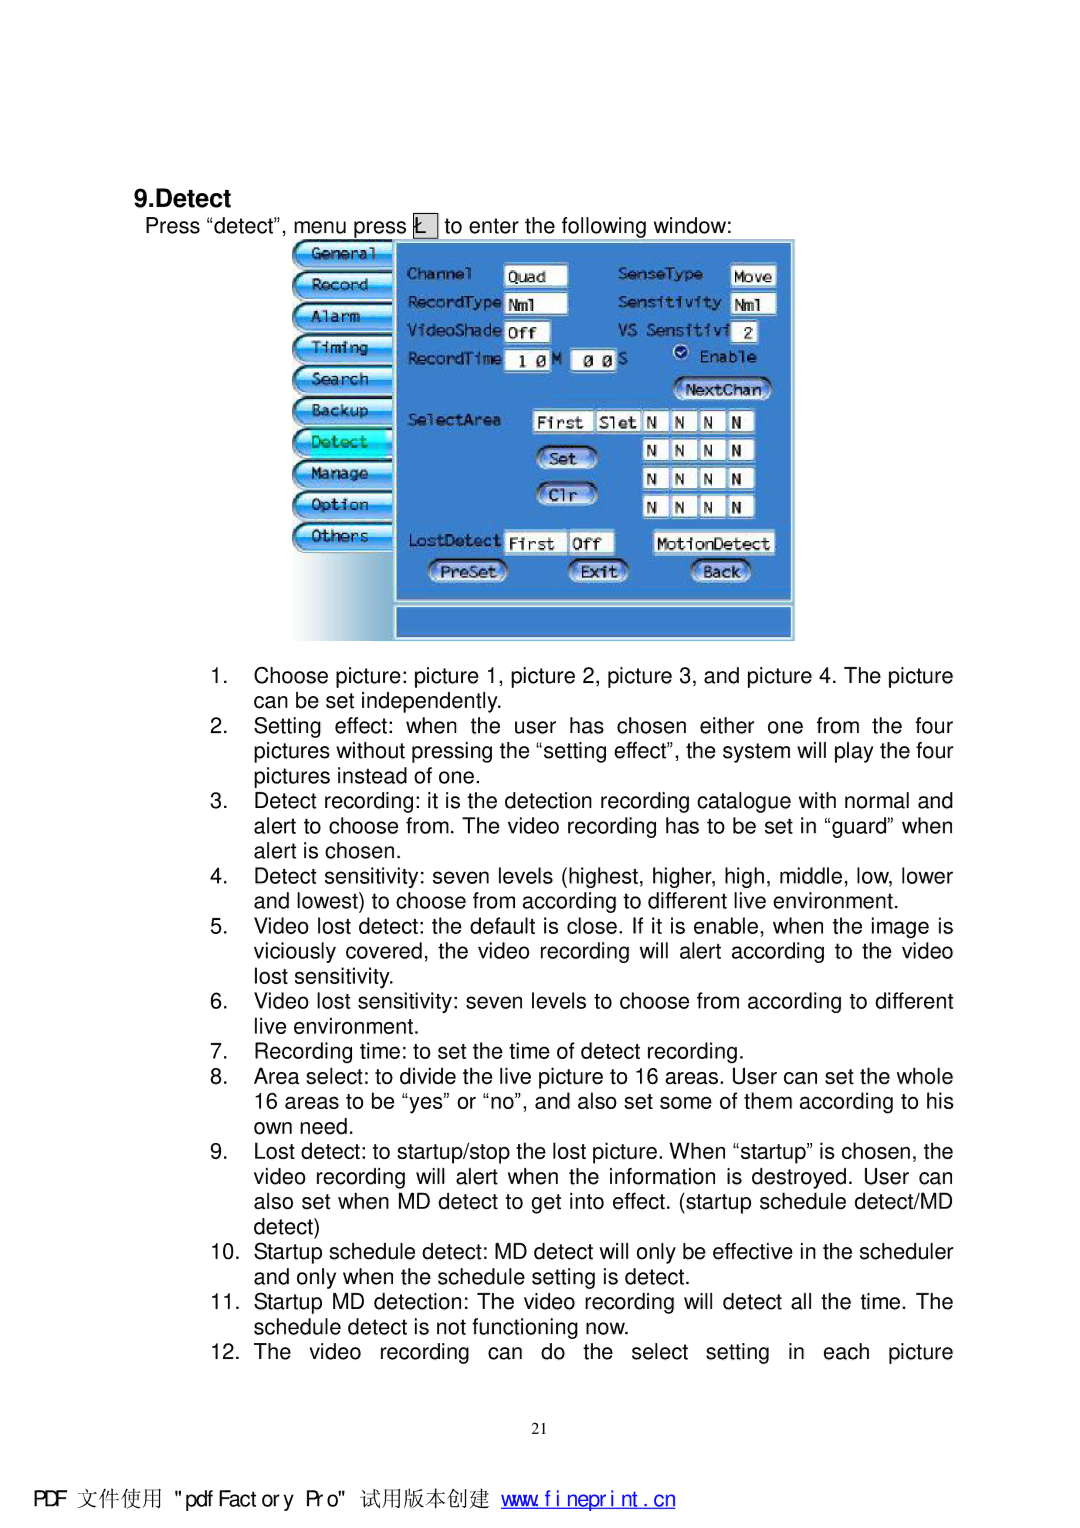
Press “detect”, menu press è to enter the following window:
1.Choose picture: picture 1, picture 2, picture 3, and picture 4. The picture can be set independently.
2.Setting effect: when the user has chosen either one from the four pictures without pressing the “setting effect”, the system will play the four pictures instead of one.
3.Detect recording: it is the detection recording catalogue with normal and alert to choose from. The video recording has to be set in “guard” when alert is chosen.
4.Detect sensitivity: seven levels (highest, higher, high, middle, low, lower and lowest) to choose from according to different live environment.
5.Video lost detect: the default is close. If it is enable, when the image is viciously covered, the video recording will alert according to the video lost sensitivity.
6.Video lost sensitivity: seven levels to choose from according to different live environment.
7.Recording time: to set the time of detect recording.
8.Area select: to divide the live picture to 16 areas. User can set the whole 16 areas to be “yes” or “no”, and also set some of them according to his own need.
9.Lost detect: to startup/stop the lost picture. When “startup” is chosen, the video recording will alert when the information is destroyed. User can also set when MD detect to get into effect. (startup schedule detect/MD detect)
10.Startup schedule detect: MD detect will only be effective in the scheduler and only when the schedule setting is detect.
11.Startup MD detection: The video recording will detect all the time. The schedule detect is not functioning now.
12.The video recording can do the select setting in each picture
21
PDF 文件使用 "pdfFactory Pro" 试用版本创建 www.fineprint.cn