6. Schedule setting
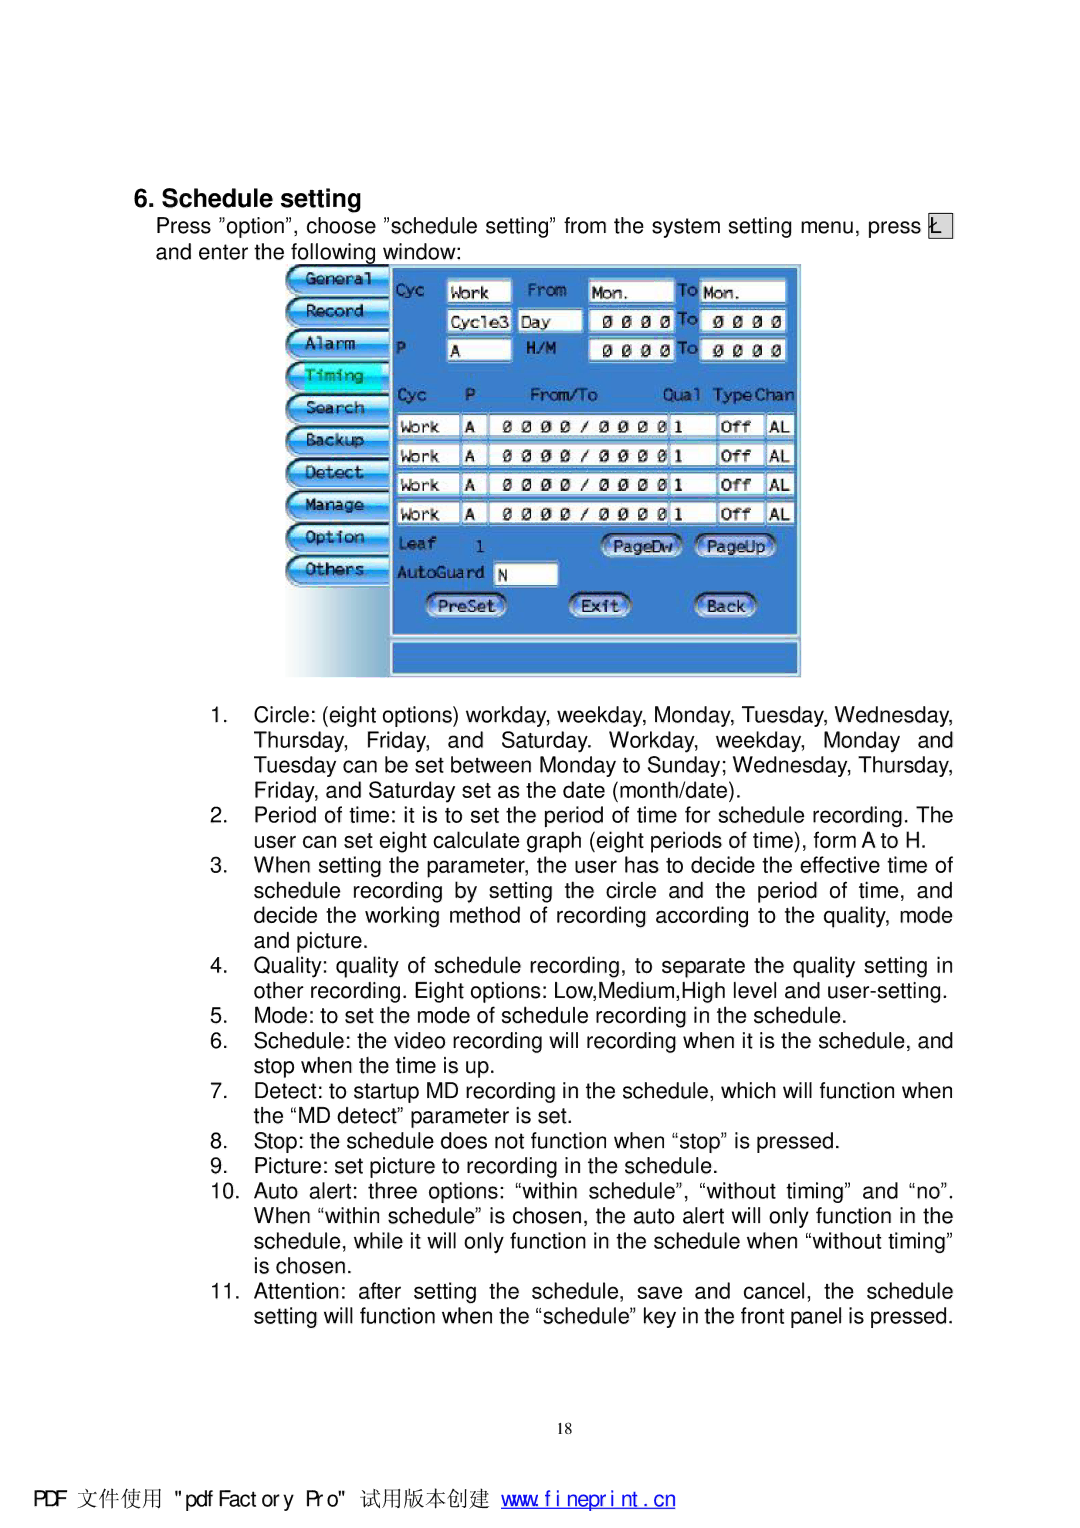
Press ”option”, choose ”schedule setting” from the system setting menu, press è and enter the following window:
1.Circle: (eight options) workday, weekday, Monday, Tuesday, Wednesday, Thursday, Friday, and Saturday. Workday, weekday, Monday and Tuesday can be set between Monday to Sunday; Wednesday, Thursday, Friday, and Saturday set as the date (month/date).
2.Period of time: it is to set the period of time for schedule recording. The user can set eight calculate graph (eight periods of time), form A to H.
3.When setting the parameter, the user has to decide the effective time of schedule recording by setting the circle and the period of time, and decide the working method of recording according to the quality, mode and picture.
4.Quality: quality of schedule recording, to separate the quality setting in
other recording. Eight options: Low,Medium,High level and
5.Mode: to set the mode of schedule recording in the schedule.
6.Schedule: the video recording will recording when it is the schedule, and stop when the time is up.
7.Detect: to startup MD recording in the schedule, which will function when the “MD detect” parameter is set.
8.Stop: the schedule does not function when “stop” is pressed.
9.Picture: set picture to recording in the schedule.
10.Auto alert: three options: “within schedule”, “without timing” and “no”. When “within schedule” is chosen, the auto alert will only function in the schedule, while it will only function in the schedule when “without timing” is chosen.
11.Attention: after setting the schedule, save and cancel, the schedule setting will function when the “schedule” key in the front panel is pressed.
18
PDF 文件使用 "pdfFactory Pro" 试用版本创建 www.fineprint.cn
