Optional Connections (continued)
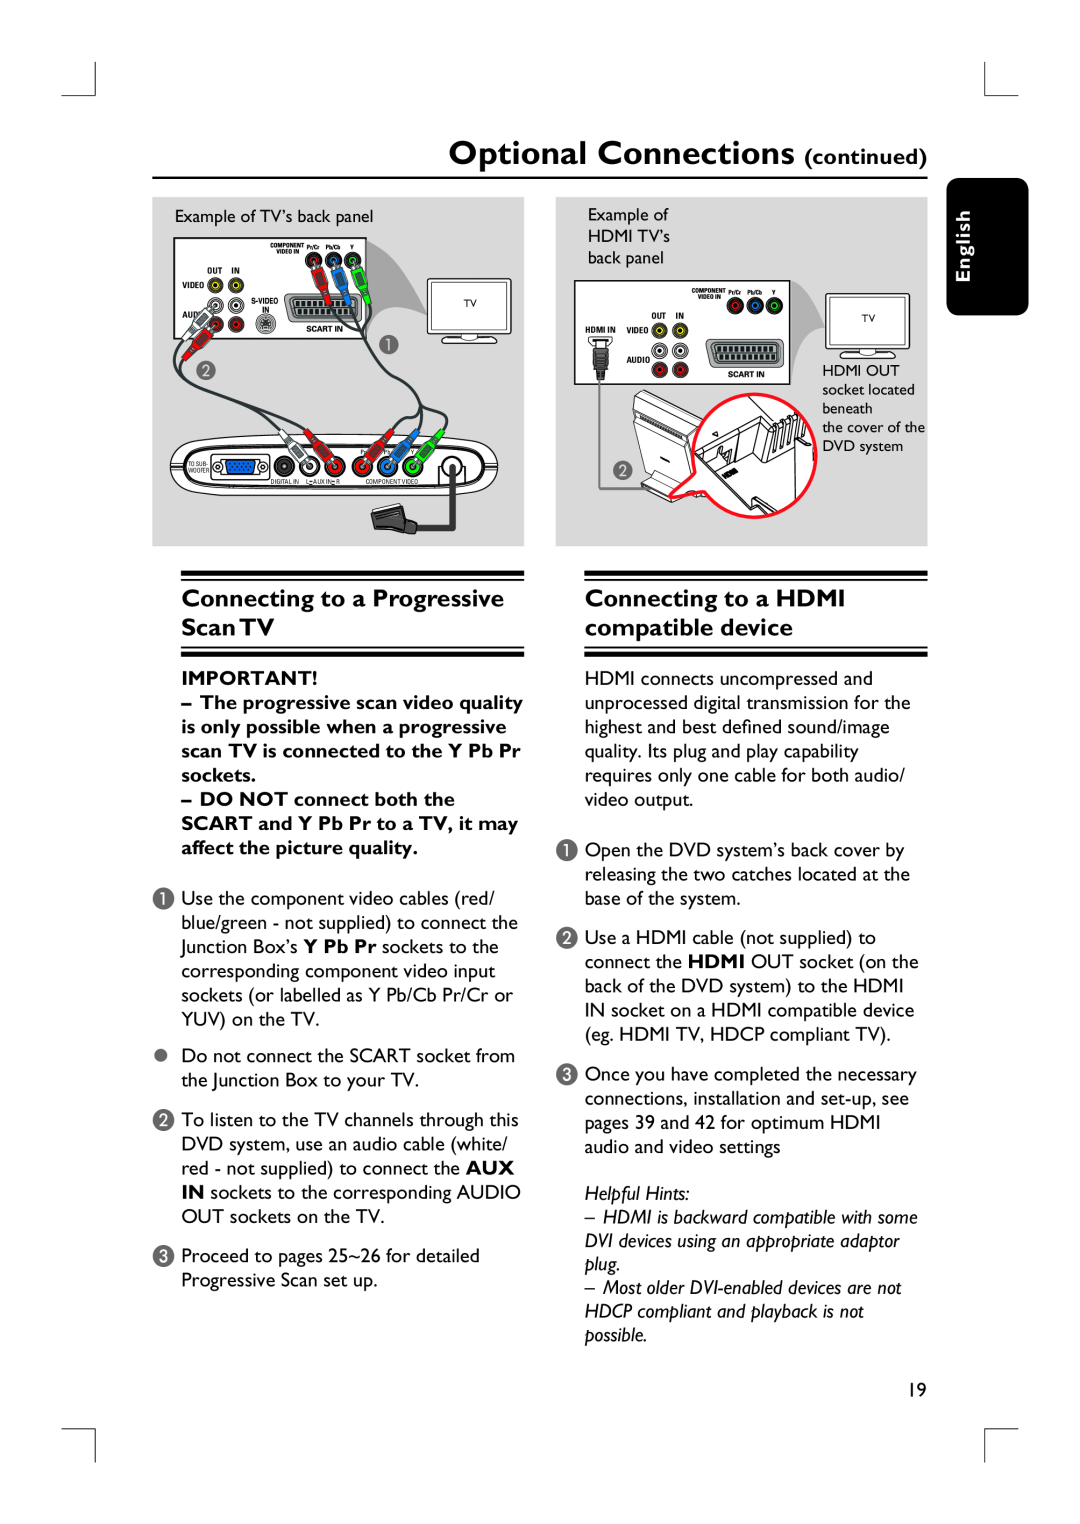
Example of TV’s back panel
OUT IN
VIDEO ![]()
TV
|
|
|
|
| A |
|
B |
|
|
|
|
|
|
|
|
|
| Pr | Pb | Y |
TO SUB- |
|
|
|
|
|
|
WOOFER |
|
|
|
|
|
|
DIGITAL IN | L | AUX IN | R | COMPONENT VIDEO | ||
Example of HDMI TV’s back panel
OUT IN
HDMI IN VIDEO ![]()
AUDIO
B ![]()
![]()
TV
HDMI OUT socket located beneath
the cover of the DVD system
English
Connecting to a Progressive Scan TV
IMPORTANT!
–The progressive scan video quality is only possible when a progressive scan TV is connected to the Y Pb Pr sockets.
–DO NOT connect both the SCART and Y Pb Pr to a TV, it may affect the picture quality.
A Use the component video cables (red/ blue/green - not supplied) to connect the Junction Box’s Y Pb Pr sockets to the corresponding component video input sockets (or labelled as Y Pb/Cb Pr/Cr or YUV) on the TV.
Do not connect the SCART socket from the Junction Box to your TV.
B To listen to the TV channels through this DVD system, use an audio cable (white/ red - not supplied) to connect the AUX IN sockets to the corresponding AUDIO OUT sockets on the TV.
C Proceed to pages 25~26 for detailed Progressive Scan set up.
Connecting to a HDMI compatible device
HDMI connects uncompressed and unprocessed digital transmission for the highest and best defi ned sound/image quality. Its plug and play capability requires only one cable for both audio/ video output.
A Open the DVD system’s back cover by releasing the two catches located at the base of the system.
B Use a HDMI cable (not supplied) to connect the HDMI OUT socket (on the back of the DVD system) to the HDMI IN socket on a HDMI compatible device (eg. HDMI TV, HDCP compliant TV).
C Once you have completed the necessary connections, installation and
Helpful Hints:
–HDMI is backward compatible with some DVI devices using an appropriate adaptor plug.
–Most older
19