Installation
English
Step 4: Placing the set and speakers
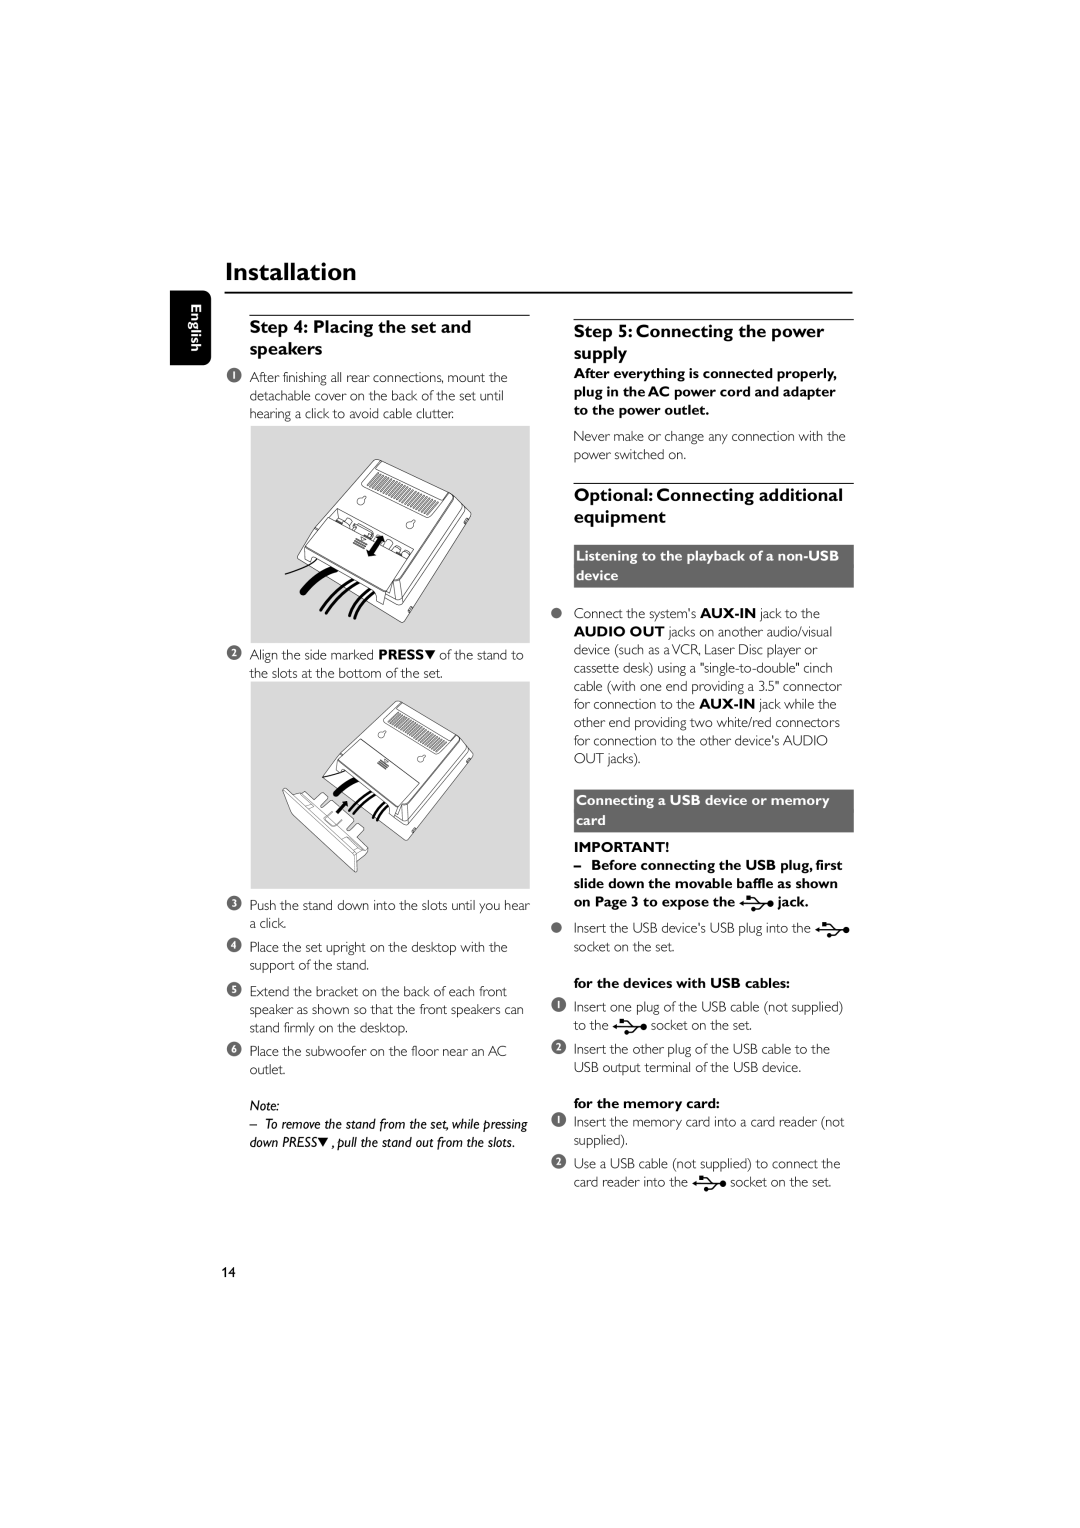
1After finishing all rear connections, mount the detachable cover on the back of the set until hearing a click to avoid cable clutter.
2Align the side marked PRESS4 of the stand to the slots at the bottom of the set.
3Push the stand down into the slots until you hear a click.
4Place the set upright on the desktop with the support of the stand.
5Extend the bracket on the back of each front speaker as shown so that the front speakers can stand firmly on the desktop.
6Place the subwoofer on the floor near an AC outlet.
Note:
– To remove the stand from the set, while pressing down PRESS4 , pull the stand out from the slots.
Step 5: Connecting the power supply
After everything is connected properly, plug in the AC power cord and adapter to the power outlet.
Never make or change any connection with the power switched on.
Optional: Connecting additional equipment
Listening to the playback of a non-USB
device
●Connect the system's
Connecting a USB device or memory
card
IMPORTANT!
–Before connecting the USB plug, first slide down the movable baffle as shown
on Page 3 to expose the | jack. |
●Insert the USB device's USB plug into the socket on the set.
for the devices with USB cables:
1Insert one plug of the USB cable (not supplied)
to the | socket on the set. |
2Insert the other plug of the USB cable to the USB output terminal of the USB device.
for the memory card:
1Insert the memory card into a card reader (not supplied).
2Use a USB cable (not supplied) to connect the
card reader into the | socket on the set. |
14
